
Series: Set up a call center in Salesforce
Configure call center settings
- Change the region of your Genesys Cloud organization
- Set up a call center in Salesforce
- Change the region of your Genesys Cloud organization
- Configure client events
- Configure Omni-Channel sync
- Configure country codes
- Map interaction attributes to Salesforce activity fields
- Configure call controls
- Customize interaction details
- Configure search in Salesforce
- Configure extension points
- Use different configurations for different agents
- Configure client events
After setting up a call center for the first time, set the values for any call center settings.
- Click Setup.
- Search for Installed Packages.
- Under Build, click Installed Packages.
- On the Installed Packages page, click Configure next to the Genesys Cloud for Salesforce package.
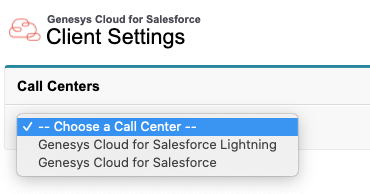
- Under Choose a Call Center, select a version of the call center definition.
The managed package that you installed contains two different call center definition files: one for Salesforce Classic (Genesys Cloud for Salesforce) and one for Lightning Experience (Genesys Cloud for Salesforce Lightning).
For information about setup and limitations with Lightning Experience, see Salesforce Lightning Experience.
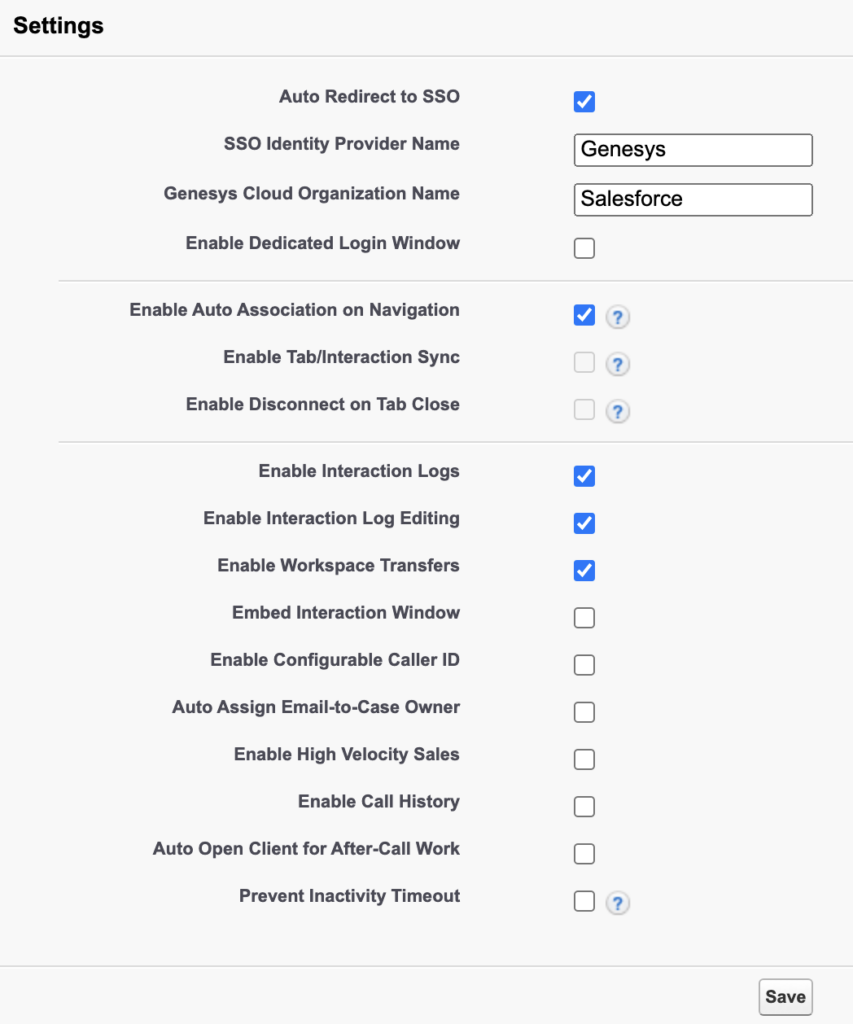
- Under Settings, configure the following items:
- Auto Redirect to SSO allows you to use a single sign-on identity provider.
By using a single sign-on identity provider, an agent can sign in to one application such as Salesforce and then is automatically logged in to the client. For information about the single sign-on providers that Genesys Cloud supports, see About single sign-on (SSO).
If you select Auto Redirect to SSO, all agents in your organization must use the single sign-on identity provider that you input. For agents that do not use this single sign-on identity provider, create a separate call center definition and assign those agents to the new call center definition. For more information about creating a separate call center definition, see Use different configurations for different agents.
- In the SSO Identity Provider Name box, input the name of the single sign-on identity provider that you want to use.
For a list of valid values, see the provider parameter at Additional Authorization Parameters (Genesys Cloud Developer Center).
- In the Genesys Cloud Organization Name box, input the name of the Genesys Cloud organization that uses this single sign-on identity provider.
Notes:- Make sure that the capitalization of the organization name matches the capitalization of the short name of your organization. For more information, see View organization settings.
- If your single sign-on identity provider does not allow the single sign-on redirect window to be embedded, then select Enable Dedicated Login Window. Otherwise, when you log in, the client will not load. Instead, you see a blank area on-screen and an error message in the console.
- In the SSO Identity Provider Name box, input the name of the single sign-on identity provider that you want to use.
- Enable Dedicated Login Window allows you to use login providers that do not work in embedded windows.
This setting causes a separate login window to open. If you close this window, you can reopen it by clicking Open Authentication Window in the client. In this window, you sign in using Genesys Cloud credentials or credentials for other providers that you configured in your Genesys Cloud organization. To direct all agents to a single provider, use this setting with the Auto Redirect to SSO. For information about the single sign-on providers that Genesys Cloud supports, see About single sign-on (SSO).
- Enable Auto Association on Navigation associates the current Salesforce record automatically with the interaction’s log as agents navigate while the interaction is connected. Note: You cannot select both Enable Auto Association on Navigation and Enable Tab/Interaction Sync.
- Enable Tab/Interaction Sync syncs primary tabs in Salesforce with interactions in the client.
When you click a primary tab in Salesforce, the integration switches to the corresponding interaction in the client. When you click an interaction in the client, the integration switches to the corresponding primary tab in Salesforce.
The integration first searches Salesforce for the data in the Name field in the client. If the integration cannot find a match in Salesforce, the integration searches Salesforce for the data in the Related To field. For more information, see Interaction logs and Synchronize interaction attributes with Salesforce activity records.
Notes:- This feature is only available in Salesforce console apps in either Classic (Service Cloud) or Lightning Experience.
- You cannot select both Enable Tab/Interaction Sync and Enable Auto Association on Navigation.
- Enable Disconnect on Tab Close automatically disconnects interactions in the client when agents close tabs in Salesforce that are associated with the interactions. Notes:
- This feature is only available in Salesforce console apps in either Classic (Service Cloud) or Lightning Experience.
- This feature is only available when Enable Tab/Interaction Sync is selected.
- Enable Interaction Logs provides access to the interaction logs from the client.
This setting is selected by default. For more information, see Interaction logs.
- Enable Interaction Log Editing allows agents to write and edit interaction logs in the client.
This setting is selected by default.
If you clear Enable Interaction Log Editing, the integration initially creates an activity record in Salesforce when an agent picks up an interaction. However, the integration does not update the record during or after the interaction. As a result, the integration does not save data that is only available during or after the interaction, such as duration or wrap-up codes, to Salesforce.
For more information, see View and edit interaction logs.
You can cause a Notes section to appear in the Wrap-up window by clearing this setting. For more information, see Wrap up an interaction.
- Enable Workspace Transfers allows agents to transfer tabs when they transfer a call.
The integration transfers the main tab that the agent is viewing and any subtabs for that record that the agent has open. This setting is selected by default.
Workspace transfers take precedence over other screen pop attributes (such as SF_URLPop and SF_SearchValue). If you select Enable Workspace Transfer in the call center settings and agents select Transfer Selected Tab when transferring a call, the integration ignores other screen pop attributes.
For more information, see Workspace transfers and Screen pop.
- Embed Interaction Window enables an embedded interaction window.
By default, scripts, chats, emails, and messages open in a separate window. You can configure Salesforce to show scripts, chats, emails, and messages in an embedded interaction window in Classic (Service Cloud) and Lightning Experience. If you select Embed Interaction Window, be sure to add an embedded interaction window. For more information, see Add an embedded interaction window.
Notes:- Access to Service Cloud requires a special license from Salesforce.com.
- If you run Genesys Cloud for Salesforce in multiple browser tabs, then do not select Embed Interaction Window. For more information, see Can I run Genesys Cloud for Salesforce in multiple browser tabs?.
- Enable Configurable Caller ID enables caller ID for outbound calls.
This setting causes caller ID name and number boxes to appear in the client when agents make calls. The names and phone numbers that agents input appear to recipients of outbound calls. After enabling this setting, configure Calling for your external trunk in your Genesys Cloud organization. For more information, see Configure caller ID.
- Auto Assign Email-to-Case Owner automatically assigns the case owner of routed emails to the agent who picks up the interaction. Note: This setting also assigns the ownership of routed non-case objects.
- Enable High Velocity Sales allows the integration to automate the progress of sales cadence steps when using the Salesforce High Velocity Sales app in Lightning Experience.
For more information, see Open CTI and High Velocity Sales in the Salesforce documentation.
Important:
- Contact Salesforce to enable High Velocity Sales in your Salesforce organization.
- To make calls, agents must click the Click to Dial button on contacts, leads, or person accounts under Sales Cadence in the Work Queue pane in Salesforce. The integration cannot track the progress of calls that occur through standard click-to-dial events.
For more information, see High Velocity Sales with Genesys Cloud for Salesforce overview.
- Enable Call History allows agents to view their call history in the client.
For more information, see Access call history.
- Auto Open Client for After-Call Work automatically opens the client when the interaction disconnects and the agent has to complete the after call work.
For more information, see Wrap up an interaction.
- Prevent Inactivity Timeout sends a network request periodically to avoid inactivity timeout in Genesys Cloud while the agent is active in Salesforce.
For more information, see Set an automatic inactivity timeout.
- Auto Redirect to SSO allows you to use a single sign-on identity provider.
- Under Server-Side Logging Settings, select Enable Server-Side Logging to enable logging that Customer Care can access.
By default, logs appear in your browser console that you can use to troubleshoot issues. You can also configure Genesys Cloud for Salesforce to save logs server side by selecting Enable Server-Side Logging. Customer Care can then access these logs directly.Notes:- When you select this option, you consent and acknowledge to provide Genesys with the sensitive information for diagnostic and troubleshooting purposes.
- If you have a slow or unreliable Internet connection, or you risk running out of session storage, Genesys recommends that you do not select Enable Server-Side Logging.
- Click Save.
For information about all steps necessary to set up a call center, see Set up a call center.
For more information about the integration, see About Genesys Cloud for Salesforce.