
Series: Set up groups
Add group members
Note: On the Membership tab, Genesys Cloud always displays the total number of members of a group, including inactive members.
Genesys Cloud features two kinds of groups: general groups and skill expression groups. How you add members depends on the kind of group. To add members to either type of group, first do the following:
- Click Admin.
- Under Directory, click Groups.
- For a General group, click the General tab. For a Skill Expression group, click the Skill Expression tab.
- Click the name of the group that you want to edit.
Add people as general group members individually, or create a rule that adds a group of people at once and automates changes in group membership. For more information, see Group membership rules.
Note: For best results, temporarily disable group calls while you add members.
Add members individually
Notes:
- When you add someone individually, changes to membership rules do not affect their membership.
- Genesys recommends that you limit the members that you add individually to 1000.
- On the right side of the Membership tab, click Edit.
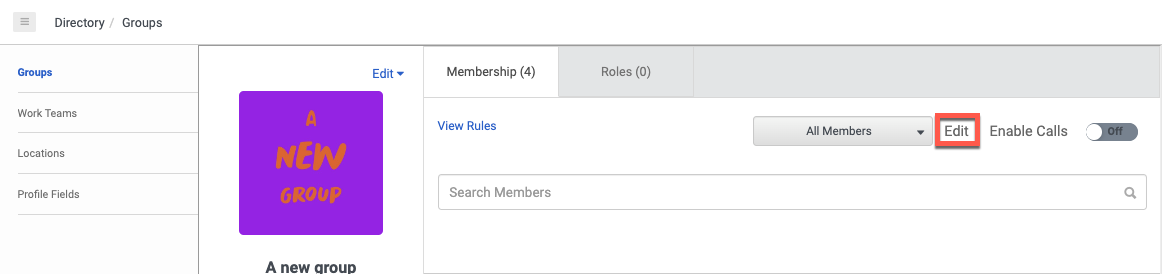
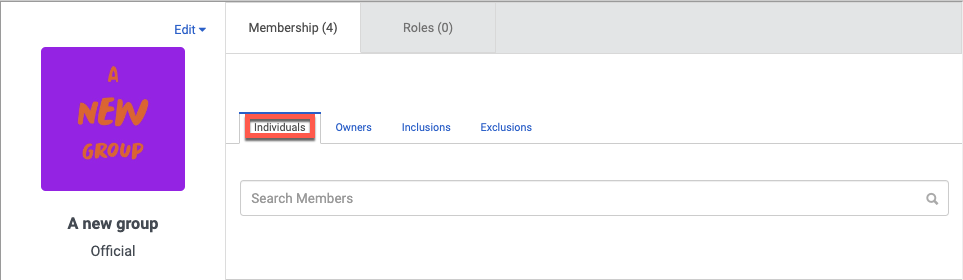
- Click the Individuals tab.
- At the bottom, in the Add Person box, begin to type the name of the person you want to add and select it when it appears.
- Click Save.
Add members with a rule by keyword
Use a membership rule by keyword to include or exclude people with a certain tag on their profile page.
For example: Your organization wants to create a group for everyone who has the latest company safety certification, the ASC. You can create a rule with one keyword to include everyone with an ASC tag in the Certifications section of their profiles. For more information, see Add tags to your profile.
- On the right side of the Membership tab, click Edit.
- To define a rule that includes people, click the Inclusions tab.
Alternatively, to define a rule that excludes people, click the Exclusions tab.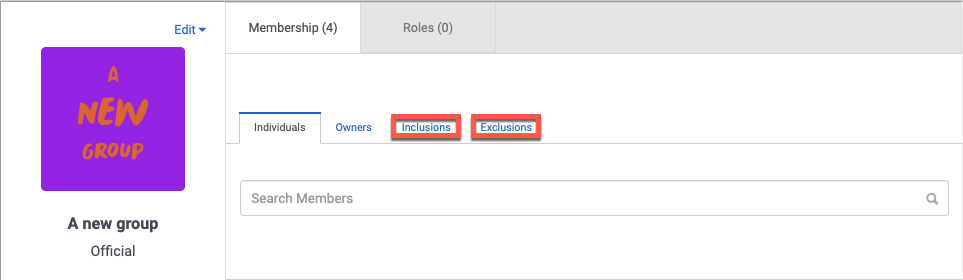
- In the Add Keyword box, begin typing the term.
- Click the keyword when it appears.
- Click Save.
Add members with a rule by relationship
Use a membership rule by relationship to include or exclude people who have a connection to the same person in the reporting structure.
For example: Tanya is head of the Technical Publications department. Tanya wants a group chat room to discuss developments on the new product line, which includes most people in her department. However, Tim and his team, who report to Tanya, work on a different product line. Tanya needs a group with everyone who reports to her except Tim and his people. Tanya can accomplish her task with two relationship rules:
- Include Tanya, her direct reports, and her distant reports
- Exclude Tim, his direct reports, and his distant reports
- On the right side of the Membership tab, click Edit.
- To define a rule that includes people, click the Inclusions tab.
Alternatively, to define a rule that excludes people, click Exclusions tab. - In the Add Person box, begin to type the name of the person to be the base of the relationship rule.
- Click the name when it appears.
- To the right, click the buttons that define the relationship:

- Superiors: Everyone up the chain from the person’s manager
- Manager: Who the person reports directly to
- Self: The person who is the base of the rule
- Peers: Anyone who also reports directly to the person’s manager
- Direct Reports: Everyone who reports directly to the person
- Distant Reports: Everyone down the chain from the person’s direct reports
- Click Save.
Add members to a skill expression group
To manage membership based on ACD skills, make sure that your agents have the appropriate ACD skills assigned.
- On the right side of the Membership tab, click Build Skill Expression.
The Skill Expressions panel appears. - To add an expression, click Add .
- Under Condition 1, in the Select Skill box, begin to type an ACD skill and select the skill from the list.
- From the Select Operator list, select the operator that you want to use. You can select from these relational operators:
- equals (==)
- not equals (!=)
- greater than (>)
- greater than or equal to (>=)
- less than (<)
- less than or equal to (<=)
- From the Select Skill Level list, select the skill level that you want to use.
- Optionally, to add a subcondition, to the right of the expression, click Add .
- Click the logical operator. You can select from these logical operators:
- AND
- OR
- NOT
- To build your subcondition expression, repeat steps from 6 through 8.
- Click the logical operator. You can select from these logical operators:
- Optionally, to add more conditions, repeat steps from 5 through 8.
- Click Save.
The expression you build appears in the box under Skill Expressions.
Notes:
- Skill expression groups are dynamic. If you modify a skill or proficiency value for an agent, it can impact their membership in a skill expression group.
- Changes can take up to a minute for membership to take effect.
Set privacy rules for a group :Previous Suggested Article Next Suggested Article: Add and remove group owners