
Set up a Customer Hardware Solution Edge
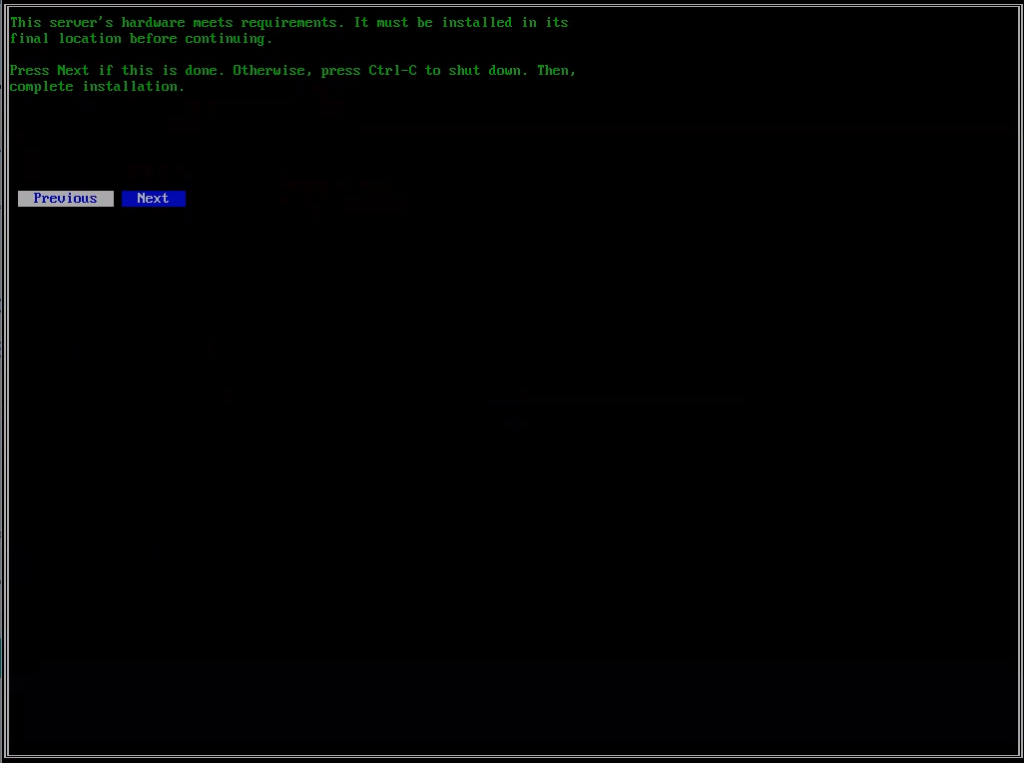
After you have acquired your Customer Hardware Solution (Small or Large) hardware and have it assembled, you are ready to set up your Edge. To do so, Genesys recommends that you have your Edge in its permanent location. For more information on the required hardware, see the appropriate Customer Hardware Solution bill of materials: Small or Large.
This article describes the following tasks:
- Take note of the Edge and Installer versions
- Check your firewall ports
- Download the installer
- Begin the provisioning procedure
- Prepare your USB flash drive
- Set up RAID 1 on your Edge
- Connect your Edge to the network
- Perform the hardware verification
- Configure the network adapter settings
- Enter PIN
- Download the image
- Installer process complete
- Finish provisioning and configure your Edge
Take note of the Edge and Installer versions
Before you begin, you should take note of the current Edge and Installer version numbers. This information will come in handy should you need to work with Product Support to troubleshoot an issue.
Check your firewall ports
Check your firewall ports to make sure that your Edge will be able to communicate with your network. As you do, pay particular attention to DNS ports. For more information, see Ports for core services.
Download the installer
- Download the BYOC Premises – Customer Hardware Solution installer image file.
- Take note of the download location.
- To download the image file, edge-cloudfront.use1.pure.cloud must be in your firewall allowlist.
- The image is in a .zip file, but there is no need to unzip the file. The Rufus tool that you will use later in this procedure will accept the .zip file.
Begin the provisioning procedure
In the first stage of the procedure, you begin provisioning the Customer Hardware Solution Edge from within the Genesys Cloud user interface. You are provided two key pieces of information that you will need at a later stage of the operation.
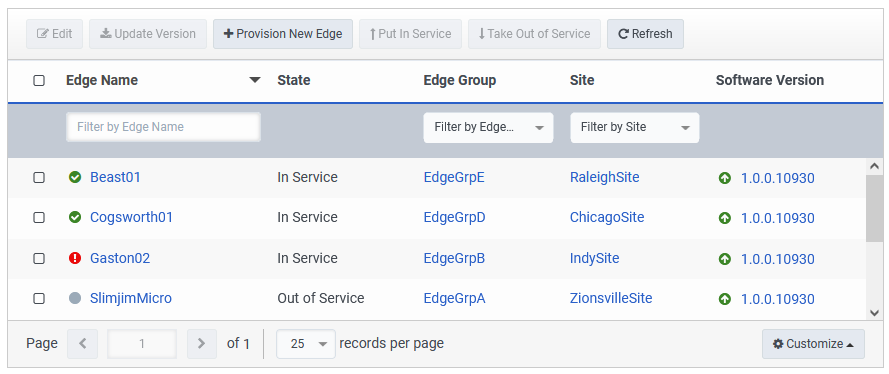
- From a Genesys Cloud client computer on your network, log in to Genesys Cloud.
- Click Admin.
- Under Telephony, click Edges.
- Click Menu > Channels > Telephony > Edges.
- Click Provision New Edge.
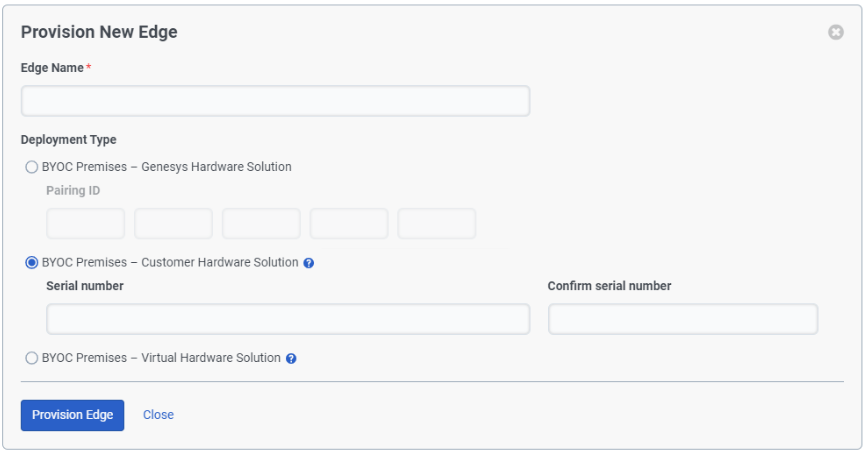
- On the Provision New Edge screen, enter a name in the Edge Name box.
- Click BYOC Premises – Customer Hardware Solution.
- Enter the HPE serial number found on your server chassis in the Serial number and Confirm serial number boxes.
- Click Provision Edge.
- On the Enter the device pin and region into the installer screen. Take note of the value in the Device PIN field as you need it later.

Now that the provisioning operation has begun, you’ll leave it running and proceed to the next step.
Prepare your USB flash drive
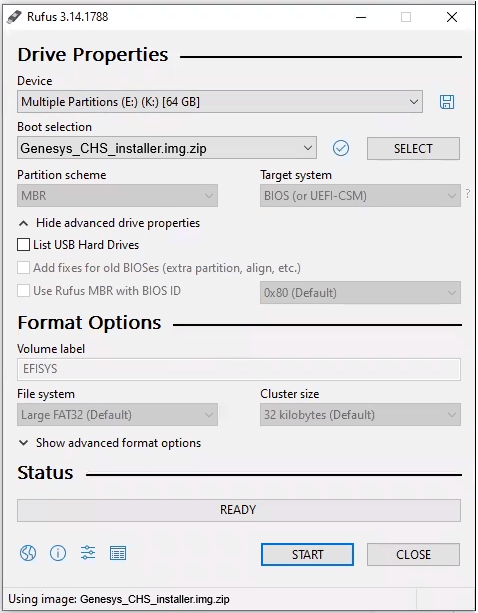
To prepare your USB flash drive, you download and use an open source tool called Rufus. The Rufus tool reformats your USB flash drive as a bootable device and then copies the Customer Hardware Solution installer to your USB flash drive.
- Download the Rufus tool.
- Insert your USB flash drive into the USB port on your computer.
- Locate and click the Rufus executable file to run the tool.
- Select your USB flash drive from the Device list.
- Select the Disk or ISO image from the Boot selection list.
- Click Select and choose the image file you downloaded. Rufus automatically fills in the required fields.
- MBR or GPT for the Partition scheme.Note: Rufus chooses the value for the Partition scheme based on the current format of your USB flash drive. Either Partition scheme works.
- UEFI (non CSM) for the Target system.
- Large FAT32 (Default) from the File system list.
- 32 kilobytes (Default) for the Cluster size.
- MBR or GPT for the Partition scheme.
- Click Start and wait while Rufus prepares your bootable Customer Hardware Solution installation USB flash drive.
- When Rufus completes its operation, click Close.
Set up RAID 1 on your Edge
Customer Hardware Solution – Small Edge
On the Customer Hardware Solution – Small Edge, the installer automatically configures the RAID 1 array on two of the three hard drives in the system. The installer configures the third hard drive for support purposes. More specifically, the third drive stores local media used for factory image restoration and provides space for over-the-air operating system upgrades.
Customer Hardware Solution – Large Edge
For the Customer Hardware Solution – Large Edge, you must manually configure the RAID 1 array and controller before you connect your Edge to the network. You use two of the three hard drives for the RAID 1 array. The installer configures the third hard drive for support purposes. More specifically, the third drive stores local media used for factory image restoration and provides space for over-the-air operating system upgrades.
To configure the RAID 1 array and controller, you can use the HPE Smart Storage Administrator or the configuration menus in the UEFI System Utilities. For more information, see the HPE Smart Array SR Gen10 Controller User Guide.
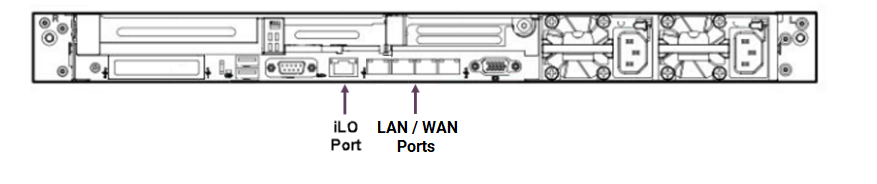
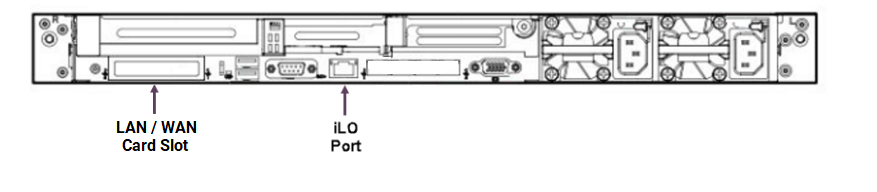
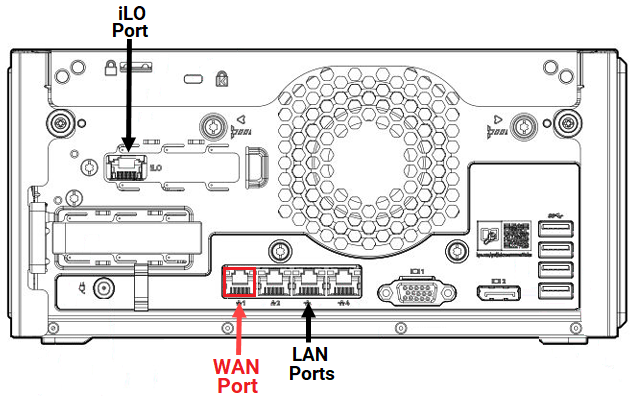
Connect your Edge to the network
Before you can perform the hardware verification, you must first connect your Edge to an internet facing network. This connection must be made to the WAN port on the Edge.
Customer Hardware Solution – Large Edge
One of the following chassis:
Customer Hardware Solution – Small Edge
Perform the hardware verification
To perform the hardware verification, you boot up the Edge using the Customer Hardware Solution installation USB flash drive.
- Connect your Edge to your network.
- Insert the Customer Hardware Solution installation USB flash drive into a USB port in your Edge.
- To boot from the USB flash drive, turn on your Edge and press F11 during the post.
- When you see the system boot menu, select the USB drive, and wait while the Edge boots up.
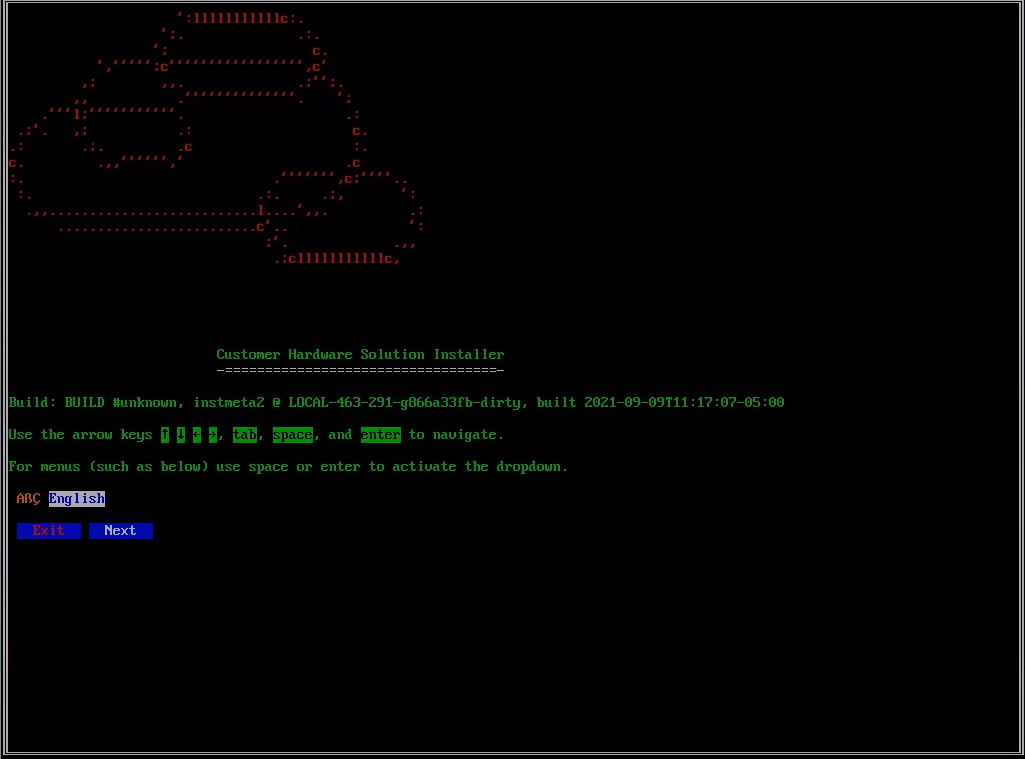
- When you see the Customer Hardware Solution installer, select your language, and click Next.
- The installer checks the hardware.
- If the hardware doesn’t match exactly what the Customer Hardware Solution bill of materials specifies, then the process ends and displays a QR code that will take you to the appropriate Customer Hardware Solution bill of materials article.
- If the hardware matches the requirements, you see a success screen. To continue, click Next.
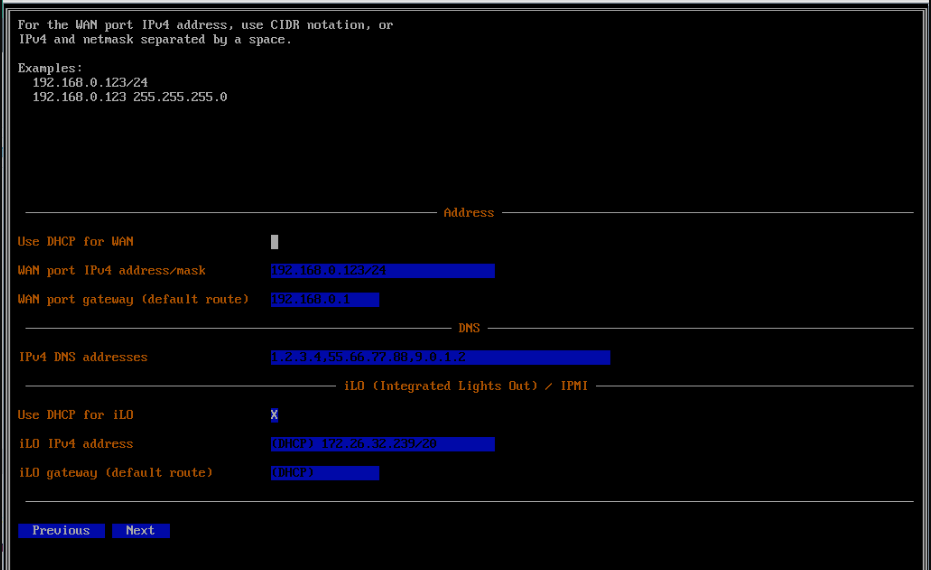
Configure the network adapter settings
In this part of the procedure, the Customer Hardware Solution installer prompts you to configure your network adapter settings,
- Click the Use DHCP for WAN box, if you are going to use DHCP addresses.
- Enter an address in the WAN port IPv4 address box. (You can use CIDR notation.)
- Enter an address in the WAN port gateway (default route) box.
- Enter up to two addresses in the IPv4 DNS addresses box.
- Click the Use DHCP for iLO box, if you are going to use DHCP addresses.
- Enter an address in the iLO IPv4 address box. (You can use CIDR notation.)
- Select DHCP in the iLO gateway (default route) box.
- Click Next.
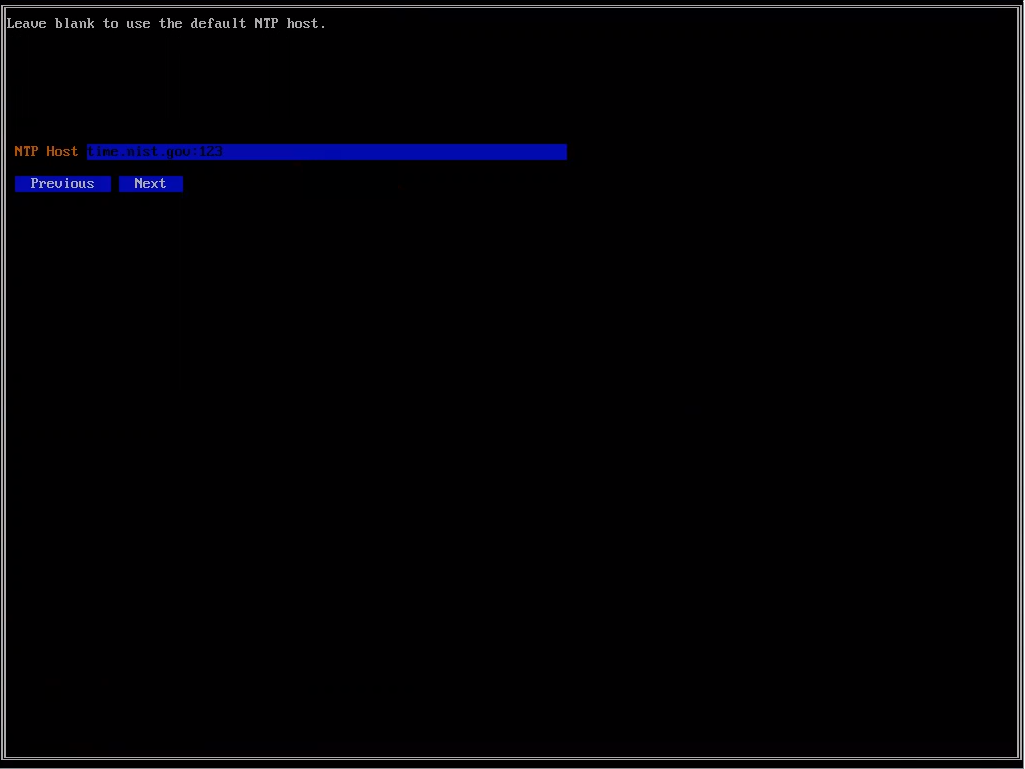
- Enter your NTP server address in the NTP Host box or leave it blank to use the default NTP host.
- Click Next.
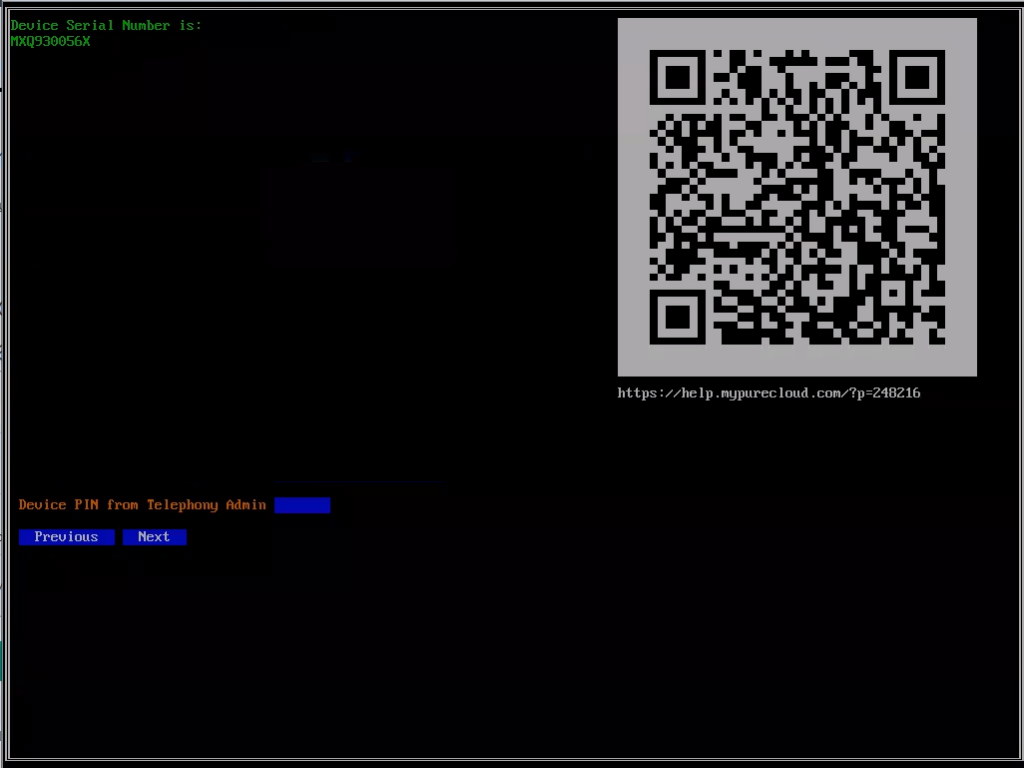
Enter PIN
In this part of the procedure, you use the Device PIN that you recorded when you began the provisioning procedure.
- Enter the PIN in the Device PIN from Telephony Admin box.
- Click Next.
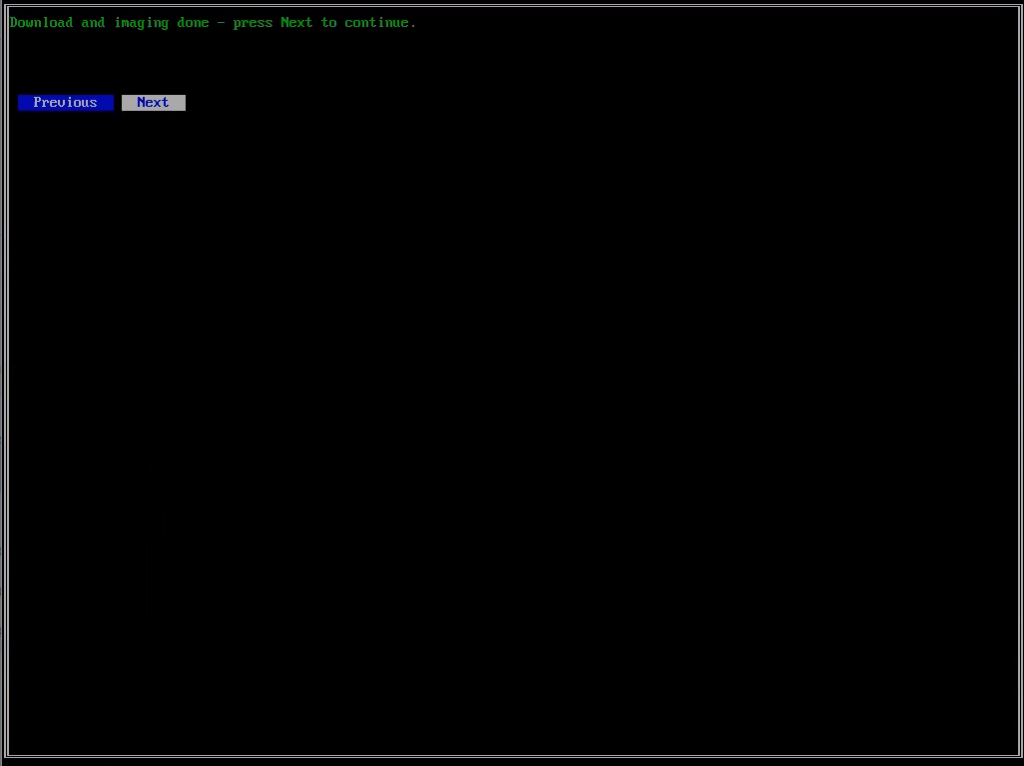
Download the image
In this part of the procedure, the installer downloads the actual Edge image. The download may take some time to complete.
After the download completes, the installer writes the image to the hard disk.
- When you see the Ready to download and install prompt, click Next.
- When the installer completes the imaging procedure, click Next.


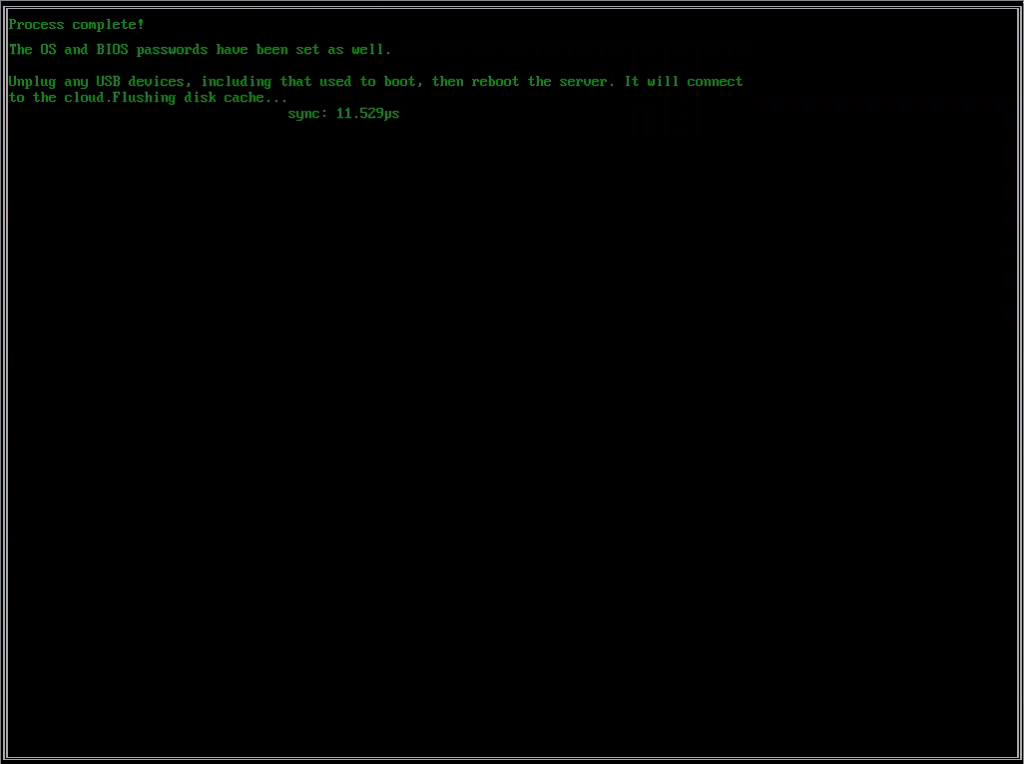
Installer process complete
When the installation is complete, the installer prompts you to reboot the Edge.
- Remove the USB flash drive.
- Reboot the Edge via a hard boot process:
-
- Using the power button, turn off the Edge.
- Wait for the Edge to completely power down.
- Using the power button, turn on the Edge.
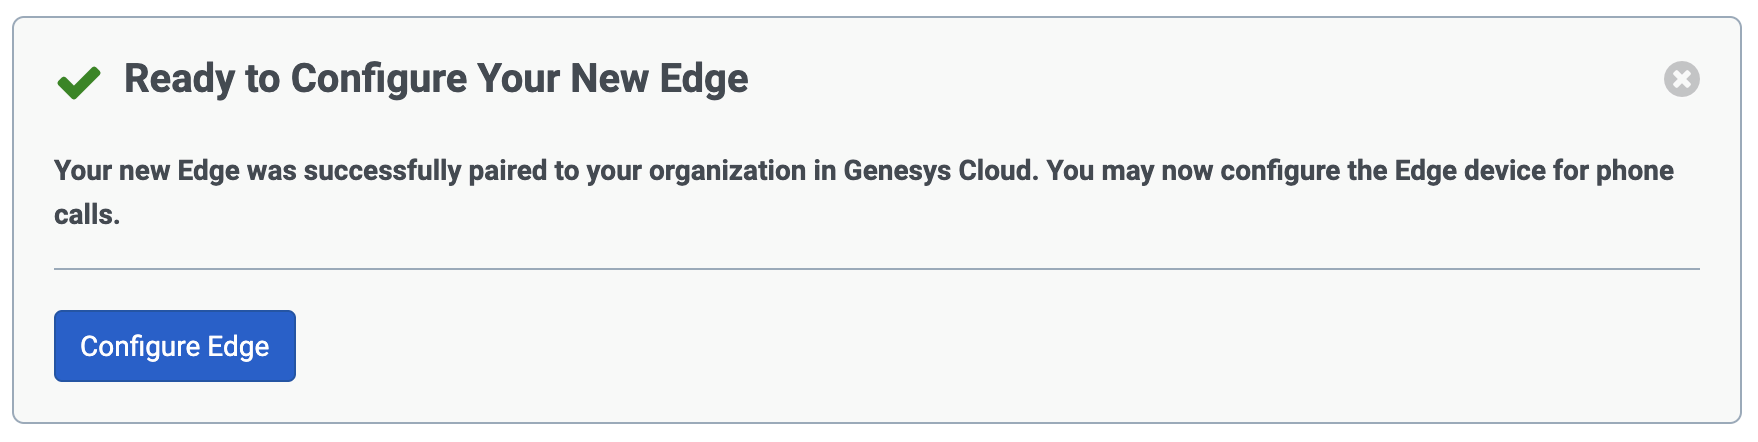
Finish provisioning and configure your Edge
At this point, your Edge is paired to your Genesys Cloud organization and you return to the Genesys Cloud user interface to configure your Edge’s telephony connections.
- When you see the Ready to Configure prompt, click Configure Edge.
To configure your new Edge for use in your Genesys Cloud organization, you perform a series of configuration operations.
- Create a SIP trunk
- Create a phone trunk
- Connect an existing trunk to an Edge network interface.
- Determine how many sites you need and add them to the system.
- Associate the Edge with a site and an Edge group. Attach an External SIP trunk.
- Add a new or modify the default number plan.
- Add a new or modify the outbound route.
- Configure emergency services