Import or export articles in a knowledge base v2
You can import question and answer articles, including linked categories and labels, in CSV, JSON, or XLSX formats to a knowledge base in any of these ways:
- Into a new or existing knowledge base
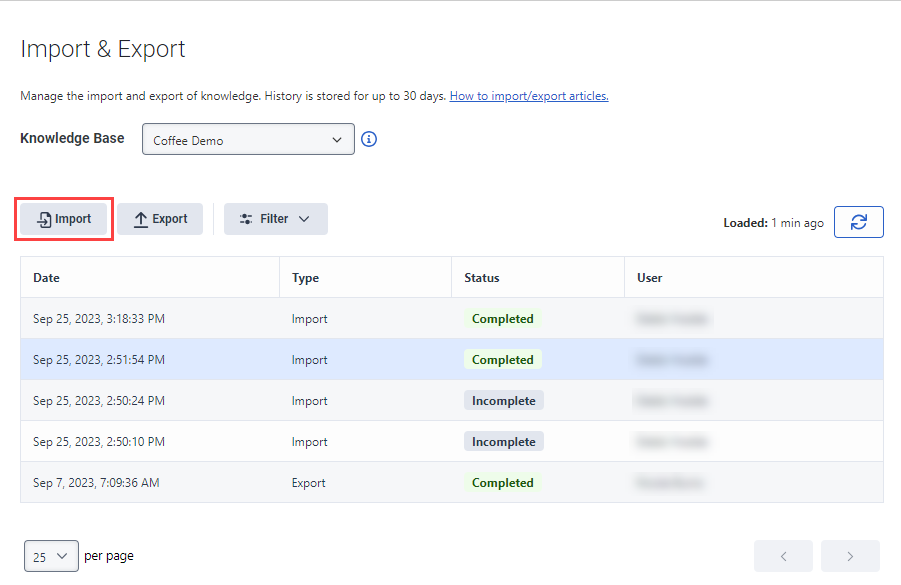
- From the Import & Export view
- Download a template in your preferred format, modify it to your organization’s specifications, and import the file into the knowledge base
If the articles do not contain categories and labels before you import them, then the import process automatically creates them.
- You can create new or update existing articles in CSV, JSON, and XLSX formats.
- You can import article categories and labels in CSV, JSON, and XLSX formats.
- In the Imports & Exports view, use the Filter button to sort the import or export instances by date, status, type, and user.
You can also export articles in CSV, JSON, and XLSX formats from the Import & Export view.
For more information about how to create an FAQ, see Knowledge article question and answer creation tips.
- Make sure that you create question and answer articles in the same language as the knowledge base.
- Questions and answers must include a minimum of five characters.
Import question and answer articles into a new or existing knowledge base
To import a .csv, .json, or .xlsx file that contains your question and answer articles, follow these steps:
- Click Admin.
- Under Knowledge, click Articles.
- Click Menu > Knowledge > Articles.
- Create a new knowledge base or open an existing one.
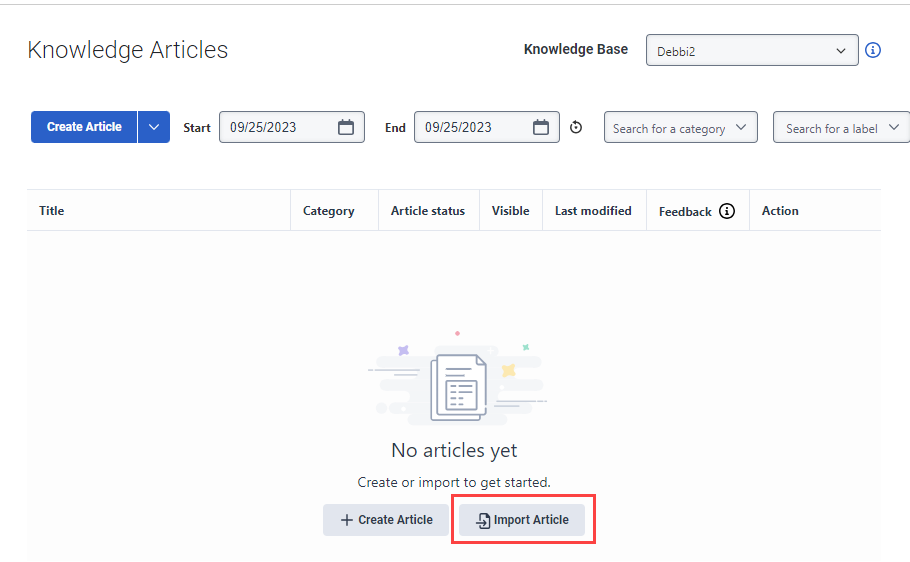
- If you choose to create a new knowledge base, then to import articles, click Import Article.
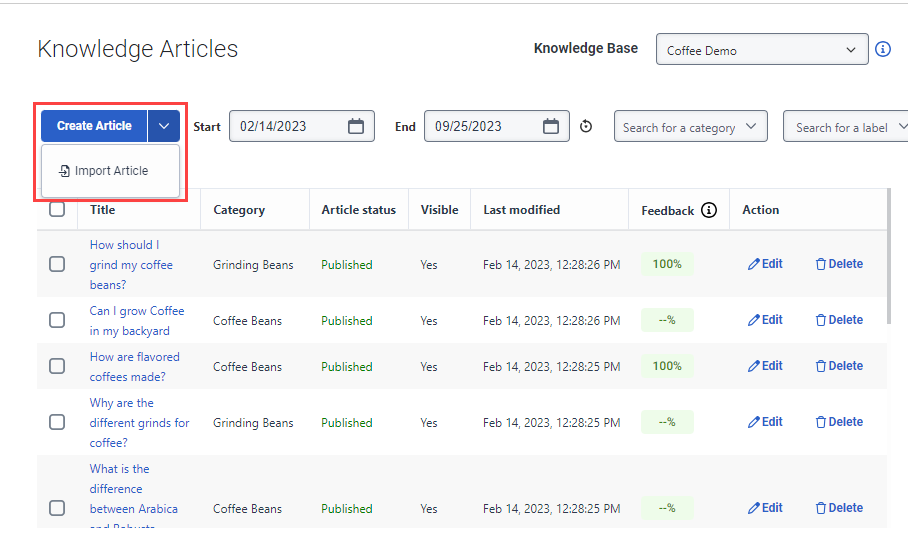
- If you choose to add articles to an existing knowledge base, then to import articles, click Create Article > Import Article.
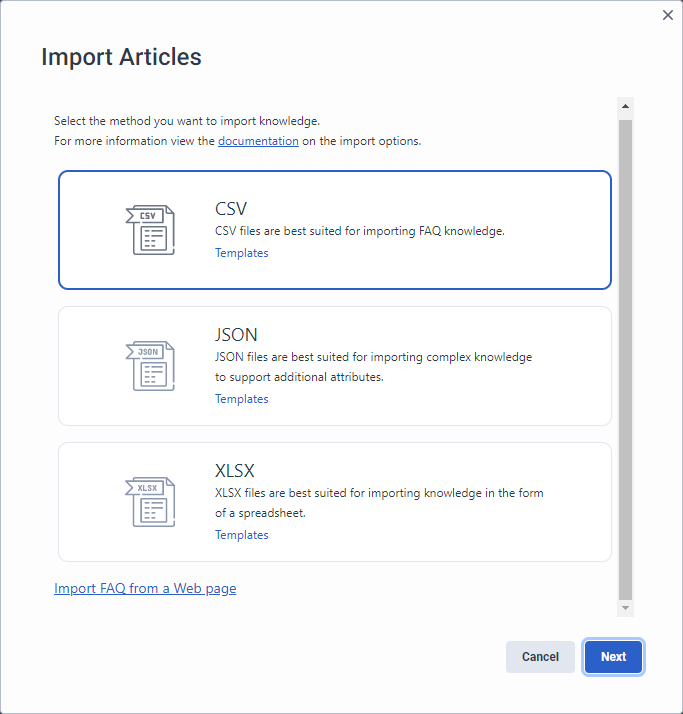
- From the Import Article dialog box, select the file format in which to import:
- CSV
- JSON
- XLSX
- Click Next.
- Do one of the following steps:
- Drag and drop the file that you want to import into the Select a CSV file to upload, Select a JSON file to upload, or CSV, JSON, and XLSX box.
- Click the box to navigate to the appropriate location and then select your .csv, .json, or .xlsx file.
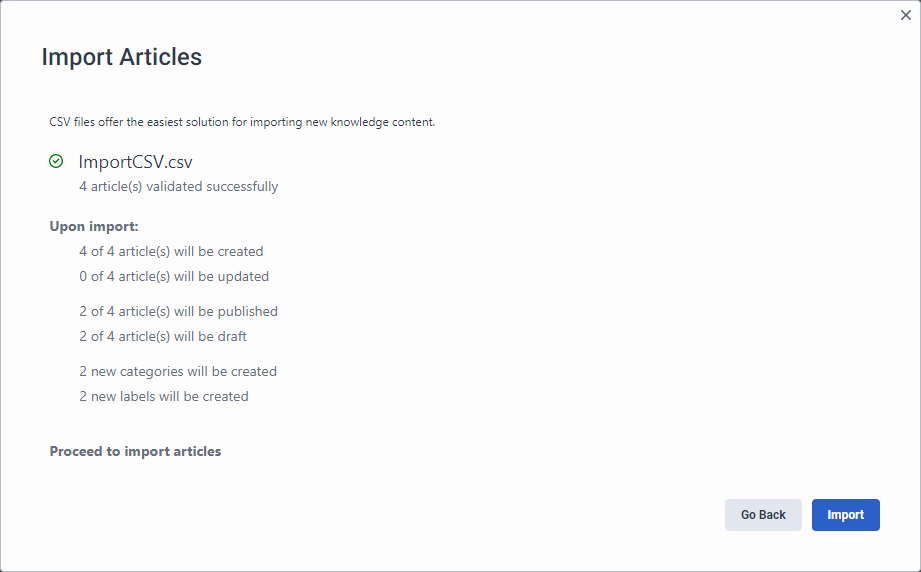
- Click Import. The system automatically checks for any errors in your file and returns a list of items to check before you continue.
- If the validation check includes no errors, click Import. The system imports the question and answer pairs as individual articles with new or links to existing categories and labels.
- This process extracts question and answer pairs by identifying question marks in the content. The content must be in the form of a question or the import does not consider it a question and answer pair.
- You cannot import content from nested URLs.
- The system does not recognize dynamically generated FAQ content on the client side (for example, with JavaScript). FAQ content must be rendered as a static HTML page.
- If a URL-based import does not work because the content is behind authentication, you can download the HTML FAQ file manually from your browser and use the HTML file upload option.
To import a question and answer pair from a URL or HTML file, follow these steps:
- Click Admin.
- Under Knowledge, click Articles.
- Click Menu > Knowledge > Articles.
- Create a new knowledge base or open an existing one.
- If you choose to create a new knowledge base, then to import articles, click Import Article.
- If you choose to add articles to an existing knowledge base, then to import articles, click Create Article > Import Article.
- From the Import Articles dialog box, click Import FAQ from a Web page. The Import FAQ from a Web page opens.
- Under Source, select the option you want to import:
- URL Import: Import from the given URL
- HTML Import: Import from the uploaded HTML file
- If you choose URL Import, follow these steps:
- Under Enter FAQ URL, add the URL.
- Click Find. The system imports the question and answer pairs from the URL that you provide.
- If you choose HTML Import, follow these steps:
- Under Upload HTML file, add the file name.
- Click Select File.
- Navigate to the HTML file location and select it. The system imports the question and answer pairs from the uploaded HTML that you provide.
- For both URL and HTML import, if you see that some FAQs did not import, follow these steps:
- Click Locate missing FAQ.
- Enter an example of a missing question.
- Click Find. The system attempts to return the missing FAQ.
- Select the questions and answer FAQ pairs that you want to include, or leave the default Select all unchanged, and click Add to Knowledge Base.
The system imports the question and answer pairs as individual articles.
Import a knowledge base file
Validate an imported knowledge base file
Download a knowledge base template
You can use templates in CSV, JSON, or XLSX formats to create new articles. You can download the template in your preferred format below or from the import dialog window. After you download a template, modify it to your organization’s specifications, and then use the file to import articles into your knowledge base.
- Make sure that you check the status of the articles in your file. If the article status is published, then the articles are live and available to your agents and customers when you import them.
- For article entities, you can add the externalID attributes to the import file. Then, you can maintain API updates with external knowledge bases. This feature works automatically for Genesys Cloud knowledge workbench V2 articles. You can import and export these articles back and forth across different knowledge bases by name; however, the externalID attributes and the category and label structure are only available in JSON file format.
Select the file that you want to download:
Now, modify the template that you download and then import it into your knowledge base.
- If you want to update existing articles, do not use the provided templates. Instead, export them into your format of choice, update the content excluding article IDs, and then import them back into your knowledge base.
- If you use this method to export knowledge base articles to edit in bulk, make sure that you do not modify the article IDs. Doing so creates new question and answer articles in the selected knowledge base.
Export question and answer articles from the Import & Export view
You can export articles in CSV, JSON, and XLSX formats from the Import & Export view. Exported articles include the knowledge base ID and the linked category and label structures. If the knowledge base does not have the linked categories and labels already defined, the export process automatically creates them. When you import articles in CSV, JSON, and XLSX formats to the same knowledge base, the import process updates the existing articles. When you import articles to a different knowledge base, the import process creates articles for the imported content.
- Genesys recommends that you use CSV to export basic FAQ knowledge.
- Genesys recommends that you use JSON to export complex knowledge and more attribute support.
- Genesys recommends that you use XLSX to export knowledge as a spreadsheet.
To export a file that contains your question and answer articles, follow these steps:
- Click Admin.
- Under Knowledge, click Articles.
- Click Menu > Knowledge > Articles.
- Open the knowledge base that contains the articles that you want to export.
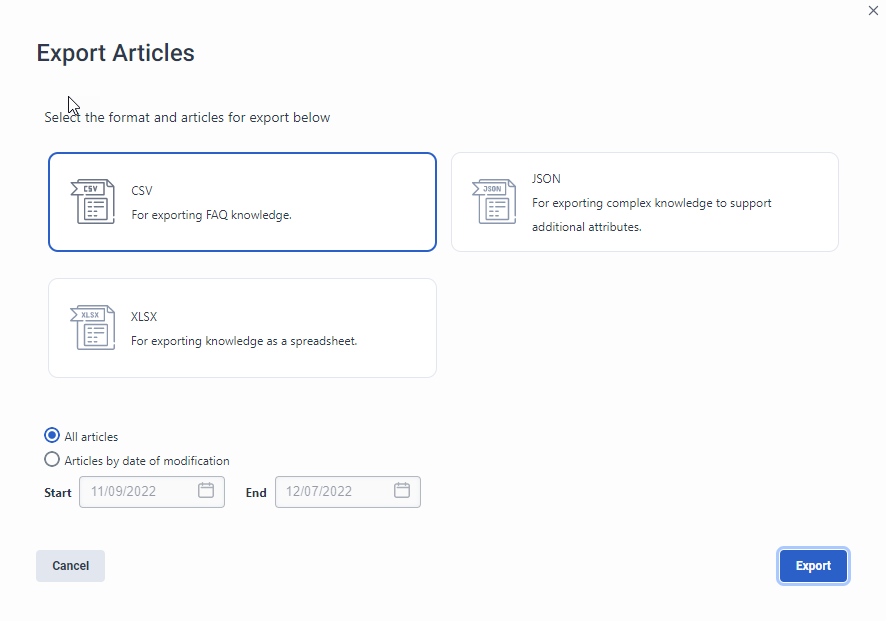
- Click Export . The Export Knowledge dialog box opens.
- Choose the format in which to export the knowledge articles:
- CSV
- JSON
- XLSX
- Select the articles that you want to export:
- To export all articles in the knowledge base, leave the default All articles setting unchanged.
- To export articles from a specific time period, click the calendar at the end of the Start and End boxes and select the time frame from which to export the articles.
- Click Export. The system downloads the articles into a .json file and returns a message when complete. You can select to download the file from the message link.

