Add question and answer articles to a knowledge base V2

After you create a knowledge base, you can add question and answer articles to use in bots.

Note: For more information about how to create a question and answer article, see Knowledge base question and answer creation tips.

You can also add varieties of the initial question. This feature helps train the AI model for the different ways that a customer asks a question.

Add question and answer articles to the knowledge base

Notes:
  • Make sure that you create question and answer articles in the same language as the knowledge base.
  • Questions and answers must include a minimum of five characters.
  • For more information about how to create an FAQ, see Knowledge workbench FAQ creation tips.

Create a new question and answer article

Click the image to enlarge.

Knowledge base question and answer

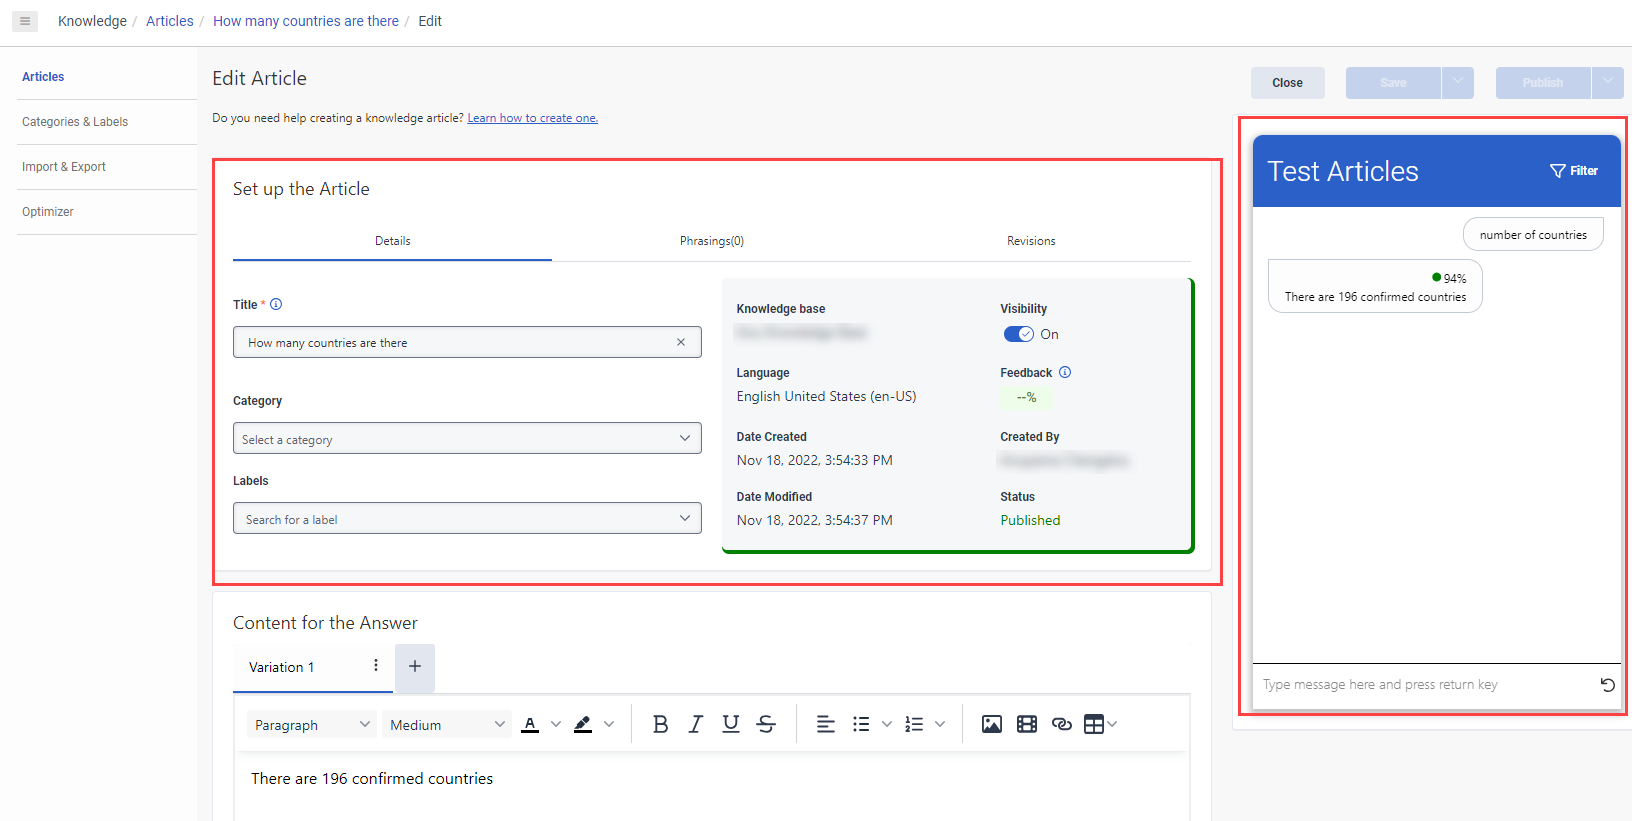
To add a new question and answer article to your knowledge base, follow these steps:

  1. Click Admin
  2. Under Knowledge, click Articles.
  3. Create a new knowledge base or open an existing one.
  4. Click Create Article. The Question & Answer page opens.
  5. Under Question, add the knowledge article question.
  6. (Optional) Under Category, select an existing question and answer category from the list.
  7. In the Content for the answer box, add the knowledge article answer.
  8. (Optional) Format the answer with bold, italic, underline, bulleted, and numbered lists.
  9. (Optional) To upload an image to include with the answer, click Image and perform one of the following steps.
    Note: Genesys Cloud supports the following image formats: .jpg, .jpeg, .png, and .gif.

    • To select an existing image, follow these steps:
      1. Search for the image that you want to use.
      2. Click to select the image.
      3. Click Insert image.
    • To select a locally saved image, follow these steps:
      1. Click Browse for image.
      2. Drag and drop the image into the dialog box or click to search for the image that you save locally.
      3. Click Upload.
    • To select an image from a fully formed URL, perform these steps:
      1. Click the down arrow next to Browse for image.
      2. Click Insert image from URL.
      3. Enter the URL that contains the image to add.
      4. Click Insert image.
  10. (Optional) After you upload and insert an image, to link the image to a hyperlink URL, perform these steps:
    Click the image to enlarge.
    KB Create a URL for an image
    1. Double-click the inserted image.
    2. Click Create Hyperlink . The Create Hyperlink dialog box opens.
    3. In the Text to Display / Image URL box, perform one of these steps:
      • To display wording other than the URL string, enter the text to display to the customer.
      • To link the image, add the image URL.
    4. Under Link Type, select URL or E-mail.
    5. Under Target, leave the default setting unchanged.
      • For URL, the default is New tab.
      • For email, the default is Open e-mail provider.
    6. Under URL, perform one of the following steps.
      Note: Currently, the only supported transfer protocol is https.
      • For URL, add the fully qualified URL string.
      • For email, type the complete email address.
    7. Click Create.
  11. (Optional) To embed a video to include with the answer, follow these steps.
    1. Click Import Video .
    2. Enter the video URL to embed into the answer. 
    3. Click Save.
  12. (Optional) To add an image or email address as a hyperlink to include with the answer, follow these steps.

    Click the image to enlarge.
    Create a knowledge base hyperlink
    1. Click Create Hyperlink . The Create Hyperlink dialog box opens.
    2. In the Text to Display / Image URL box, perform one of these steps:
      • To display wording other than the URL string, enter the text to display to the customer.
      • To link the image, add the image URL.
    3. Under Link Type, select URL or E-mail.
    4. Under Target, leave the default setting unchanged.
      • For URL, the default is New tab.
      • For email, the default is Open e-mail provider.
    5. Under URL, perform one of the following steps.
      Note: Currently, the only supported transfer protocol is https.
      • For URL, add the fully qualified URL string.
      • For email, type the complete email address.
    6. Click Create.
  13. To save the knowledge base article, perform one of the following steps.
    • To save the article and continue working, click Save.
    • To save the article and close the knowledge base, click Save & Close.