
Format a knowledge base V2 question and answer article
You can perform general updates to your knowledge base article, such as change font style, change font size, change font color, change background color, change text emphasis, alignment, add bulleted or numbered lists. You can also customize your article to include rich media, tables, and more. These updates appear in your touchpoints. These sections describe how to perform various tasks to tailor your question and answer article for your audience.
- Make sure that you create question and answer articles in the same language as the knowledge base.
- Questions and answers must include a minimum of five characters.
- The maximum size of article content or uploaded file size is 300 KB.
- The maximum number of articles in a knowledge base is 15,000.
- The maximum number of knowledge bases in a single organization is 500.
- Hyperlinks cannot include an ampersand (&) in the construction of the string.
- For more information about constraints, see Limits in the Developer Center. For more information about how to create an FAQ, see Knowledge workbench FAQ creation tips.
- Click Admin.
- Under Knowledge, click Articles.
- Create a new knowledge base or open an existing one.
- Open an existing question and answer article or create a new one.Note: If you select an existing article with multiple variations that include touchpoints and segments in an existing article, to view details about the article, perform these steps:
- Select the variation from the list.
- Click Variation Details. The Variation Details dialog box opens.
- To view segment information, under Segments, click to expand the segment that you want to view.
- Add your article text.
- As appropriate, double-click to select the text to change and then use these steps to format your article:
- To change the font style, position the cursor anywhere in the line or paragraph, click the arrow at the end of Paragraph, and choose from one of the following options:
- Paragraph (default)
- Heading 1–6
- Preformatted
- To change the font size, click the arrow at the end of Medium and choose from one of these options:
- XX-Small
- X-Small
- Small
- Medium (default)
- Large
- X-Large
- XX-Large
- To change the font color, click the arrow next to Text Color
 and choose one of these steps:
- Select a predefined font color.
- Click Custom Color . The Color Picker opens. Enter the color’s RGB or Hex code and then click Save.
- To add highlight to a word, phrase, or paragraph, click the arrow next to Background Color
 and choose one of these steps:
- Select a predefined highlight color.
- Click Custom Color . The Color Picker opens. Enter the color’s RGB or Hex code and then click Save.
- To adjust the text emphasis, select from the formatting options in the toolbar:
- Bold
- Italic
- Underline
- Strikethrough
- To change the text of the alignment, position the cursor anywhere in the line or paragraph, click Alignment , and select an option:
- Decrease indent
- Increase indent
- Align left
- Align center
- Align right
- To create bulleted lists, select the text for which you want to add bullet points and click Bullet List .Note: To change from the default disc style, click the arrow at the end of Bullet List and choose circle or square.
- To create numbered lists, select the text for which you want to add numbering and click Numbered Points .Note: To change from the default numbering style, click the arrow at the end of Numbered Points and choose lower alpha or lower Roman.
- To change the font style, position the cursor anywhere in the line or paragraph, click the arrow at the end of Paragraph, and choose from one of the following options:
Genesys Cloud supports the following image formats: .jpg, .jpeg, .png, and .gif.
- Click Image and do one of the following.
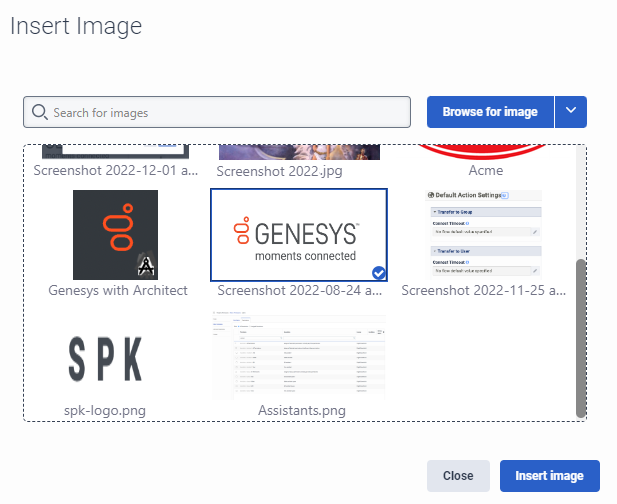
- To select an existing image, follow these steps:
- Search for the image that you want to use.
- Click to select the image.
- Click Insert image.
- To select a locally saved image, follow these steps:
- Click Browse for image.
- Drag and drop the image into the dialog box or click to search for the image that you save locally.
- Click Upload.
- To select an image from a hyperlink URL, perform these steps:
- Click the down arrow next to Browse for image.
- Click Insert image from URL.
- Enter the URL that contains the image to add.
- Click Insert image.
- To select an existing image, follow these steps:
- To resize an image, follow one of these steps:
- Click the image. A blue border appears around the image. Click any blue corner of the image and drag the image to the preferred size.
- Right-click the image and from the menu that appears, select Edit Image. The Edit Image dialog box opens. Adjust the alternative description, width, and measurement in units.
- After you upload and insert an image, to link the image to a hyperlink URL, perform these steps:
-
- Click to select the inserted image.
- Click Create Hyperlink . The Create Hyperlink dialog box opens.
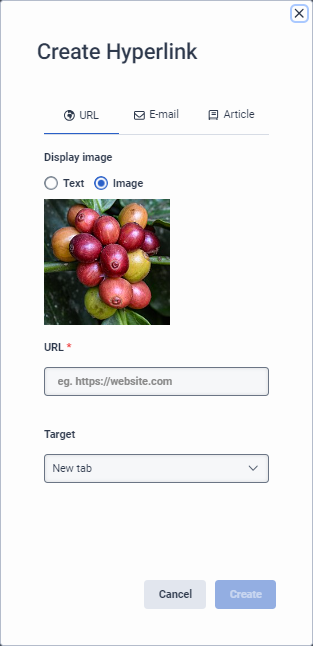
- To create a URL link type, follow these steps:
- Remain on the default URL tab.
- Under Display image, to link the display the image, leave the default Image setting. Conversely, to display wording other than the URL string, click Text and enter the text to display to the customer.
- Under URL, add the fully qualified URL string.Note: Currently, the only supported transfer protocol is
https. - Under Target, leave the default New tab setting unchanged.
- To create an email link type, follow these steps:
- Click the E-mail tab.
- Under Display image, to link the display the image, leave the default Image setting. Conversely, to display wording other than the URL string, click Text and enter the text to display to the customer.
- Under E-mail, type the complete email address.
- Under Action, leave the default Open e-mail provider setting unchanged.
- To create an article link type, follow these steps:
- Click the Article tab.
- Under Display image, to link the display the image, leave the default Image setting. Conversely, to display wording other than the URL string, click Text and enter the text to display to the customer.
- Search for and select the article link.
- Click Create.
Genesys Cloud supports the following media formats: Vimeo and YouTube.
- Click Insert/Edit Media . The Add/Edit Video dialog box opens.

- Under Media URL, enter the URL of the media source that you want to add.
- (Optional) adjust the width and height of the media file.
- To allow a participant to adjust the media file size, click Constrain proportions . The Constrain proportions changes.
- Click Save.
You can add a URL, email address, or an article from the same knowledge base as a hyperlink in an article. You can also display these hyperlinks as text or as an image that you upload.
- Click Create Hyperlink . The Create Hyperlink dialog box opens.
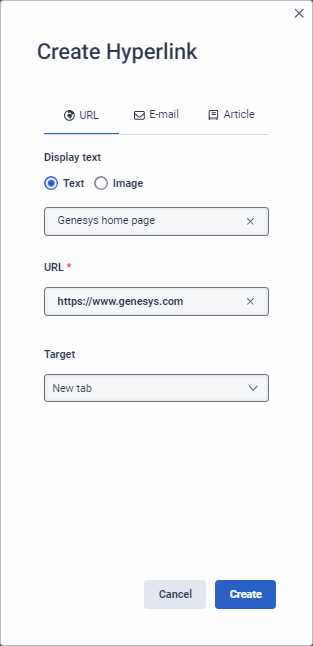
- To create a URL hyperlink, follow these steps:
- Remain on the URL tab.
- Under Display Text, perform one of these steps:
- Leave the Text option selected and to display wording other than the URL string, enter the text to display to the customer.
- Click Image and either upload a new image, select an existing image, or add the image URL.
- Under URL, add the fully qualified URL string.Note: Currently, the only supported transfer protocol is
https. - Under Target, leave the default New tab setting unchanged.
- To create an email address as a hyperlink, follow these steps:
- Click the E-mail tab.
- Under Display Text, perform one of these steps:
- Leave the Text option selected and to display wording other than the email address, enter the text to display to the customer.
- Click Image and either upload a new image or select an existing one.
- Under Email, type the complete email address.
- Under Action, leave the Open e-mail provider setting unchanged.
- To create a link to another article in the same knowledge base, follow these steps:
- Click the Article tab.
- Under Display Text, perform these steps:
- Leave the Text option selected and to display wording other than the article string, enter the text to display to the customer.
- Click Image and either upload a new image or select an existing one.
- Under Article, search for and select the article that you want to link to in the current article.
- Under Variation, select the appropriate variation for which to provide this hyperlink.
- Click Create.
- To resize the image, follow one of these steps:
- Click the image. A blue border appears around the image. Click any blue corner of the image and drag the image to the preferred size.
- Right-click the image and from the menu that appears, select Edit Image. The Edit Image dialog box opens. Adjust the alternative description, width, and measurement in units.
- Create a table:
- Click Table . The Table menu appears.
- Hover over Table and move your cursor over the grid until you highlight the number of columns and rows that you want.
- To make general changes, click anywhere in the table and from the menu that appears, choose to perform any of these actions:
- Open the table properties
- Delete the table
- Insert row before
- Insert row after
- Delete row
- Insert column before
- Insert column after
- Delete column
- To configure the cell properties, select the cell or cells that you want to format, click Table > Cell, and from the menu that appears, perform these steps:
- To configure the cell format, click Cell Properties. The Cell Properties dialog box opens.
- On the General tab, customize any of these options:
- Width
- Height
- Cell type (header or regular cell)
- Scope (row, column, row group, or column group)
- Horizontal align
- Vertical align
- On the Advanced tab, configure these optional border settings:
- Border width
- Border style
- Border outline color
- Border background color
- Click Save.
- On the General tab, customize any of these options:
- To merge cells, click Merge cells.
- To split a cell, click Split cell.
- To configure the cell format, click Cell Properties. The Cell Properties dialog box opens.
- To set row properties, select the row or rows that you want to format, click Table > Row, and from the menu that appears, follow these steps:
- To insert a row before the selection, click Insert row before.
- To insert a row after the selection, click Insert row after.
- To remove a row, click Delete row.
- To format row properties, click Row properties. The Row Properties dialog box opens.
- On the General tab, customize any of these options:
- Row type (header, body, or footer)
- Alignment (left, center, or right)
- Row height
- On the Advanced tab, configure these optional border settings:
- Border style
- Border outline color
- Border background color
- Click Save.
- On the General tab, customize any of these options:
- To cut a row and paste it elsewhere, click Cut row.
- To copy a row and insert a duplicate copy in another location, click Copy row.
- To paste a cut or copied row before the selection, click Paste row before.
- To paste a cut or copied row after the selection, click Paste row after.
- To set column properties, select the column or columns that you want to format, click Table > Column, and from the menu that appears, follow these steps:
- To insert a column before the selection, click Insert column before.
- To insert a column after the selection, click Insert column after.
- To remove a column, click Delete column.
- To cut a column and paste it elsewhere, click Cut column.
- To copy a column and insert a duplicate copy in another location, click Copy column.
- To paste a cut or copied column before the selection, click Paste column before.
- To paste a cut or copied column after the selection, click Paste column after.
- To set properties for the entire table, click Table > Table properties. The Table Properties dialog box opens.
- On the General tab, customize any of these options:
- Width
- Height
- Cell spacing
- Cell padding
- Border width
- Table caption
- Show table caption
- Border Width
- Alignment
- On the Advanced tab, configure these optional border settings:
- Border style
- Border outline color
- Border background color
- Click Save.
- On the General tab, customize any of these options:
- To resize a cell, right-click inside the cell and from the menu that appears, select to resize a cell. The properties dialog box opens. Adjust the width, height, cell type, scope, horizontal alignment, and vertical alignment.
- To resize a row, follow one of these steps:
- Hover over the row that you want to increase and when the cursor changes to Resize horizontally , drag the row to the preferred size.
- Right-click the row and from the menu that appears, select to resize a row. The properties dialog box opens. Adjust the row type, height, and alignment. Click the advanced tab and configure border properties.
- To resize a column, follow one of these steps:
- Hover over the column that you want to increase and when the cursor changes to Resize vertically , drag the row to the preferred size.
- Right-click the column and from the menu that appears, select to resize a column. The properties dialog box opens. Adjust the width, height, cell type, scope, horizontal alignment, and vertical alignment. Click the advanced tab and configure border properties.
- To resize the table, follow one of these steps:
- Click anywhere in a table cell. A blue border appears around the table. Click any blue corner of the table and drag it to the preferred size.
- Right-click inside the table and from the menu that appears, select Table Properties. The Table Properties dialog box opens. Adjust the width, height, cell spacing, cell padding, border width, caption, and alignment. Click the advanced tab and configure border properties.
- Click Save.
- To remove the entire table, click Table > Delete Table.
- Under Content for the Answer, click More next to the variation you want to edit.
- To view and edit the variation, follow these steps:
- Click Edit Variation.
- Update the variation name.
- Add or remove touchpoints.
- Modify segments.
- Click Update.
- To delete the variation if more than one exists, click Delete Variation.
- To save the article and continue working, click Save.
- To save the article and close the knowledge base, click Save & Close.