
Create a site under BYOC Premises
A site is a list of rules for routing calls. Objects such as phones associated with a site share the same rules. When a user makes a call from a phone, the system looks up the site and the call type in order to route the call to the best outbound phone line, or endpoint. Phones that are associated with a site are usually located in the same general area and have the same general purpose.
When you configure a site, you must choose a Media Model setting. If you are using the BYOC Cloud or the Genesys Cloud Voice telephony connection option, you select Cloud as your media model. If you are using the BYOC Premises telephony connection option, you select Premises as your media model. For more information, see Telephony connection options overview.
Create a site
- Click Admin.
- Under Telephony, click Sites.
- Click Menu > Channels > Telephony > Sites.
- Click Create New.
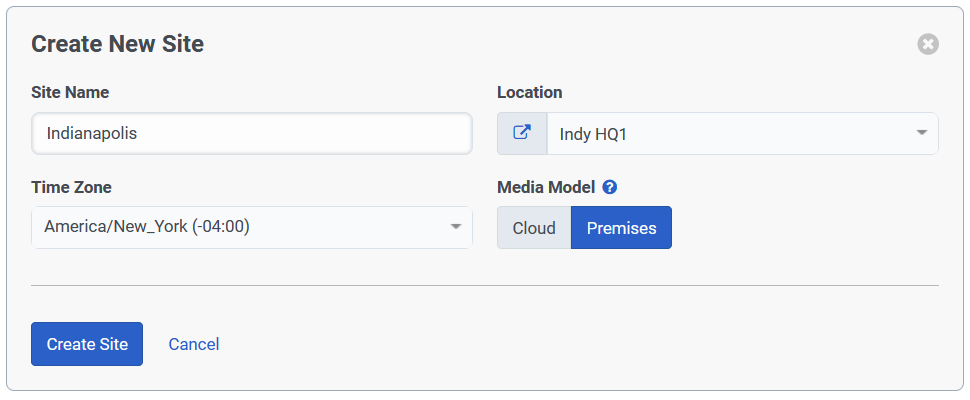
- Type a name in the Site Name box.
- From the Location list, select a location for your site.
- From the Time Zone list, select your time zone.
- Under Media Model, select Premises.
- Click Create Site.
Configure a site
After you click Create Site, the Edit Site page appears. You’ll see that it contains four tabs titled General, Number Plans, Outbound Routes, and Simulate Call. You’ll continue the initial site configuration on the General tab. For details on the settings and features on the other tabs, see the Related tasks section of this article.
- At the top of the General tab, enter a Description.
- If this site is your initial site, then in the site information panel, click Make this Site my default Site.
Note: You can only set one site as the default site. If you are creating more sites, then do not select Make this Site my default Site.
- Choose media regions and specify a Relay/TURN Behavior.
- If you are using WebRTC, you need to select a set of media regions and specify a Relay/TURN Behavior. For more information, see Configure your site for Global Media Fabric and Use the Relay/TURN Behavior feature.
- Choose Phone Edge Assignments.
- Genesys Cloud assigns phones on this site to use the Edges assigned to this site. For BYOC Premises, click Use this Site.
- Configure Outbound Calling.
- In the Caller Address box, enter the telephone number that you want to appear in the caller ID information for outbound calls. Enter this number in E.164 format, which includes the plus sign (+) and the country code.
- In the Caller Name box, enter the name that you want to appear in the caller ID information for outbound calls.
Note: While you can enter Caller ID and Caller Name information here, Genesys Cloud uses the Prioritized Caller Selection feature to specify which caller ID information to use for outbound calls. For more information, see Use the Prioritized Caller Selection feature to configure caller ID information.
- Configure NTP Settings.
- If you encounter difficulties with the default NTP settings for the Edge (time.nist.gov on port 123),you can specify Alternate NTP servers.
To specify a custom NTP source:
- Enter an IP address or an FQDN.
- To specify a port number, append it with a colon (:).
- Click the (+) plus to add the source to the list.
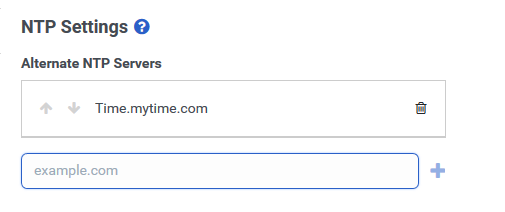 Note: If you do not specify a port, Genesys Cloud uses port 123 by default.
 - Configure Automatic Updates.
- By default, Genesys Cloud automatically updates to the latest version of Edge software every day from 2:00 A.M. to 5:00 A.M. However, you can configure a custom schedule for Edge updates. For more information, see Schedule Automatic Updates for the Edge software
- Click Save Site.
Related tasks