Create a bot flow and use third-party ASR grammar quick start guide
- Genesys Cloud CX 1, Genesys Cloud CX 2, or Genesys Cloud CX 3 license.
- A valid Genesys Dialog Engine Bot Flow subscription. For more information, contact Genesys Cloud Sales.
- Nuance OAuth Client ID and Client secret credentials. For more information, see the Nuance Mix documentation or contact your Nuance representative directly.
You can create an Architect bot and incorporate third-party ASR grammars for use with inbound chat or message flows. Create the bot within the flow, or create it separately and then call it from the flow.
Step 1: Add and activate your third-party ASR engine integration
Add your third-party ASR engine integration. The example in this article uses the Nuance Recognizer as a Service integration.
- Click Admin.
- Under Integrations, click Integrations.
- Click Integrations.
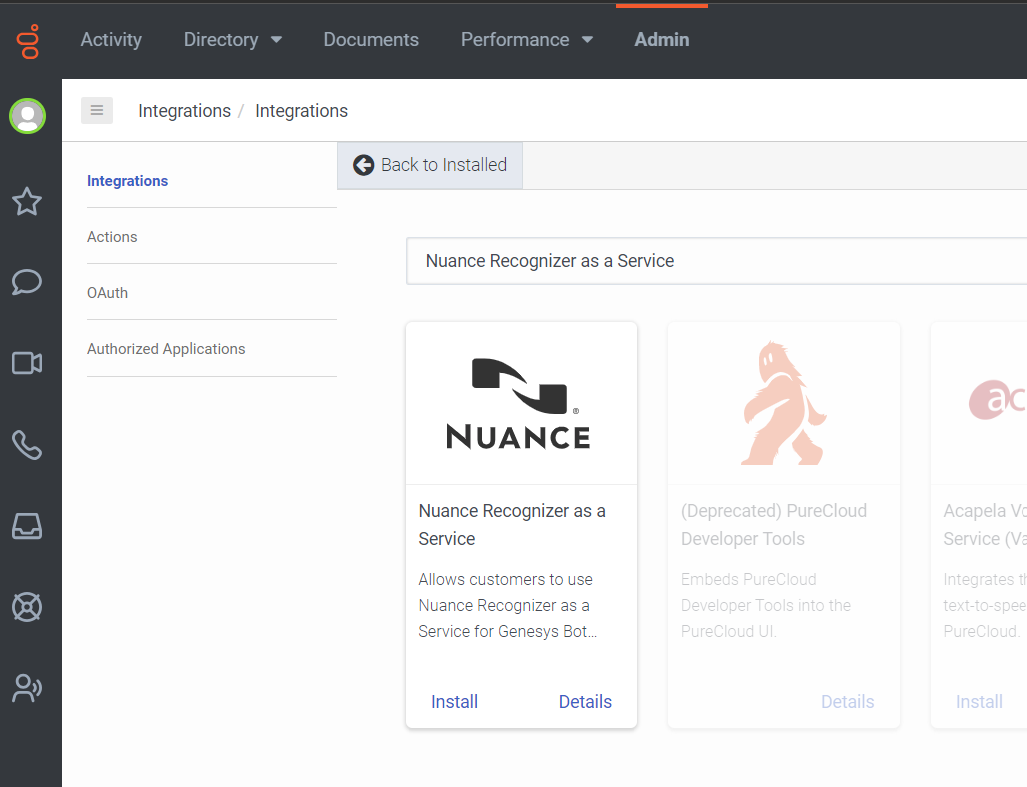
- In the Search box, type Nuance Recognizer as a Service. The card for Nuance Recognizer as a Service appears.
- Click Install.
To configure the Nuance Recognizer as a Service integration, perform the following steps:
- Open the Nuance Recognizer as a Service integration:
- If you have not previously installed the integration into your Genesys Cloud organization, install it now.
- If you have installed the integration, open the Genesys Cloud Admin menu and under Integrations, click Integrations. Then, search for and open the Nuance Recognizer as a Service integration.
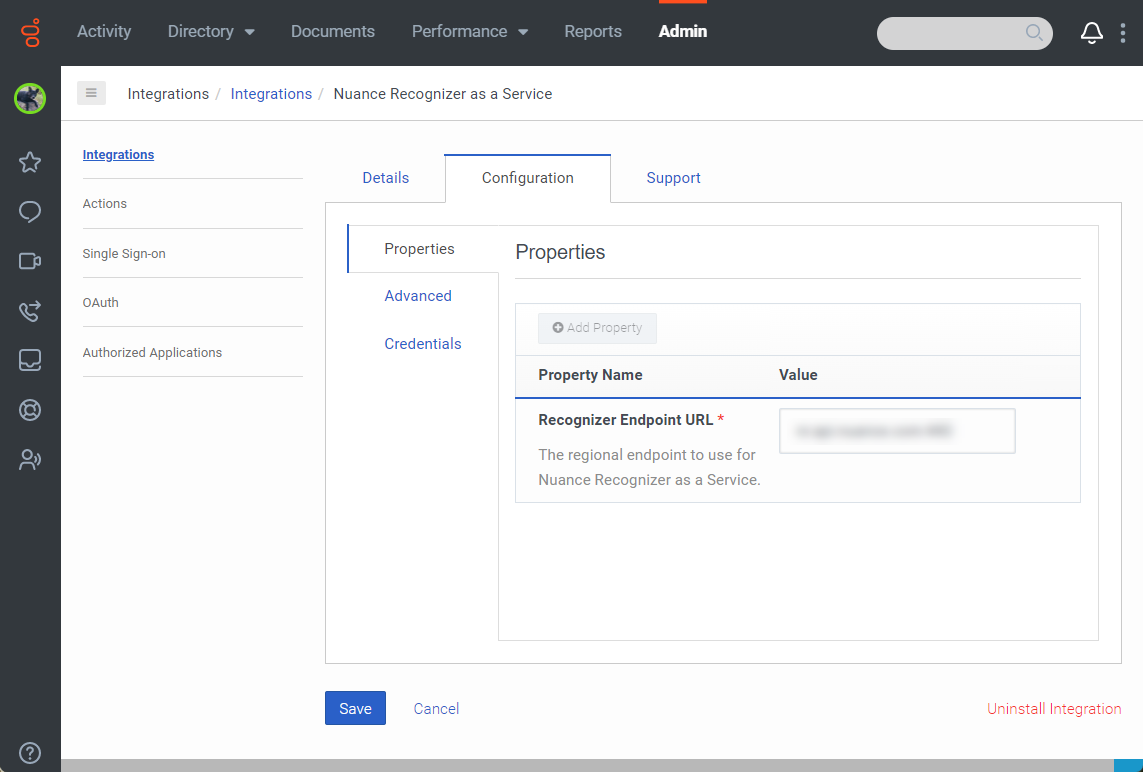
- On the Nuance Recognizer as a Service integration page, click the Configuration tab.
- Under Properties, locate the Recognizer Endpoint URL section.
- In the Value field, enter the regional endpoint that you want to use for Nuance Recognizer as a Service.
- Click the Credentials tab.
- Click Configure. The Configure Credentials dialog box opens.
- Copy the “client_id” value from your OAuth configuration into the Nuance Client ID field.
- Copy the “client_secret” value from your OAuth configuration into the Nuance Client Secret field.
- Copy the “private_key_id” from the JSON file into the Nuance Private Key ID field.
- Copy the “private_key” value from the JSON file into the Nuance Private Key field.
- Click OK.
- Click Save.
- To activate the Nuance Recognizer as a Service integration, in the Status column click Inactive. The Change Status dialog box opens.
- Click Yes. The status of the Nuance Recognizer as a Service integration changes to Active.
Install Nuance Recognizer as a Service
Click the image to enlarge.
Configure Nuance Recognizer as a Service
Click the image to enlarge.
Step 2: Add grammar from your third-party ASR engine to Architect’s grammar page
Add grammar from your third-party engine to Architect.
<?xml version="1.0"?>
<grammar xmlns="http://www.w3.org/2001/06/grammar" xml:lang="en-US" version="1.0" root="fruits">
     <rule id="fruits" scope="public">
          <one-of>
               <item>apple</item>
               <item>banana</item>
               <item>blueberry</item>
               <item>cherry</item>
               <item>grape</item>
               <item>peach</item>
               <item>pear</item>
               <item>pineapple</item>
               <item>strawberry</item>
               <item>watermelon</item>
          </one-of>
     </rule>
</grammar>
- Click Admin.
- Under Architect, click Architect. Architect opens in a new tab.
- Click Grammars.
- Click Add. The Create New Grammar dialog box opens.
- Name the grammar Fruit.
- Under Grammar Description, add descriptive details about the grammar. For example, “list of fruit for sale.”
- Click the Starting Language and select the initial language that you want the grammar to use.
- Click Create. The Grammar Editor opens.
- Depending on the type of grammar that you want to add, click one of the following tabs:
- Voice
- DTMF
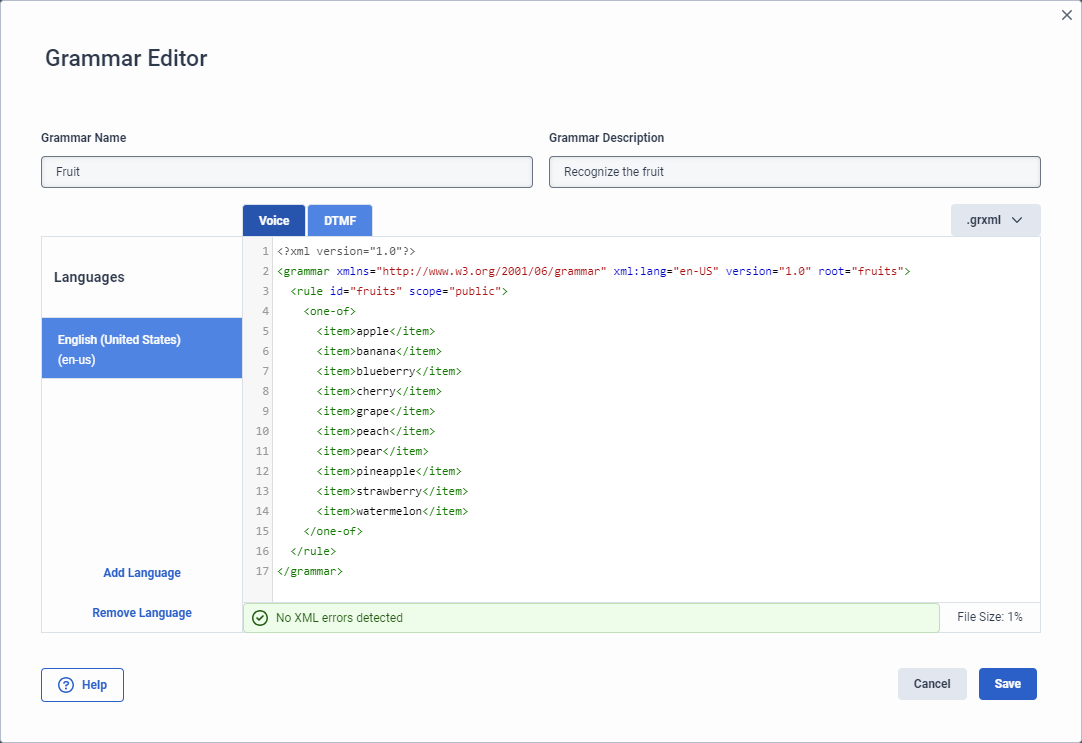
- To manually add GRXML content from Nuance Recognizer ASR grammar, enter the syntax into the editor.Note: If the grammar passes XML validation, then a green message appears, letting you know that the grammar is free of errors. If a red message appears, then Architect lets you know the location in the GRXML that the error or errors exist.
- To upload a grammar file with the .gram extension, follow these steps:Note: If you switch from the .grxml file type to the .gram file type, then Architect removes existing .grxml file.
- Click .grxml and select .gram.
- Click Select File. The Add A Grammar File dialog box opens.
- Click Select .gram file and upload the appropriate file.
- Click Add File. Architect uploads the file but does not check for errors.
- Click Save.
Grammar Editor for DTMF
The example in this article uses DTMF grammar. For details and an example of voice grammar, see Add a grammar for a bot flow in Architect.
Click the image to enlarge.
Step 3: Create a bot for an inbound flow and add intents, slots, and slot types
This procedure describes how to create a bot for an inbound message flow. In this example, build the bot flow to ask users what they want to do. They can pay their bill or order fruit.
- Create a new inbound bot flow:
- From the Architect home page, click or hover over the Flows menu and select Bot Flow.
- Click Add. The Create Flow dialog box opens.
- In the Name field, enter a unique name for the flow.
- (Optional) In the Description field, add a short sentence or phrase to describe this flow.
- Click the Default Language list and select the flow’s default supported language.
- Click the Divisions list and select the division in which to place the flow.
- Click Create Flow. The flow’s configuration page opens.
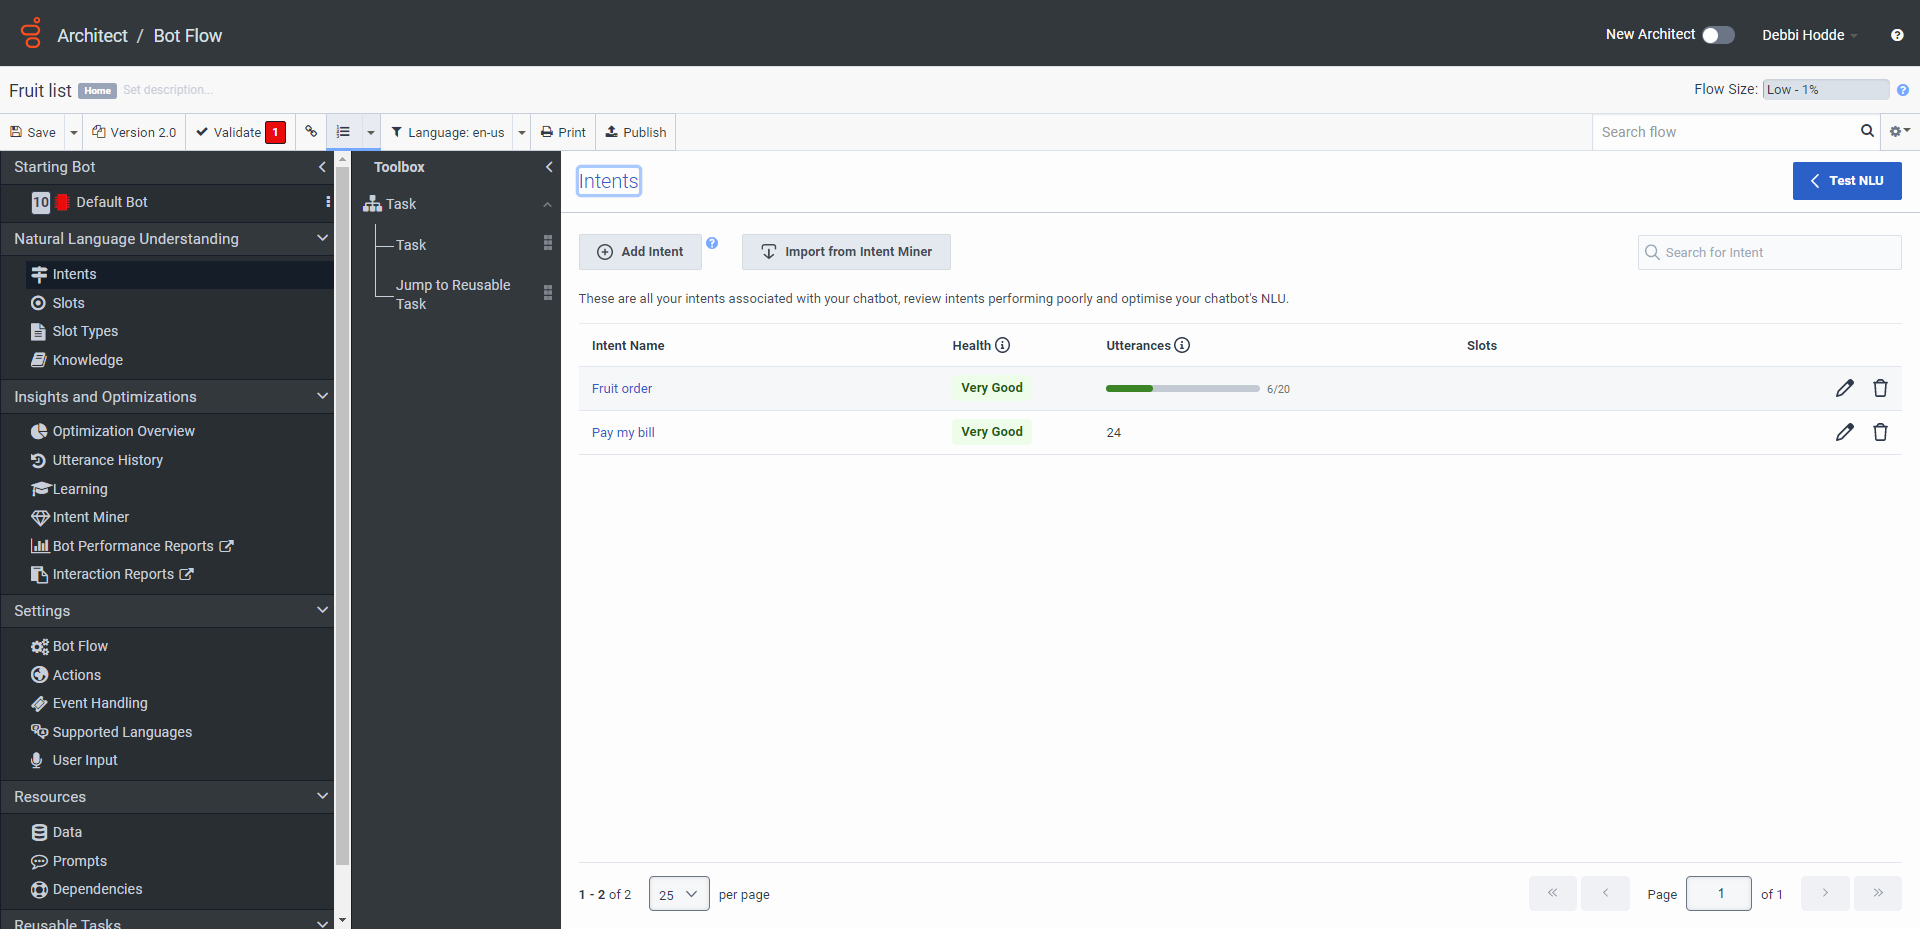
- Under Natural Language Understanding, click Intents.
- Add the first intent:
- Click Add Intent.
- Name the intent Pay my bill.
- Click Add Utterance.
- On the Utterances page, add an utterance. For example, “payment.”
- Click Add.
- Repeat steps a-e to add another utterance. Best practice recommends that you add five or more utterances.
- Add the second intent:
- Click Add Intent.
- Name the intent Fruit order.
- Click Add Utterance.
- On the Utterances page, add an utterance. For example, “place order.”
- Click Add.
- Repeat steps a-e to add more utterances. Best practice recommends that you add five or more utterances.
- Add slots:
- Under the Natural Language Understanding menu, click Slots.
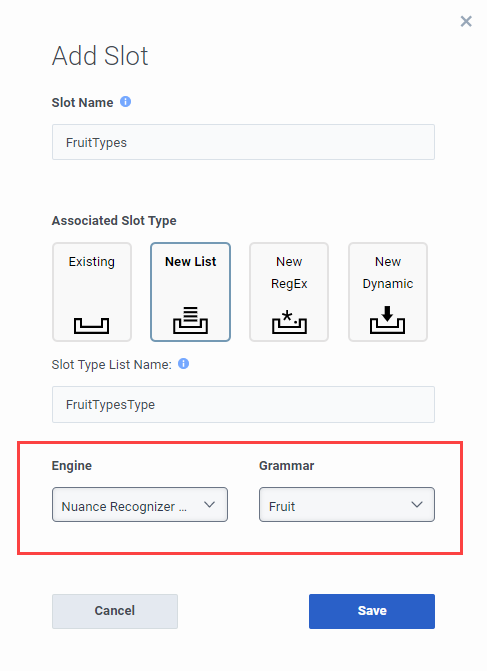
- Click Add Slot. the Add Slot dialog box opens.
- Name the slot PickFruit.
- Under Associated Slot Type, select New List.
- Click Engine and select the third-party ASR engine. In this example, select Nuance Recognizer as a Service.
- Click Grammar and select the grammar that you added in the Step 2 section above, Fruit.
- Click Save.
- Repeat steps a-g to add a slot for Payment and associate it with the builtin:amountOfMoney existing slot type.
- Add a slot type for the fruit example:
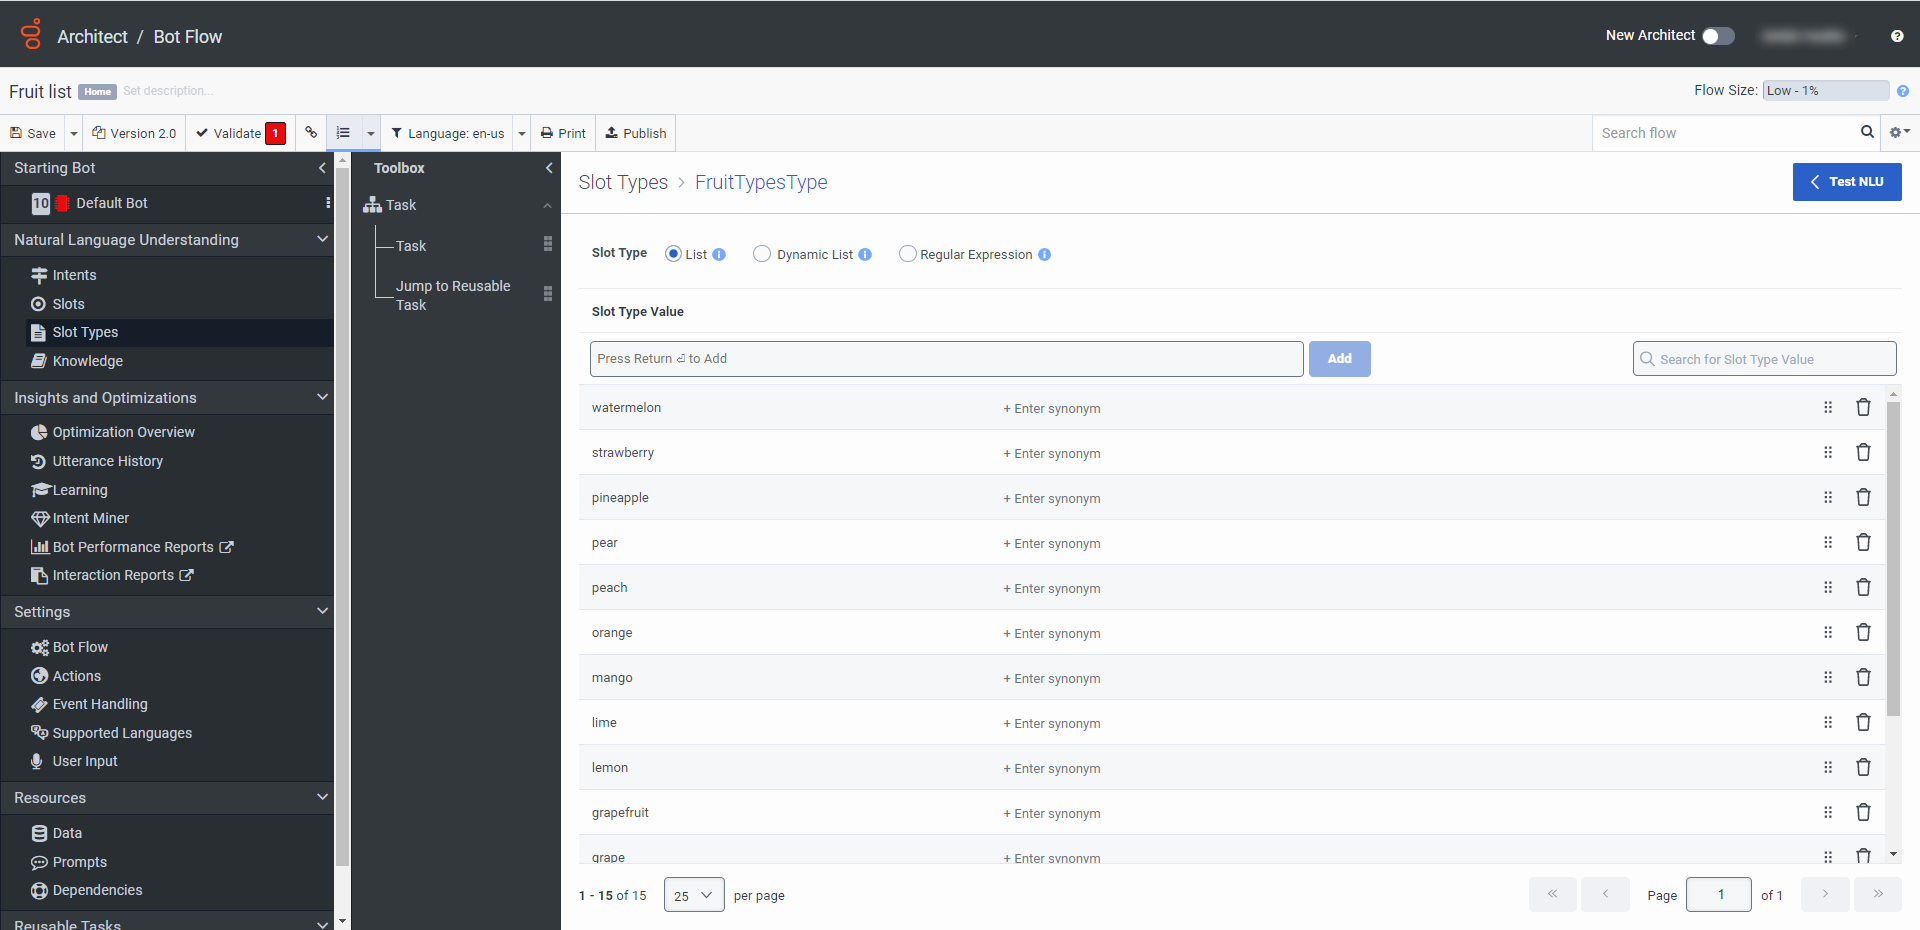
- Under the Natural Language Understanding menu, click Slot Types.
- Click Add Slot Type. The Add Slot Type dialog box opens.
- Name the slot Pick Fruit Type and then click Save.
- Add various slot type values, such as strawberry, pineapple, pear, peach, grape, cherry, blueberry, banana, apple, and watermelon.Note: The Payment slot is already related to a built-in slot type.
- Save your bot flow and continue with Step 4.
Intents
Click the image to enlarge.
Add a slot
Click the image to enlarge.
Slot list
Click the image to enlarge.

Slot types
Click the image to enlarge.
Step 4: Configure the bot flow’s starting bot task
Complete the bot configuration, then save and publish it.
- Under Starting Bot, click Default Bot.
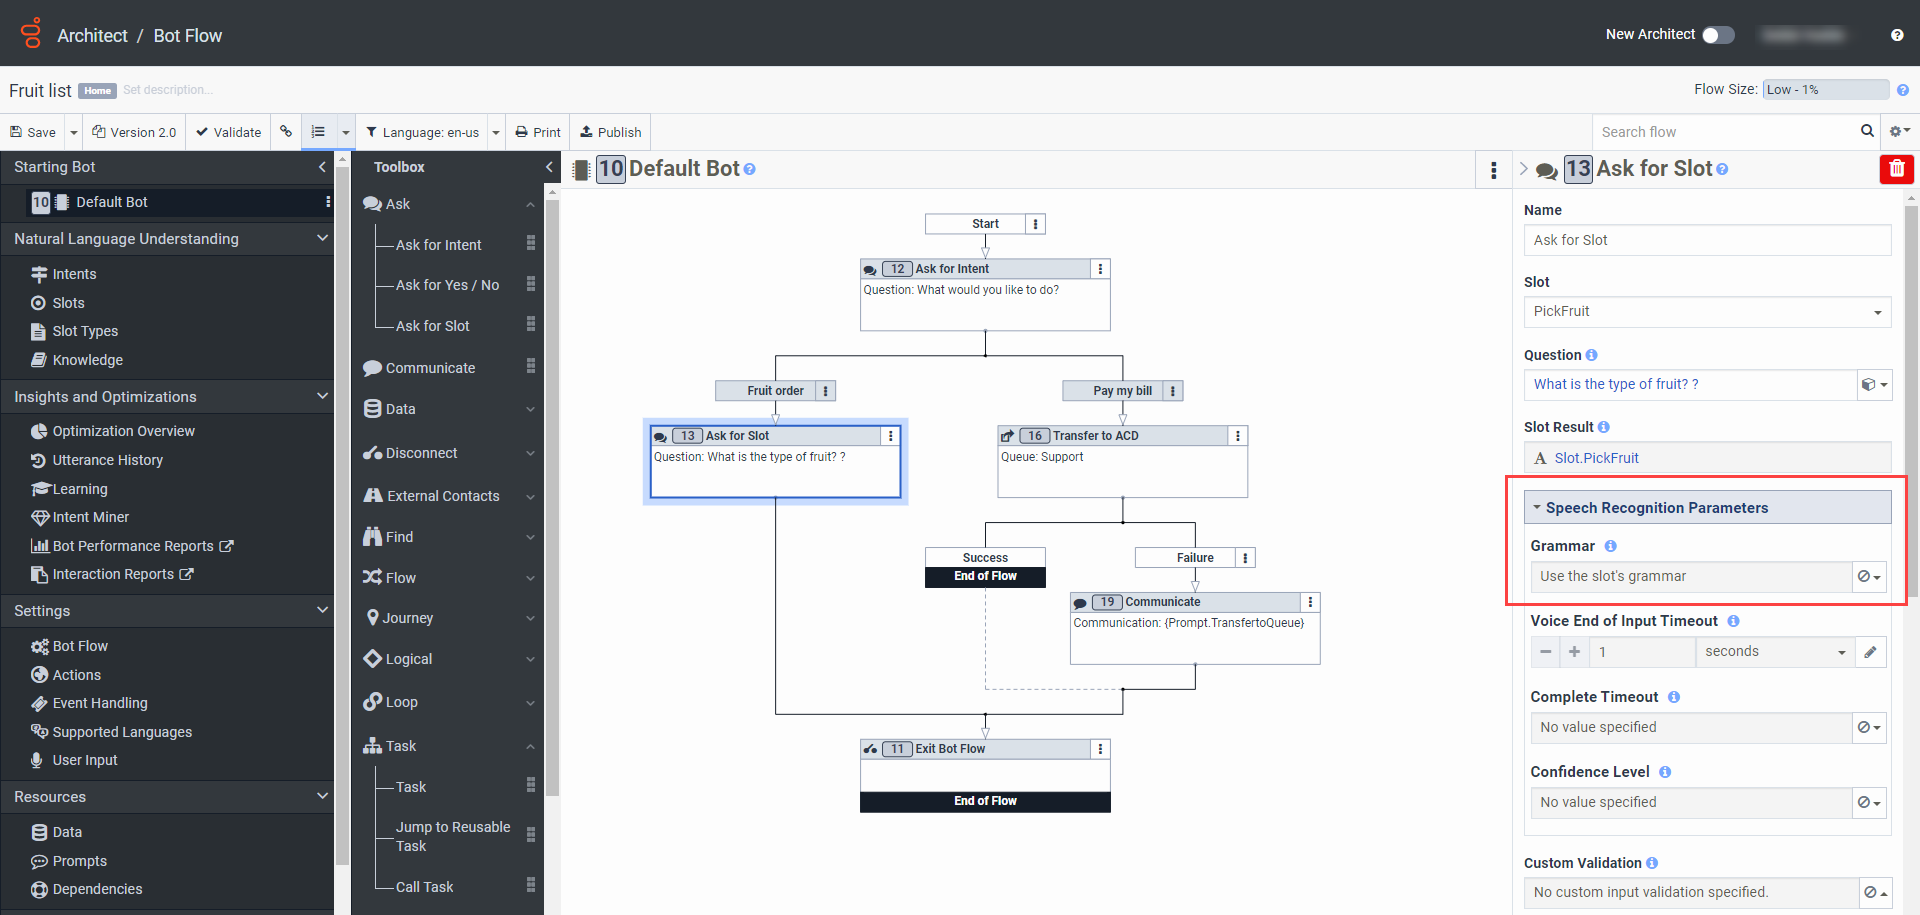
- Under Toolbox, expand the Ask menu and add an Ask for Intent action below start in the task editor.
- From the Ask menu add an Ask for Slot action below the Fruit order path and configure the action:
- Click the Slot list and select PickFruit.
- Click the Question, change the text to ask “What is the type of fruit that you want to buy?“, and click Save. Notice that the Grammar for this action uses the slot’s grammar.
- Under Toolbox, expand the Transfer menu and add a Transfer to ACD action below the Pay my bill path.
- Add your preferred action below the Pay my bill’s failure path. For example, a Communicate action.
- Save and publish your flow.
Click the image to enlarge.
Step 5: Create an inbound message flow
Create an inbound message flow that calls your new bot flow.
- From the Architect home page, click or hover over the Flows menu and select Inbound Message.
- Click Add. The Create Flow dialog box opens.
- In the Name field, type a unique name for the inbound message flow.
- (Optional) In the Description field, add a short sentence or phrase to describe this flow.
- Click the Divisions list and select the division in which to place the flow.
- (Optional) Click the Error event transfer Queue list and select the queue in which to transfer the flow if Architect detects an error.
- Click Create Flow. The flow’s configuration page opens.
- Under Starting State, click Initial State.
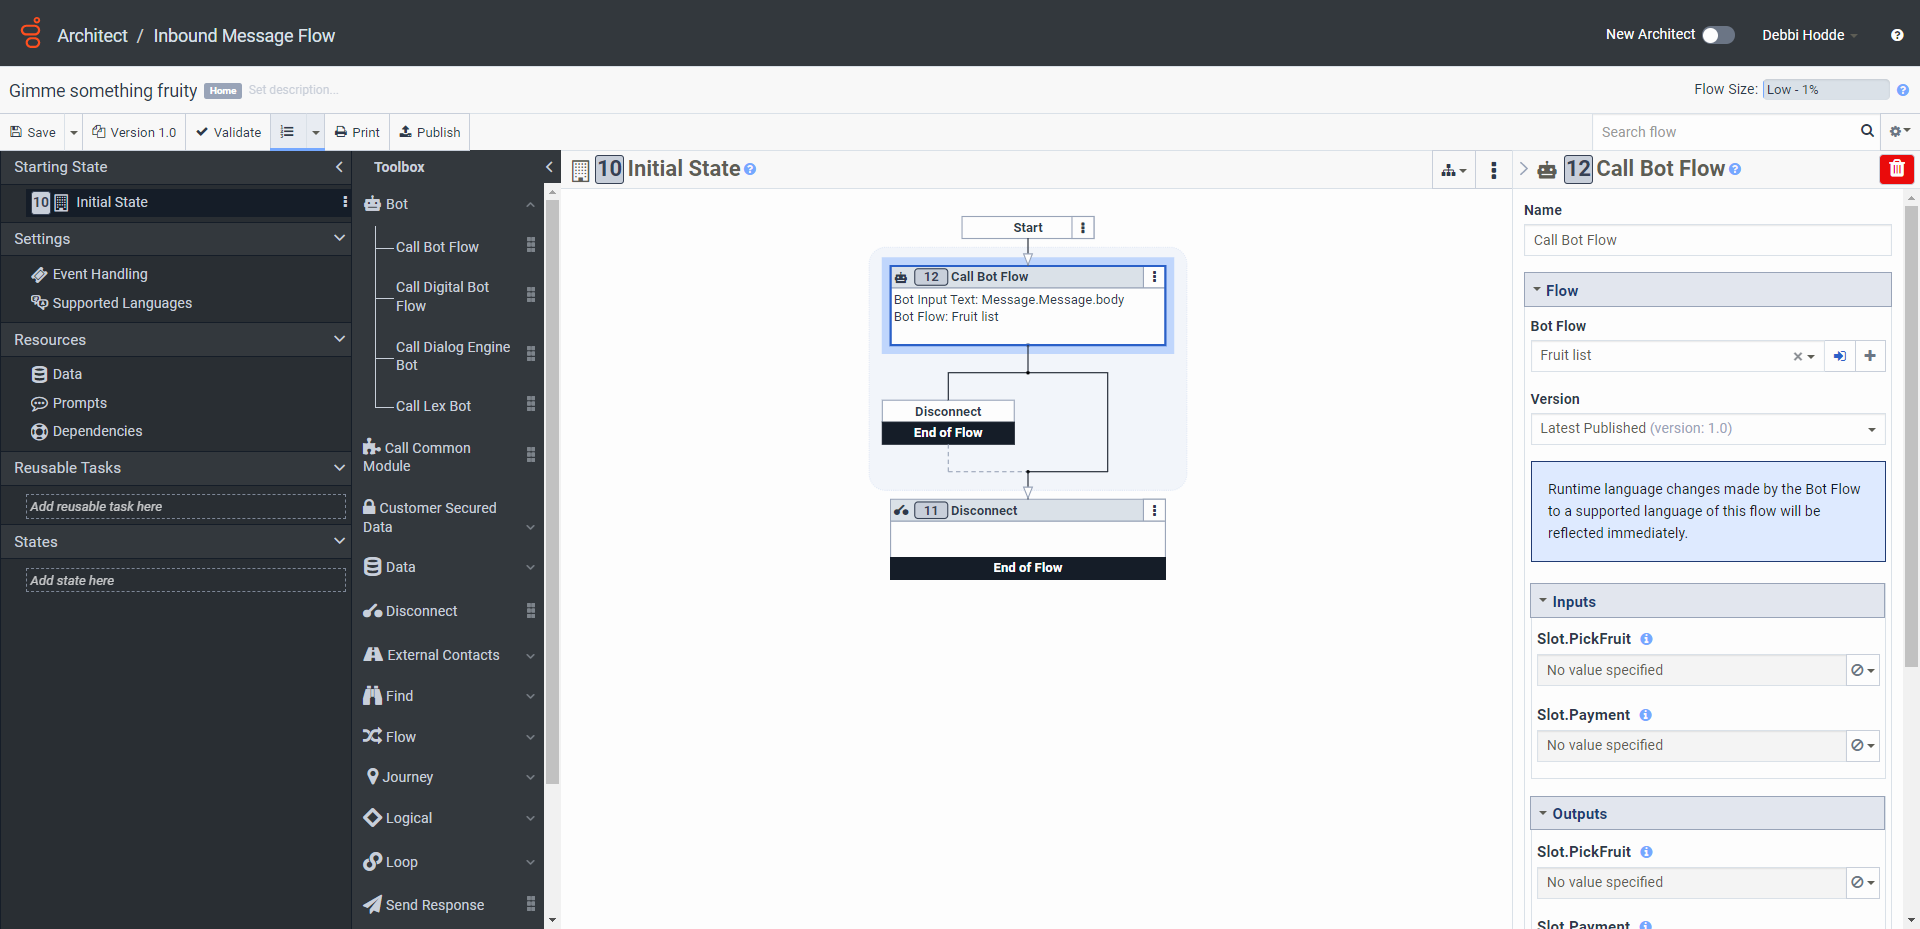
- From the Toolbox, expand the Bot menu and add a Call Bot Flow action below Start in the task editor.
- Under Bot Flow, search for and select the bot that you created in Section 3.
- Save and publish your flow.
Now you can test and implement a bot flow that uses your third-party ASR grammar in an Architect inbound message flow.
Click the image to enlarge.