
Configure and activate Nuance Recognizer as a Service for use with Architect
To access the Nuance Recognizer as a Service (NRaaS) in Genesys Cloud, you must first add and configure the Nuance Recognizer as a Service integration, and then add your credentials.
| Language | Region | Language tag |
|---|---|---|
| Basque | European Union | eu-ES |
| Catalan | Spain | ca-ES |
| Dutch | Netherlands | nl-NL |
| Chinese | Simplified - People's Republic of China | zh-CN |
| Traditional - Hong Kong S.A.R. | cn-HK | |
| English | Australia | en-AU |
| Great Britain | en-GB | |
| India | en-IN | |
| United States | en-US | |
| French | Belgium | fr-BE |
| Canada | fr-CA | |
| France | fr-FR | |
| German | Germany | de-DE |
| Switzerland | de-CH | |
| Galician | Spain | gl-ES |
| Italian | Italy | it-IT |
| Japanese | Japan | ja-JP |
| Korean | Korea | ko-KR |
| Portuguese | Brazil | pt-BR |
| Portugal | pt-PT | |
| Russian | Russia | ru-RU |
| Spanish | Spain | es-ES |
| United States and Latin America | es-US | |
| Valencian | Spain | va-ES |
Note: For more information about language coverage, see the Nuance Recognizer documentation or contact your Nuance representatives directly.
To configure the Nuance Recognizer as a Service integration, perform the following steps, based on your organizational needs:
- Open the Nuance Recognizer as a Service integration:
- If you did not previously install the integration into your Genesys Cloud organization, install it now.
- If you installed the integration, open the Genesys Cloud Admin menu and under Integrations, click Integrations. Then, search for and open the Nuance Recognizer as a Service integration.
- On the Nuance Recognizer as a Service integration page, click the Configuration tab.
- Under Properties, locate the Recognizer Endpoint URL section.
- In the Value field, enter the regional endpoint for the Nuance language group that your bot supports:
- For example, if you want to use Nuance Recognizer as a Service for en-US, ja-JP, and zh-CN, use
nr-apac4.api.nuance.com. - If your bot only supports one language, use the URI of a language group that includes the language and is closest to your organization's location. For example, if your bot supports fr-FR by default and your organization exists in Switzerland, use
nr-wu2.api.nuance.eu. For more information, see Language groups by region in the Nuance Recognizer documentation.
- For example, if you want to use Nuance Recognizer as a Service for en-US, ja-JP, and zh-CN, use
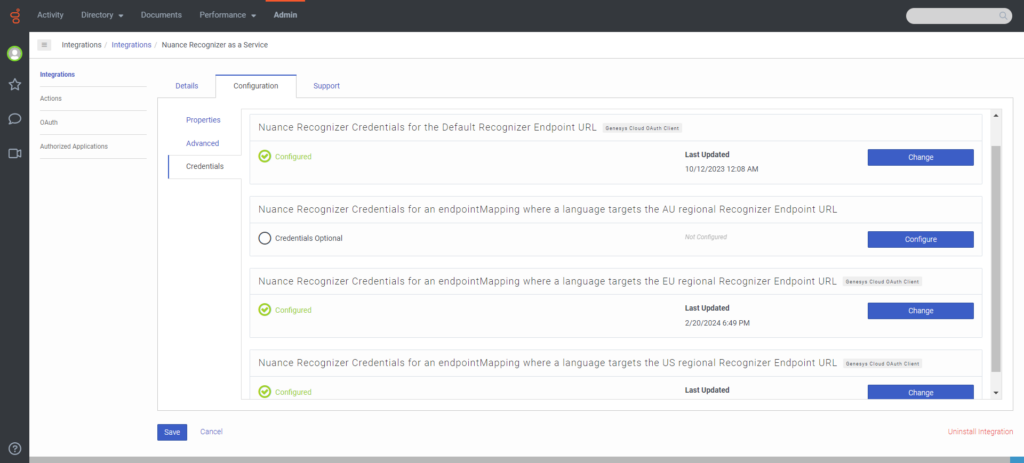
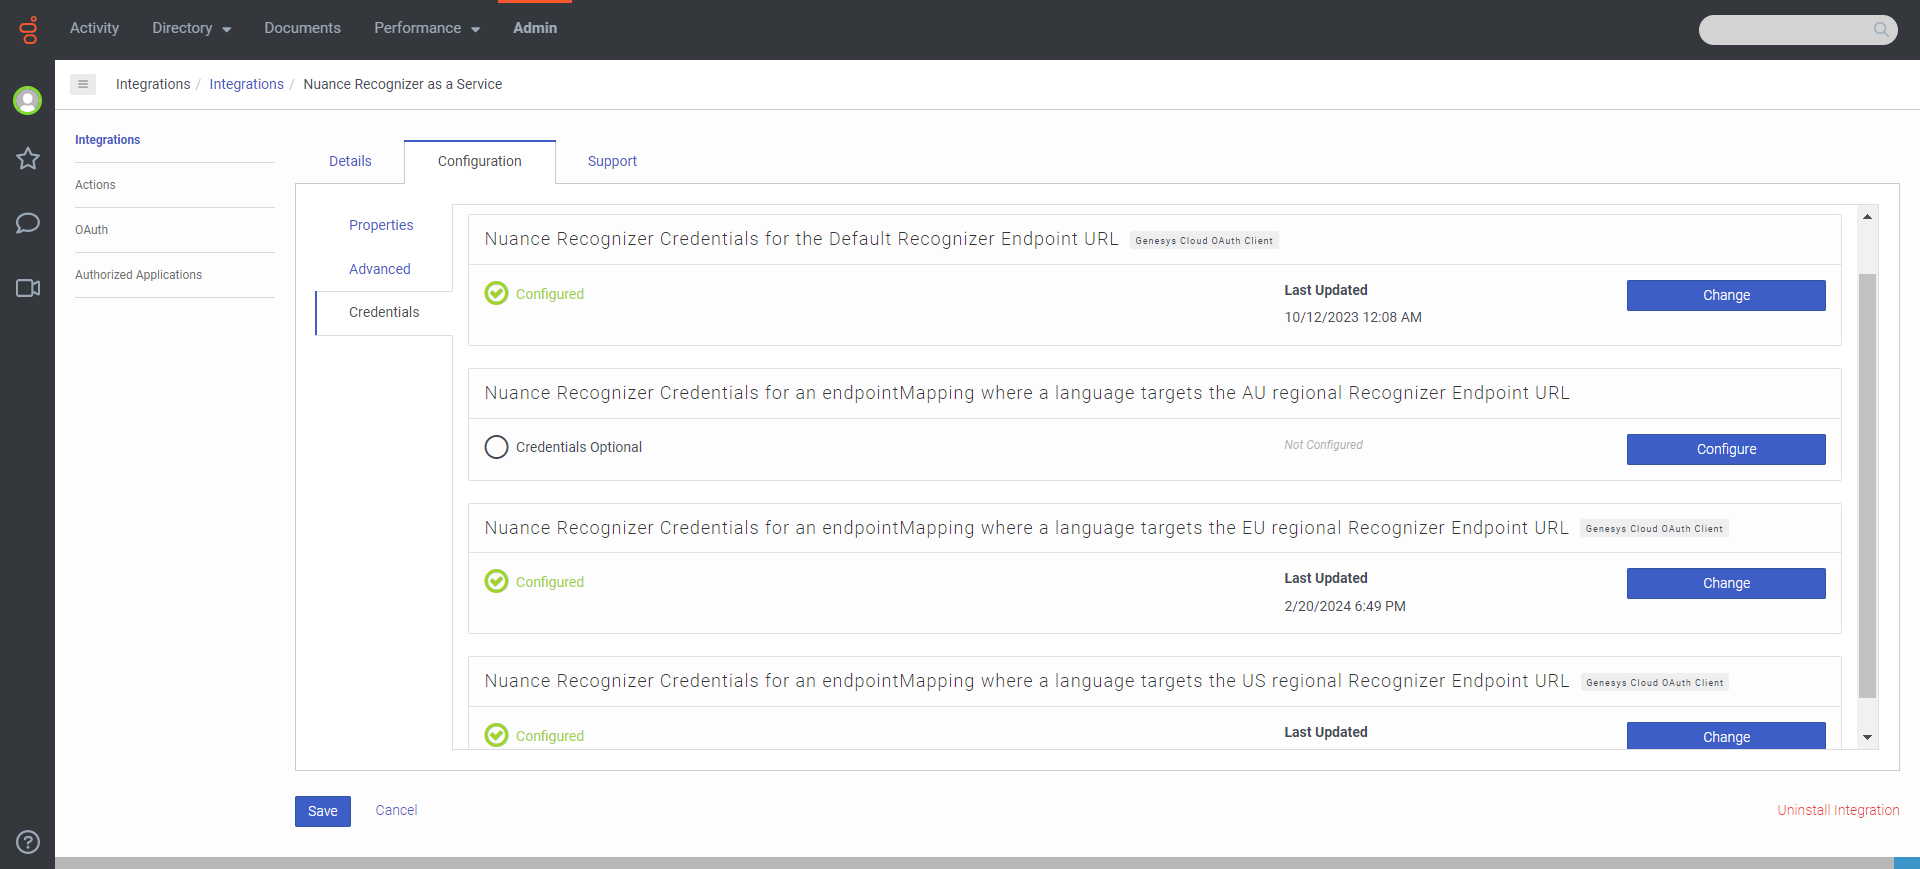
- Click the Credentials tab. Genesys Cloud lists the credentials for all authorization endpoint URLs that you can use to authenticate to endpoints associated with the various Nuance language groups. Configure the credentials for the default recognizer endpoint only.Note: To determine what credentials to configure for a specific language group, check what Nuance region the language group belongs to based on its corresponding endpoint URL. For more information, see Geographies in the Nuance Mix documentation.Click the image to enlarge.
- Click Configure for the Nuance Recognizer Credentials for the Default Recognizer Endpoint URL. The Configure Credentials dialog box opens.
- Copy the “client_id” value from your OAuth configuration into the Nuance Client ID field. Use your AU, EU, or US client ID depending on whether your bot uses languages from the AU, EU, or US Nuance region.Note: For example, if the regional endpoint URI you specified in step 4 ends inClick the image to enlarge.
nuance.eu, use the client ID of your mix.nuance.eu credentials. If the URI ends innuance.com, use the client ID of your mix.nuance.com credentials.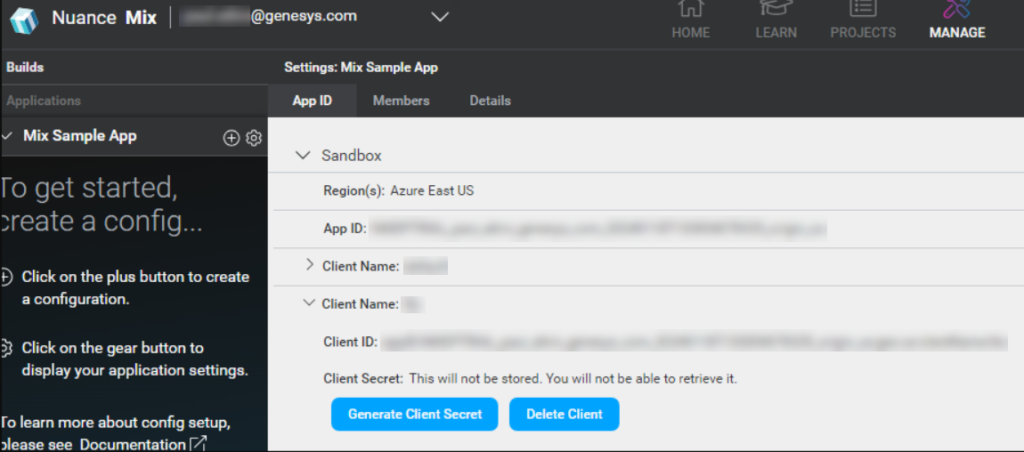
- Copy the “client_secret” value from your OAuth configuration into the Nuance Client Secret field. Use your AU, EU, or US client secret depending on whether your bot uses languages from the AU, EU, or US Nuance region.
- Copy the “private_key_id” from the JSON file into the Nuance Private Key ID field.
- Copy the “private_key” value from the JSON file into the Nuance Private Key field.
- Click OK.
- Click Save.
- To activate the Nuance Recognizer as a Service status, in the Status column click Inactive. The Change Status dialog box opens.
- Click Yes. The Nuance Recognizer as a Service integration status changes to Active.

- Open the Nuance Recognizer as a Service integration:
- If you did not previously install the integration into your Genesys Cloud organization, install it now.
- If you installed the integration, open the Genesys Cloud Admin menu and under Integrations, click Integrations. Then, search for and open the Nuance Recognizer as a Service integration.
- On the Nuance Recognizer as a Service integration page, click the Configuration tab.
- Under Properties, locate the Recognizer Endpoint URL section.
- In the Value field, enter a regional endpoint based on the following criteria:
- If a language group includes all the languages that your bot supports, use its corresponding URI. For example, if you want to use Nuance Recognizer as a Service for en-US, ja-JP, and zh-CN, use
nr-apac4.api.nuance.com. If your bot only supports one language, use the URI of a language group that includes the language and is closest to your organization's location. For example, if your bot supports fr-FR by default and your organization is based in Switzerland, usenr-wu2.api.nuance.eu. For more information, see Language groups by region in the Nuance Recognizer documentation. - If the languages that your bot supports and you want to use Nuance Recognizer as a Service for belong to multiple language groups, use a URI of a language group that includes a language that your bot supports by default. Specify the URIs of the other language groups under the Advanced tab. For more information, see Language groups by region in the Nuance Recognizer documentation.
- If a language group includes all the languages that your bot supports, use its corresponding URI. For example, if you want to use Nuance Recognizer as a Service for en-US, ja-JP, and zh-CN, use
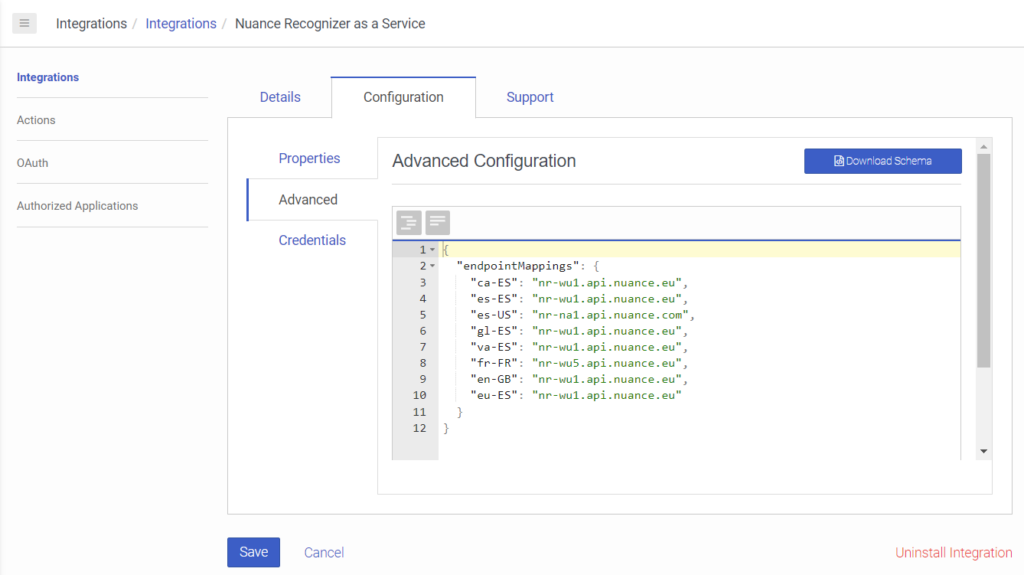
- Click the Advanced tab.
- To configure mappings for the languages that Nuance does not serve through the default endpoint you previously specified in the Recognizer Endpoint URL section, follow these steps: Notes:
- Except for the languages that the default regional endpoint covers, be sure to map all the languages to an appropriate Nuance endpoint.
- If you map a language to a regional Nuance endpoint, then you must set the credentials for that language region under Credentials, even if the default regional endpoint and its corresponding credentials would cover that language.
- If a language does not have a mapped value in the Advanced Configuration section, then Genesys Cloud attempts to use the default regional endpoint with the default credentials.
- (Optional) To download and inspect the JSON schema that Genesys Cloud validates your advanced configuration against, click Download Schema.
- Add a property named “endpointMappings” as an object.
- Add the language tags of your supported languages and the corresponding Nuance endpoints as key-value pairs to the object:
 Note: The user interface validates the object against the expected JSON schema and informs you if the object does not comply.
- Click the Credentials tab. Genesys Cloud lists the credentials for all authorization endpoint URLs that you can use to authenticate to endpoints associated with the various Nuance language groups.Note: To determine what credentials to configure for a specific language group, check what Nuance region the language group belongs to based on its corresponding endpoint URL. For more information, see Geographies in the Nuance Mix documentation.Click the image to enlarge.
- Click Configure. The Configure Credentials dialog box opens.
- Copy the “client_id” value from your OAuth configuration into the Nuance Client ID field. Use your AU, EU, or US client ID depending on whether your bot uses languages from the AU, EU, or US Nuance region.Note: For example, if the URI of the regional endpoint you want to configure credentials for ends inClick the image to enlarge.
nuance.eu, use the client ID of your mix.nuance.eu credentials. If the URI ends innuance.com, use the client ID of your mix.nuance.com credentials. - Copy the “client_secret” value from your OAuth configuration into the Nuance Client Secret field. Use your AU, EU, or US client secret depending on whether your bot uses languages from the AU, EU, or US Nuance region.
- Copy the “private_key_id” from the JSON file into the Nuance Private Key ID field.
- Copy the “private_key” value from the JSON file into the Nuance Private Key field.
- Click OK.
- Repeat step 8 for all other credentials that you must configure.Notes:
- If you configured an endpoint mapping for a language in the Advanced tab, then you must configure the credentials for the specific Nuance authorization endpoint URL that the language's group is associated with.
- If you have not configured any endpoint mapping for the language in the Advanced tab, then you must configure the credentials for the default regional endpoint that you previously specified under the Properties tab.
- Click Save.
- To activate the Nuance Recognizer as a Service status, in the Status column click Inactive. The Change Status dialog box opens.
- Click Yes. The Nuance Recognizer as a Service integration status changes to Active.