Add a grammar for a bot flow in Architect
In Architect, you can use a grammar-based automatic speech recognition (ASR) third-party engine, for example Nuance Recognizer as a Service integration, to customize grammar recognition and capture the result.
Add the grammar-based Nuance Recognizer as a Service integration and then choose from the Nuance voice and language options in Architect’s Ask for Slot action for Genesys Dialog Engine Bot Flows.
GRXML for DTMF
<?xml version="1.0" encoding="UTF-8"?>
<grammar xmlns="http://www.w3.org/2001/06/grammar"
	 xmlns:xsi="http://www.w3.org/2001/XMLSchema-instance"
	 xsi:schemaLocation="http://www.w3.org/2001/06/grammar http://www.w3.org/TR/speech-grammar/grammar.xsd"
	 version="1.0"
 	 mode="dtmf"
	 xml:lang="en-US"
	 tag-format="semantics/1.0"
	 root="ROOT">

   <rule id="ROOT" scope="public">
      <one-of>

         <!-- checking-->
         <item>
            <one-of>
               <item>1</item>
            </one-of>
            <tag> out = "checking" </tag>
         </item>

         <!-- savings-->
         <item>
            <one-of>
               <item>2</item>
            </one-of>
            <tag> out = "savings" </tag>
         </item>

      </one-of>
   </rule>
</grammar>
GRXML for Voice
<?xml version="1.0" encoding="UTF-8"?>
<grammar version="1.0"
   xmlns="http://www.w3.org/2001/06/grammar"
   mode="voice"
   xml:lang="en-US"
   tag-format="swi-semantics/1.0"
   root="ROOT">

   <rule id="ROOT" scope="public">
      <one-of>

         <!-- checking-->
         <item>
            <one-of>
               <item>
                  <item repeat="0-1">
                     <one-of>
                        <item>a</item>
                        <item>the</item>
                        <item>my</item>
                     </one-of>
                  </item>
                  <item>
                     <one-of>
                        <item>checking</item>
                        <item>check</item>
                     </one-of>
                  </item>
                  <item repeat="0-1">account</item>
                  <item repeat="0-1">please</item>
               </item>
            </one-of>
            <tag> SWI_meaning = "checking" </tag>
         </item>

         <!-- savings-->
         <item>
            <one-of>
               <item>
                  <item repeat="0-1">
                     <one-of>
                        <item>a</item>
                        <item>the</item>
                        <item>my</item>
                     </one-of>
                  </item>
                  <item>
                     <one-of>
                        <item>savings</item>
                        <item>saving</item>
                     </one-of>
                  </item>
                  <item repeat="0-1">account</item>
                  <item repeat="0-1">please</item>
               </item>
            </one-of>
            <tag> SWI_meaning = "savings" </tag>
         </item>
      </one-of>
   </rule>
</grammar>
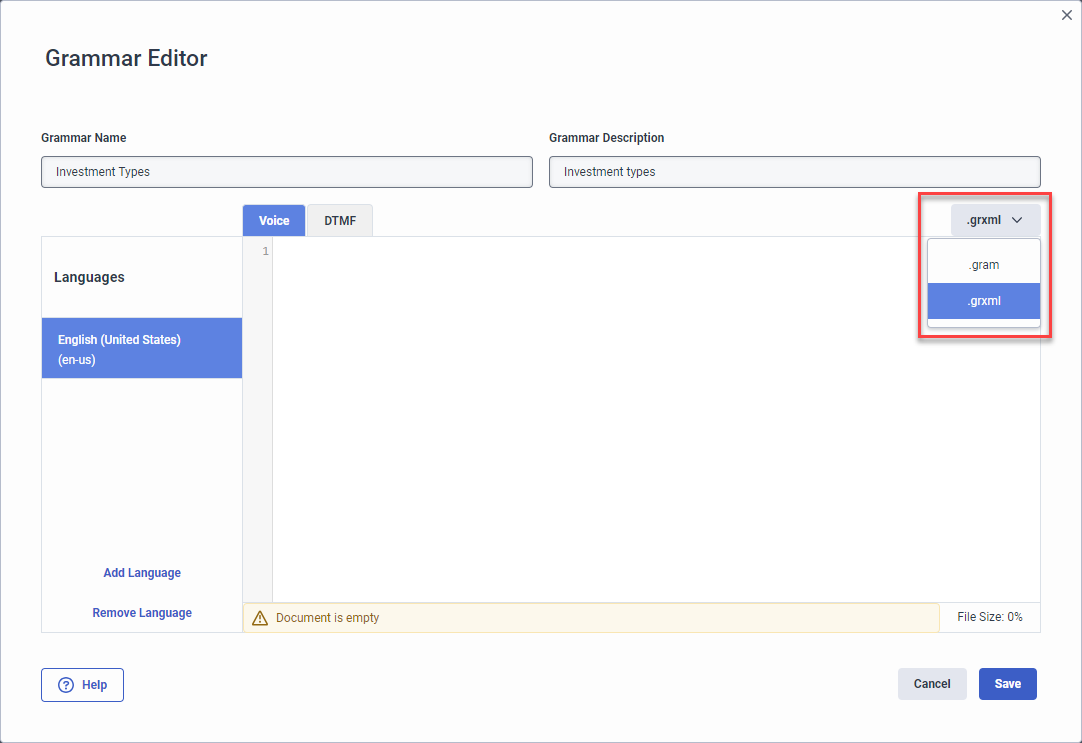
Click the image to enlarge.
Grammar Editor for DTMF
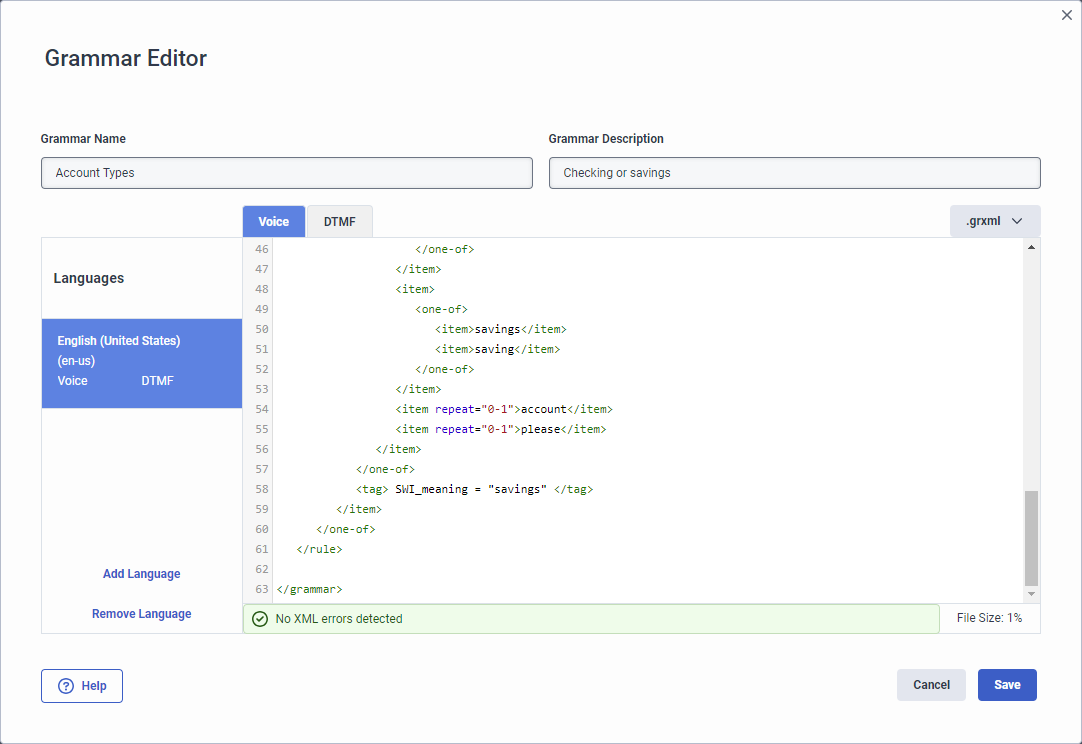
Grammar Editor for voice
To add an uncompiled grammar to Architect, follow these steps:
Note: For more information about size limits for grxml files, see the limit
grammars.grxml.upload.bytes.max in Limits in the Genesys Cloud Developer Center.- Click Admin.
- Under Architect, click Architect. Architect opens in a new tab.
- Click Grammars.
- Click Add. The Create New Grammar dialog box opens.
- Under Grammar Name, give your grammar a meaningful name.
- (Optional) Under Grammar Description, add descriptive details about the grammar. For example, “recognize 4 to 8 digits.”Note: You can add descriptive language here or you can add it later in the Grammar Editor.
- (Optional) Click the Starting Language and select the initial language that you want the grammar to use.Note: You can leave the starting language set to None, but you must add at least one language in the Grammar Editor before you can use the editor.
- Click Create. The Grammar Editor opens.
- To add one grammar language at a time, follow these steps:
- Click Add Language.
- From the Select Language dialog box, choose another language for the grammar to use.
- Repeat steps a-b to add another language.
- Depending on the type of grammar that you want to add, click one of the following tabs. You can have both voice and DTMF configured for a language:
- DTMF
- Voice
- Add the GRXML content from Nuance Recognizer ASR grammar into the editor.Note: If the grammar passes XML validation, then a green message appears, letting you know that the grammar is free of errors. If a red message appears, then Architect lets you know the location in the GRXML that the error or errors exist. Architect only indicates whether a supplied GRXML file is valid XML without syntactical XML issues, which does not guarantee that the file is a valid grammar file.
- Click Save. Note: If you attempt to save the grammar without correcting errors, the XML Error dialog box opens and asks you to confirm that you want to proceed.
To add a precompiled grammar to Architect, follow these steps:
Notes:
- For more information about size limits for gram files, see the limit
grammars.gram.upload.bytes.maxin Limits in the Genesys Cloud Developer Center. - You can upload one grammar file for each mode (DTMF and voice).
- You cannot edit the precompiled grammar file in the Grammar Editor.
- Click Admin.
- Under Architect, click Architect. Architect opens in a new tab.
- Click Grammars.
- Click Add. The Create New Grammar dialog box opens.
- Under Grammar Name, give your grammar a meaningful name.
- (Optional) Under Grammar Description, add descriptive details about the grammar. For example, “recognize 4 to 8 digits.”Note: You can add descriptive language here or you can add it later in the Grammar Editor.
- (Optional) Click the Starting Language and select the initial language that you want the grammar to use.Note: You can leave the starting language set to None, but you must add at least one language in the Grammar Editor before you can use the editor.
- Click Create. The Grammar Editor opens.
- To add one grammar language at a time, follow these steps:
- Click Add Language.
- From the Select Language dialog box, choose another language for the grammar to use.
- Repeat steps a-b to add another language.
- Depending on the type of grammar that you want to add, click one of the following tabs:
- DTMF
- Voice
- Select .gram and click Select File to import a precompiled grammar file that you generated externally.

- The Add A Grammar File dialog box opens. To select the file that you want to import, click the example file field.
- Click Remove File to remove the imported grammar file or click Save to save the imported grammar file.