
Click-to-dial
Agents can use click-to-dial, click-to-email, and click-to-sms functionality when making calls, initiating emails, or sending SMS messages. The functionality differs depending on the product.
The following content applies to Genesys Cloud for Chrome and Genesys Cloud for Firefox.
The extension allows tel: links and mailto: links on webpages to be clickable links. The extension provides two options:
- Enable Click-to-Dial – This functionality is selected by default.
- Enable Click-to-Dial in Dynamic Content – On dynamic webpages, you can select this option if a phone number is not clickable.
You can configure the client to make a call or send an email on behalf of a queue. For more information, see Configure click-to-dial.
Calls
For direct calls, the client immediately places the call.
For calls on behalf of a queue, the extension auto-populates the Name or Number box.
- In the On Behalf of Queue box, type the name of the queue.
- Click Call.
Emails
For emails, the extension auto-populates the Recipient Email box.
- In the On Behalf of Queue box, type the name of the queue.
- Click Compose.
For more information, see Make a call, Send an email, Configure click-to-dial, and Turn off click-to-dial.
The following content applies to Genesys Cloud Embeddable Framework.
The integration allows you to use data in your CRM to make calls, send emails, or send SMS messages.
You can configure the client to make a call, send an email, or send an SMS message on behalf of a queue. For more information, see Configure click-to-dial.
Calls
For direct calls, the client immediately places the call.
For calls on behalf of a queue, the integration auto-populates the Name or Number box.
- In the On Behalf of Queue box, type the name of the queue.
- Click Call.
Emails
For emails, the integration auto-populates the Recipient Email box.
- In the On Behalf of Queue box, type the name of the queue.
- Click Compose.
SMS messages
For SMS messages, the integration auto-populates the Number box.
- In the On Behalf of Queue box, type the name of the queue.
- Click Compose.
For more information, see Make a call, Send an email, Send an SMS message, and Configure click-to-dial.
The following content applies to Genesys Cloud for Salesforce.
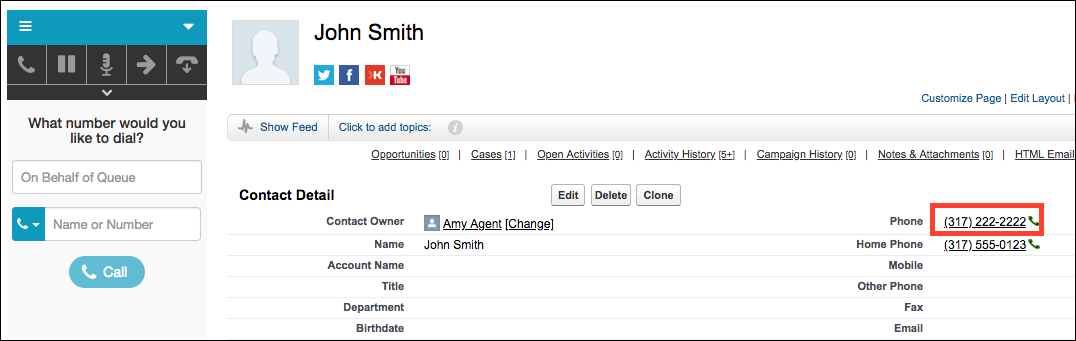
Salesforce displays all phone numbers as a clickable link (or as a button in High Velocity Sales). You can configure the integration either to make a call directly or to make a call on behalf of a queue when you click a phone number in Salesforce. This configuration persists until you change it. For more information, see Configure click-to-dial.
For direct calls, when you click a phone number in Salesforce, the phone number immediately dials.
For calls on behalf of a queue, the phone number auto-populates the Name or Number box.
- Type the name of the queue in the On Behalf of Queue box.
- Click Call.
In both cases, when you make the call, the phone number auto-associates that Salesforce record (for example, contact, lead, or account) with the interaction log.
The following image shows click-to-dial as a clickable link.
For more information, see Make a call, Configure click-to-dial, Create click-to-dial on custom Visualforce pages, and Make a call with High Velocity Sales.
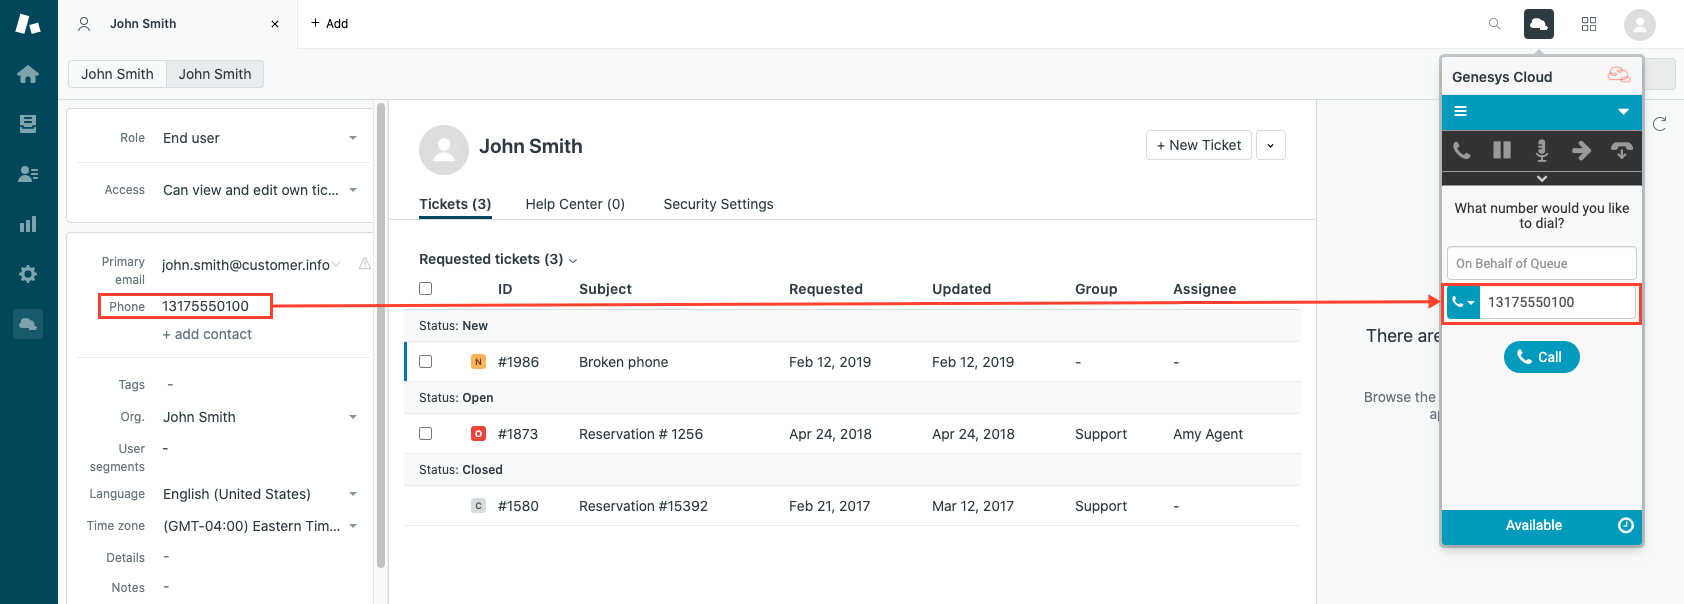
The following content applies to Genesys Cloud for Zendesk.
The client auto-populates with the phone number or email address on the ticket or user record that you are currently viewing. The phone number in the Name or Number box or the email address in the Recipient Email box changes as you switch between records on different tabs.
To place an auto-populated call, click Call. To send an auto-populated email, click Compose.
If you manually change the phone number in the Name or Number box or the email address in the Recipient Email box, then the client stops auto-populating until you clear the box and navigate to a different record.
If you change the phone number or email address on the record, the phone number in the Name or Number box or the email address in the Recipient Email box does not automatically change.
For more information, see Make a call and Send an email.
For more information about the integrations, see About the Genesys Cloud browser extensions, About Genesys Cloud Embeddable Framework, About Genesys Cloud for Salesforce, and About Genesys Cloud for Zendesk.