
Send an email
Prerequisites
- Conversation > Email > Create permission
- Member of a queue with an outbound email address
If your administrator granted you permission, you can send an email on behalf of a queue.
- Click Menu > New Interaction.
- Select Email.
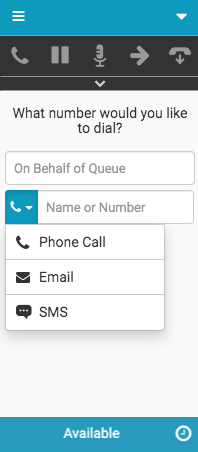
- In the On Behalf of Queue box, type a queue name.
As you start to type, a list of queues appear.
Note: The client only auto-completes and returns queue names in the search results for queues that you are member of. The queue that you select must have an outbound email address associated with it. For more information, see Manage queues.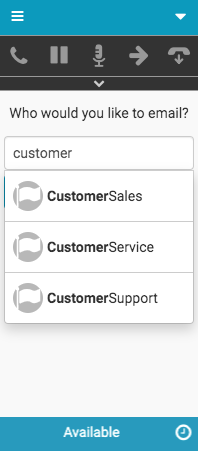
- In the Email Recipient box, type at least one email address.
You can add multiple email addresses separated by a space or comma.
Note: The Compose button remains unavailable until you enter both a valid queue name and a properly formatted email address.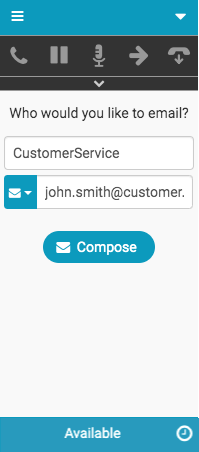
- Click Compose.
In the client, an email interaction connects. You can blind transfer or disconnect the email interaction. (Disconnecting the email interaction cancels the email.)
Note: If you do not have access to call logs, Interaction Log does not appear on interactions.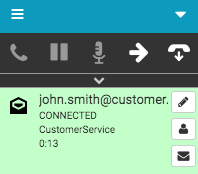
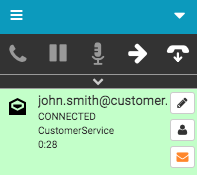
- Click Email.
An Interactions window opens. In the client, the Email icon turns orange, indicating that an Interactions window is open or accessible.
-
Write your email in the Interactions window.
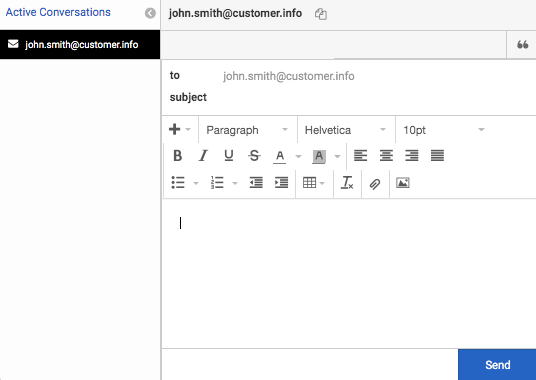
- When you are ready to send the email, click Send in the Interactions window.
In the client, you are disconnected from the email interaction and the Wrap-up window automatically opens.
Note: If call logging is disabled, then the Notes section appears in the Wrap-up window.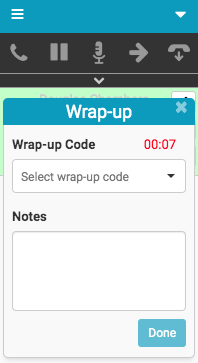
- To complete wrap-up work, select your wrap-up code in the client or in the Interactions window and click Done.
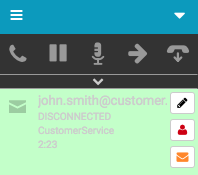
The email interaction deallocates from your interaction list. In the example, the Email icon remains orange, indicating that the Interactions window is open or accessible.
If you close the Wrap-up window without clicking Done, the Wrap-up icon turns red, indicating that you need to complete wrap-up work.
For more information, see Click-to-dial, Configure on behalf of queue, and About emails.
For more information about the integrations, see About the Genesys Cloud browser extensions, About Genesys Cloud Embeddable Framework, About Genesys Cloud for Microsoft Teams, About Genesys Cloud for Salesforce, and About Genesys Cloud for Zendesk.