
Accept and respond to a social listening interaction
Prerequisites
- To create a public social media post: Conversation > Socialmedia > Create permission
- Log in as an agent and go on queue. The Agent Workspace opens and new messages appear in the Active Interactions list.
- To accept a social listening interaction, click Answer. The social listening message appears.
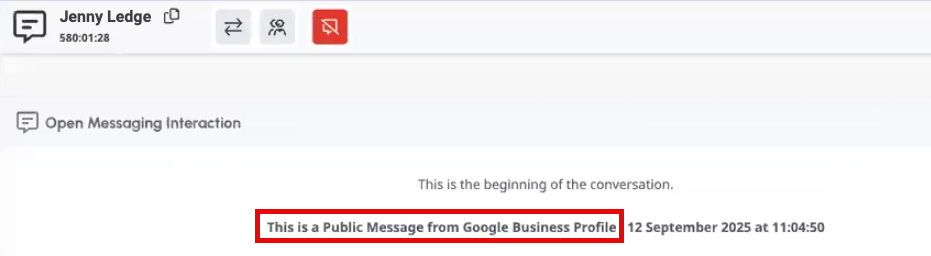
Notes:Google Business Profile interactions display the open messaging icon.
- Below the message, the channel identifier appears.
- To identify Google Business Profile interactions, the subcategory appears below the open messaging identifier in the active conversation window.
- To see the original post that prompted the message, expand the channel identifier box and then click Click to View Parent Post .
- The interaction can include both public and private messages.
- To reply to a specific public message, select that message.
- Because Meta does not include GIF and sticker information, any Facebook or Instagram GIFs or stickers that a user sends are not viewable.
- Google Business Profile reviews can take up to one hour to appear. To view the reviewed location, click View Review. If you send a second reply, it replaces your previous reply. If a customer edits their review, the update appears as a new message within the same interaction if it happens within the threading timeline; if the edit happens outside the threading timeline, it creates a new interaction.
- Type your response to the incoming message.
Notes:
- Your response can include text and emojis up to the characters limit.
- You can use canned responses in your message.
- The counter below the message entry box shows how many characters you have remaining on the character set that you are using.
- You can also create or edit an External Contact. For more information, see Create or promote a contact in the profile panel
- To determine the visibility for your response, below the response, click either Send as public or Send as private. If you select Send as public, Genesys Cloud shows you a preview of the message before you send it. To edit the message, above the preview, click More and Reply. For Google Business Profile interactions, you can only send public responses.
- For X, if there is an existing conversation from a user, Genesys escalates any comments from the same user under the same post to the agent workspace, even without a keyword match.
- (Optional) To attach a file, do one of the following:
- Drag and drop the file into your message.
- Paste the file from your clipboard.
- Below the message entry box, click Attach file and locate the file that you want to attach.
Notes:
- If you attach multiple files, Genesys Cloud sends them as individual messages.
- Incoming media from X direct messages arrives as a link.
- You cannot send media for X interactions.
- Because Google Business Profile does not support attachments, you cannot send or receive attachments with Google Business Profile interactions.
- To send your message, click Send or press Enter.Note: By default, Genesys Cloud sends the response publicly. To send the message privately, click Send as Public > and select your preferred visibility. Genesys Cloud sends the message as a response to the latest public message. If you want to respond to a different public message, above the message, click More and Reply.
- To continue the conversation, repeat steps 3–4 as needed.
- To end the interaction, click End Messages.

- Complete any needed after contact work.
Notes:
- When you decline or do not answer an interaction within a certain amount of time, Genesys Cloud places you into Not Responding status. While Not Responding, you do not receive new interactions. Declined or unanswered interactions reenter the queue.
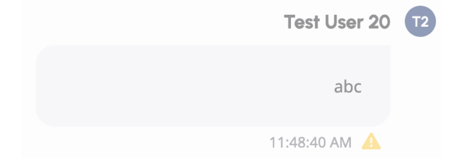
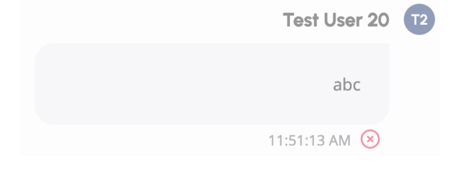
- Genesys Cloud confirms a successful message delivery with a . If message delivery fails, Genesys Cloud displays a warning to inform you of a delivery error. For more information, see Messaging errors and explanations.
- To resend or to copy a message, beside the message sender’s name, click More and then either Resend or Copy.
- You can escalate a maximum of 50 messages per minute as a conversation. If you exceed this limit, Genesys Cloud throttles message processing and does not allow automatic escalation. You must escalate throttled messages manually. For more information, see Social Listening Posts view.
| Error | Description |
|---|---|
|
Note: To see the error that the platform returns, click More and then Copy with context. |
|
 |
Pending delivery. The end user receives the message when they return to online. |
 |
Genesys Cloud successfully sent the message, but the server rejected it due to a server outage. The message is lost. To send it again manually, click Resend. Note: If you exceed your message limit, you receive a similarly formatted message. Contact your admin for more information. |
 |
Genesys Cloud was unable to reach the server. For example, a network outage could cause this error. The message is lost. To send it again manually, click Resend. |