
Series: Configure the campaign management global settings
Configure contact list columns
- Configure phone types
- Configure the campaign management global settings
- Retrieve Genesys Cloud campaign options
- Configure Genesys Cloud campaign settings
- Configure Genesys Cloud contact list sync job
- Configure phone types
- Configure the agent-owned column
- Configure zip code column
- Configure the agent-owned column
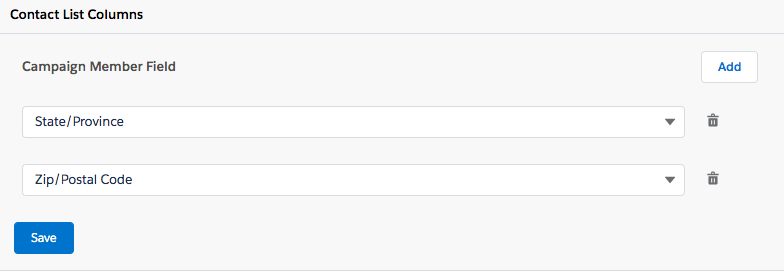
The global settings for the Campaign Management integration include a Contact List Columns section. In this section, you associate fields on campaign member records in Salesforce with columns on contact lists in Genesys Cloud.
The Contact List Columns section is a global repository of all contact list columns that you can add to contact lists for campaigns. When you create a campaign setting, you can configure the campaign setting to use all the columns listed here or only a subset.
- On the Setup Home page in Salesforce, click the App Launcher icon.
- Search for Campaign Management in the Search apps and items box and open the app.
- In the navigation menu, select Global Campaign Settings.
- Under Contact List Columns, click Add.
- Select a campaign member field. The integration adds this field as a column to your contact list in Genesys Cloud.
You can select a default field or a custom field. Custom fields can be any data type, but if you use any of the text data types, set Length to 512 or fewer characters.
- Click Setup.
- Search for Fields.
- Under Object and Fields, navigate to Object Manager > Campaign Member > Field & Relationships.
- Click New.
- Choose the appropriate data type for the new custom field and click Next.
- Enter a name for the custom field in the Field Label and click Next. Note: If you use any of the text data types, set Length to 512 or fewer characters.
- For different user profiles, you can modify the field-level security for the custom field as required and click Next.
- Click Save.
This custom field is now available from the Campaign Member Field menu.
- Add more columns and select fields as needed. Note: You cannot select the same Campaign Member Field more than once.
- Delete or change fields as needed.
- Click Save.
For more information, see About Campaign Management in CX Cloud from Genesys and Salesforce.
The global settings for the Campaign Management integration include a Contact List Columns section. In this section, you associate fields on campaign member records in Salesforce with columns on contact lists in Genesys Cloud.
The Contact List Columns section is a global repository of all contact list columns that you can add to contact lists for campaigns. When you create a campaign setting, you can configure the campaign setting to use all the columns listed here or only a subset.
- Under Contact List Columns, click Add.
- Select a campaign member field. The integration adds this field as a column to your contact list in Genesys Cloud.
You can select a default field or a custom field. Custom fields can be any data type, but if you use any of the text data types, set Length to 512 or fewer characters.
- Click Setup.
- Search for Fields.
- Under Object and Fields, navigate to Object Manager > Campaign Member > Field & Relationships.
- Click New.
- Choose the appropriate data type for the new custom field and click Next.
- Enter a name for the custom field in the Field Label and click Next. Note: If you use any of the text data types, set Length to 512 or fewer characters.
- For different user profiles, you can modify the field-level security for the custom field as required and click Next.
- Click Save.
This custom field is now available from the Campaign Member Field menu.
- Add more columns and select fields as needed. Note: You cannot select the same Campaign Member Field more than once.
- Delete or change fields as needed.
- Click Save.
For more information, see About Campaign Management in Genesys Cloud for Salesforce.