
Log in to the client
You can log in to the client only, or for more functionality, you can also log in to and run Genesys Cloud alongside the client. You can log in to the client and Genesys Cloud in any order.
The integration uses access tokens that expire after a set amount of time. 30 minutes before an access token (session) expires, the client alerts logged-in users and prompts them to log in again. If a user logs in to the client with less than 30 minutes before a session expires, the client does not issue a warning before logging the user out of the client.
To log in to the client, follow these steps:
- Enter your Genesys Cloud login credentials.
- Click Log In.
If you are not assigned a phone, you are ready to make and receive non-voice interactions such as emails and SMS messages. If you have logged in before and already have a phone selected, you are ready to make and receive calls or other interactions. For more information, see Make a call, Send an email, Send an SMS message, and Pick up an interaction.
You can confirm that you do not have a phone assigned two ways. Look for the phone name by clicking Arrow in the upper-right corner of the client or look for the icon indicating no phone at the lower-left corner of the client. You can later select a phone by clicking Select Phone or the icon indicating no phone. For more information, see Select a phone.
 To see which phone you have selected, click Arrow in the upper-right corner of the client. The selected phone appears below your email address. In the example, the selected phone is SupportWebRTC.
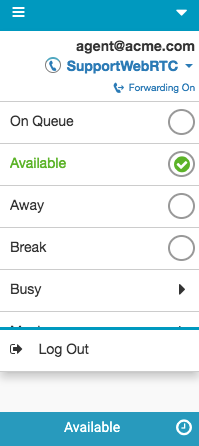
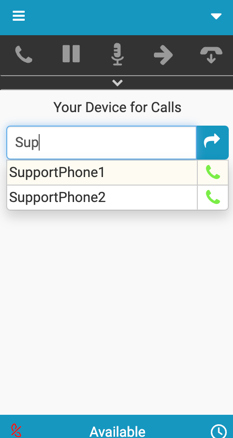
- (Optional) Enter the name of the phone that you want to use.
Tip: Before selecting a WebRTC phone, review requirements and other information about WebRTC phones. For more information, see About phones.
The search box automatically looks for a phone as you type. Phones currently associated with other users are not available.
WebRTC phones for Firefox browser users (first time)
If you use Firefox, when you first select a WebRTC phone, Firefox prompts you to allow the app to use your microphone. Select Remember this decision and click Allow.
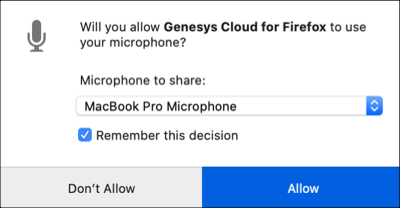
If you do not select Remember this decision and click Allow, then Firefox continues to prompt you, and you cannot pick up incoming calls.
After selecting Remember this decision and click Allow, the prompt disappears and you can select a WebRTC phone and settings.
For next steps about selecting a WebRTC phone, see WebRTC phones.
WebRTC phones
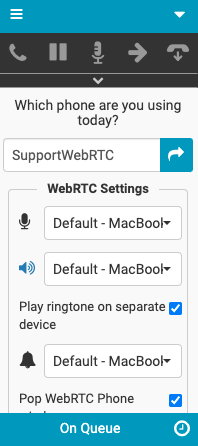
If you select a WebRTC phone, then the WebRTC Settings section appears. The items in the WebRTC Settings section differ depending on the browser and product used.
In the WebRTC Settings section, you can do the following actions:
- Select your microphone and speakers for WebRTC phones.
- Test your speakers.
- Select your speakers for the ringer.
The Play ringtone on separate device setting is not selected by default. When you select this setting, the setting defaults to your WebRTC phone speakers.
- Change the behavior of the WebRTC Phone window.
The Pop WebRTC Phone window setting is selected by default.
- Test your settings
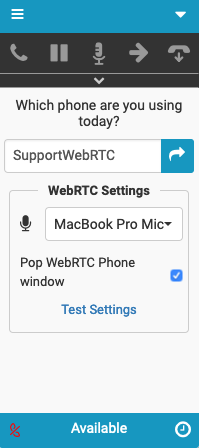
The following image shows the available settings in Genesys Cloud for Zendesk in the Chrome browser when selecting a phone.
In the WebRTC Settings section, you can do the following actions:
- Select your microphone.
- Change the behavior of the WebRTC Phone window.
The Pop WebRTC Phone window setting is selected by default.
- Test your settings.
The following image shows the available settings in Genesys Cloud for Zendesk in the Firefox browser when selecting a phone.
- To proceed with the selected phone, click Arrow .
You are now logged in and ready to make and receive calls. For more information, see Call controls, Make a call, Send an email, and Pick up an interaction.
For more information about the integrations, see About Genesys Cloud Embeddable Framework, About Genesys Cloud for Salesforce, About Genesys Cloud for Microsoft Teams, and About Genesys Cloud for Zendesk.