Manage phones and base settings
- Telephony > Plugin > All permission
In Phone Management, you can perform a number of tasks to create and manage your phone and base setting configurations.
- Click Admin.
- Under Telephony, click Phone Management.
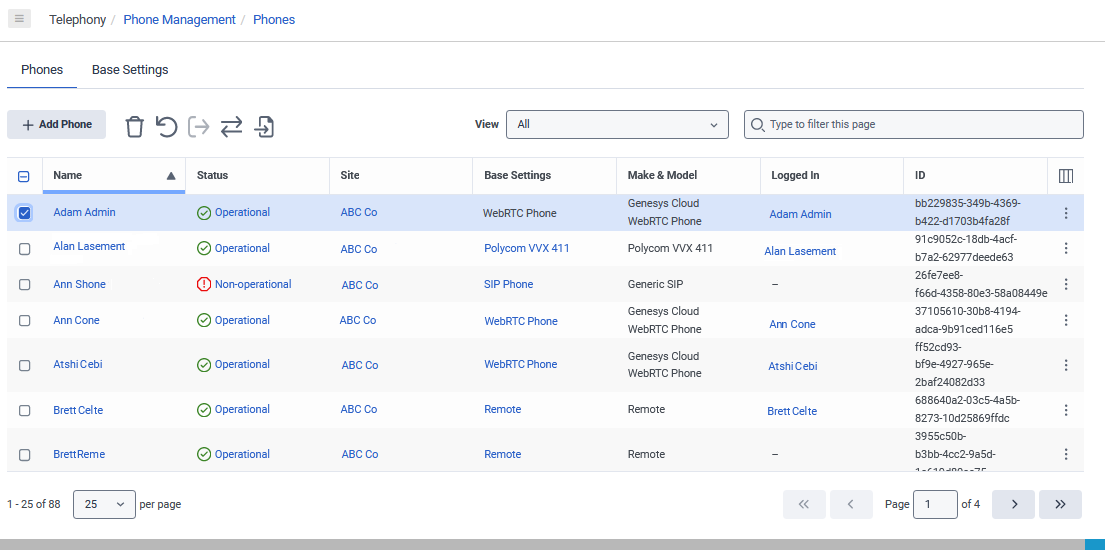
- Click the Phones tab or the Base Settings tab to perform a task.
To learn more about the tasks that you can perform, click the appropriate tab.
Click the image to enlarge.
| Task | Description |
|---|---|
| Rearrange columns |
Click any column and drag it to a new position. |
| Add/Remove columns |
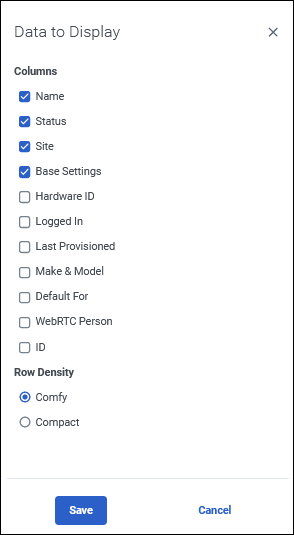
You can customize the Phones view by adding and removing columns. Use Choose the data to display and select next to the columns you want to display. To return the Phones view to its default configuration, clear all the check boxes and click Save. |
| Set row density |
You can customize the Phones view with the row density setting. Use Choose the data to display and select one of the row density options. Comfy increases the amount of space between rows and Compact condenses the amount of space between rows. |
| Access actions shortcut menu |
At the end of every row, you can access a set of phone specific actions. Use Click to show available actions and select an action. Available actions include:
|
| Add phones |
Click Add Phone to add new phones to your organization. For more information, see: |
| Import phones |
Use Import phones from a comma-separated values file to bulk import phone configurations. For more information, see Import phones |
| Delete phones |
Select a row Use Delete to remove phones from your Genesys Cloud organization. |
| Restart phones |
Select a row Use Restart to restart phones. Note: WebRTC phones do not support restarting.
|
| Log people out |
Select a row Use Log people out to log people out of a phone. |
| Change phone base settings |
Select a row Use Change phone base settings to migrate base settings. For more information, see Migrate base settings. |
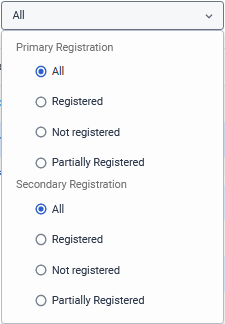
| Filter by registration |
You can customize the Phones view by selecting the preconfigured registration filters from the View list. The registration filter allows you to determe a phone's registration status. You can filter by Primary Registration and Secondary Registration. Under both filters, you can choose All, Registered, Not Registered, or Partially Registered. |
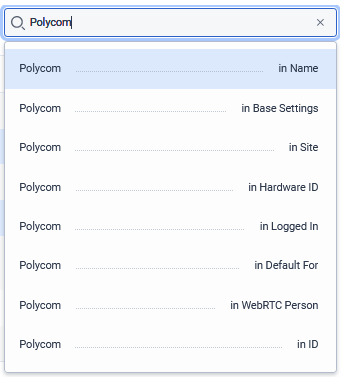
| Filter phone view |
You can customize the Phones view by using general filters. Just type a term in the Type to filter this page box and select the column from the list. |
| Edit a phone |
The Name column shows the name assigned to each phone. You can edit any phone by clicking its name in the Name column. For more information, see: |
| Check a phone's status | The Status column provides a brief status indicator for each phone. Click the status indicator to open the phone's information pane. This pane contains details about the phone. |
| Edit a site | The Site column indicates the phone's site. Click the site name to go to the Edit Site page. For more information, see About Sites. |
| Find provision details | The Last Provisioned column tells you when the phone was last provisioned. |
| Find phone hardware ID | The Hardware ID column shows each phone's hardware ID. |
| Find the phone ID | The ID column shows the ID number that Genesys Cloud assigns to the phone. |
| Edit base settings |
The Base Settings column shows each phone's base setting. You can edit any phone's base settings by clicking its name in the Base Settings column. For more information, see: |
| Find out who is logged in | The Logged in column shows who is logged in to the phone. |
| Find phone make and model | The Make & Model column shows the type of phone. For more information, see Managed phones and models matrix. |
| Find the default user | The Default For column shows the name of the user who is assigned to that phone. |
| Find the WebRTC user | The WebRTC Person shows the name of the user who is assigned to that WebRTC phone. |
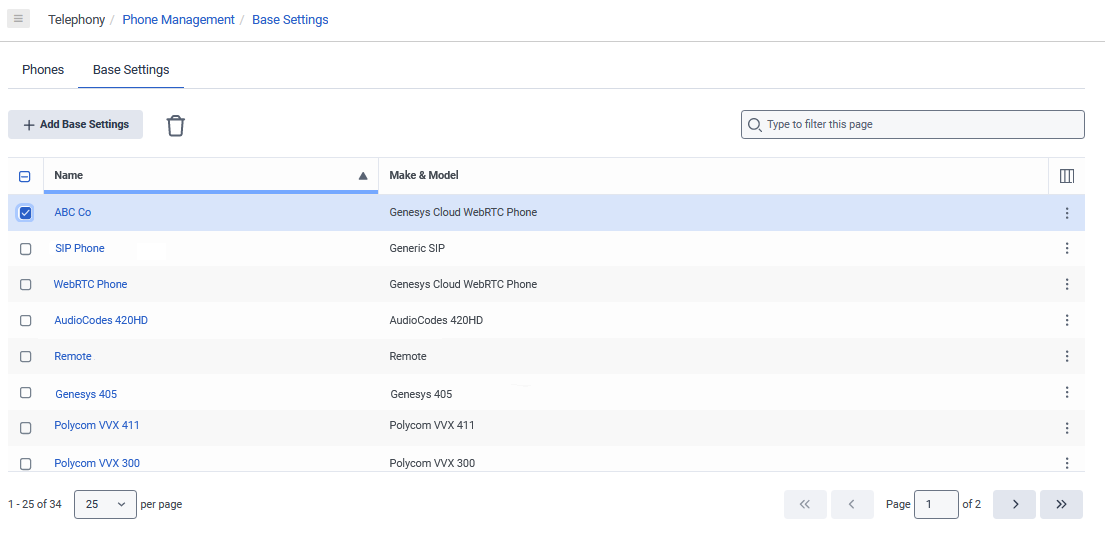
Click the image to enlarge.
| Task | Description |
|---|---|
| Rearrange columns |
Click any column and drag it to a new position. |
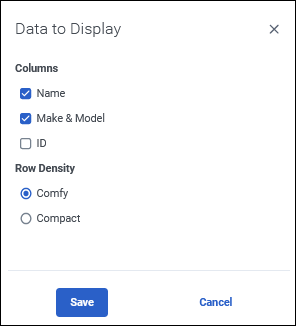
| Add/Remove columns |
You can customize the Base Settings view by adding and removing columns. Use Choose the data to display and select next to the columns you want to display. To return the Base Settings view to its default configuration, clear all the check boxes and click Save. |
| Set row density |
You can customize the Base Settings view with the row density setting. Use Choose the data to display and select one of the row density options. Comfy increases the amount of space between rows and Compact condenses the amount of space between rows. |
| Access actions shortcut menu |
At the end of every row, you can access a set of base settings specific actions. Use Click to show available actions and select an action. Available actions include:
|
| Add Base Settings |
Click Add Base Settings to add new base settings to your organization. For more information, see: |
| Filter base settings view |
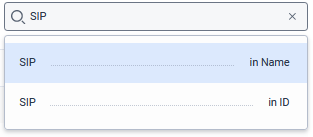
You can customize the Base Settings view by using filters. Just type a term in the Type to filter this page box and select the column from the list. |
| Delete base settings |
Select a row Use Delete to remove base settings from your Genesys Cloud organization. |
| Edit base setting | The Name column shows the name assigned to each base setting. You can edit any base setting by clicking its name in the Name column. For more information, see: |
| Find the phone make and model | The Make & Model column shows the type of phone. For more information, see Managed phones and models matrix |
| Find a base setting ID | The ID column shows the idenfication number that Genesys Cloud assigned to the base setting. This number can be helpful for troubleshooting. |