
Deploy Messenger
Prerequisites
- To view Messenger configuration:
- Genesys Cloud CX 2, Genesys Cloud CX 3, Genesys Cloud CX 1 Digital Add-on II, Genesys Cloud CX 2 Digital, or Genesys Cloud CX 3 Digital license
- Web Deployments > Configurations > All permission
- Web Deployments > Deployments > All permission
- An inbound messaging flow
- To view the Brand Logo upload field: Uploads > Public Asset > Upload permission
- To view the Knowledge Base selection field: Knowledge > Knowledgebase > View permission
- To view the Co-browse field: Conversation > Cobrowse > Add permission
- To view and update the content profile: Messaging > Supported Content > Add, Delete, Edit, and View permission
Messenger enables web messaging by providing a predefined Messenger window that customers use to interact with bots and agents. Before you create a Messenger deployment, configure Messenger and save a version of the configuration.
Messenger also enables mobile messaging via the headless Transport SDK. With the Transport SDK, mobile developers can easily build a custom mobile messaging client.
To deploy Messenger to your website:
- Create a Messenger deployment.
- Deploy the Messenger snippet to your website. You can manually deploy the Messenger snippet or use Google Tag Manager to deploy the Messenger snippet.
To deploy Messenger to your mobile platform (custom mobile messenger):
- Configure the deployment domain and ID in the Transport SDK.
To manage your Messenger deployment, you can:
- Change the Messenger configuration assigned to a deployment.
- Manage the web messaging and supported content profiles.
- Disable a Messenger deployment.
- Delete a Messenger deployment.
Create a Messenger deployment
- Click Admin.
- Under Message, click Messenger Deployments.
- Click New Deployment.
- Enter a name and description.
- Under Status, use the toggle to set the status of the Messenger deployment.
- To enable the Messenger deployment on your website or in your mobile application, turn on the toggle. The status shows as Active.
- To disable the Messenger deployment on your website or in your mobile application, turn off the toggle. The status shows as Inactive.
- Under Select your Configuration, click Select Configuration to select a version of a Messenger configuration to assign to this deployment.
- In the Assignment pane, navigate to the Messenger configuration you want to assign to the configuration and click the name of the Messenger configuration.
- Select the version that you want to assign.
- Click Save.
- Under Select your Supported Content Profile, click the list to select a Content Profile to assign to this deployment. You can also add new Supported Content Profiles, if necessary.
- Under Restrict domain access, determine whether to allow all domains or restrict the domains on which you want to deploy the snippet.
- To allow all domains, select the Allow all domains option. Use this option for testing and development purposes.
- To restrict domains, enter a domain and click Add Domain. You can add multiple domains to the list. Restrict domains to prevent unauthorized usage of your snippet from unknown domains. If you restrict a domain, then Messenger does not run on that website and rejects API requests from that domain.
- Under Select your Architect Flow, select a published inbound message flow. If a flow is not selected, messaging functions will not be available.
- Click Save. The Messenger Deployments page now displays the snippet and deployment key. Next, copy the Messenger snippet and deploy the Messenger snippet to your website. If you are building a custom Messenger, copy the deployment key.
Deploy the Messenger snippet to your website
- Click Admin.
- Under Message, click Messenger Deployments.
- Navigate to the Messenger deployment that you want to deploy and click the name in the Deployment Name column.
- Under Deploy your snippet, click Copy to Clipboard to copy the snippet.
- Paste the snippet to the
<head>tag of all of your webpages. - To use the Deployment Key with your custom messaging client, configure it in your SDK.
- Click Admin.
- Under Message, click Messenger Deployments.
- Navigate to the Messenger deployment that you want to deploy and click the name in the Deployment Name column.
- Under Deploy your snippet, click Copy to Clipboard to copy the snippet.
- In Google Tag Manager, create a new Custom HTML tag.
Click the image to enlarge.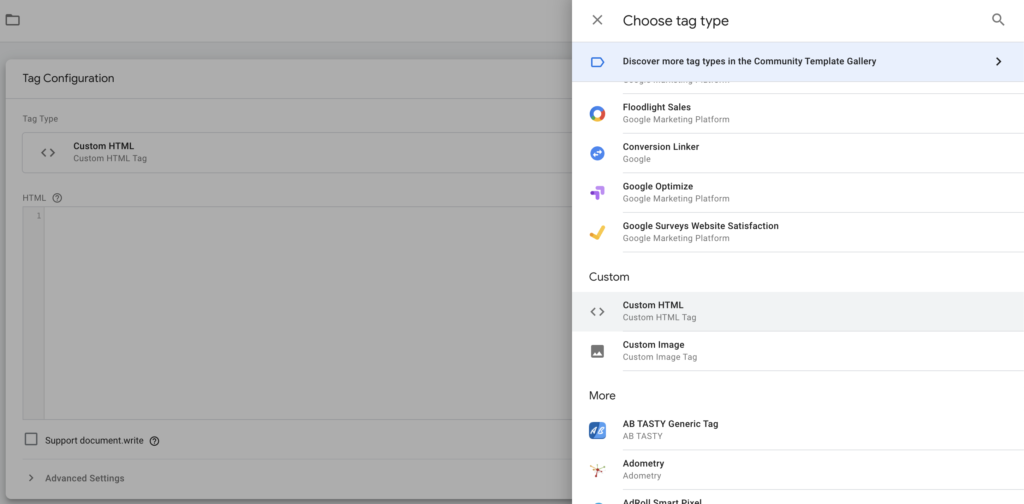
- Paste the snippet into the body of the Custom HTML tag.
- Enclose the JavaScript code with
<script>tags. Be sure to unescape the snippet code to remove the
Click the image to enlarge.
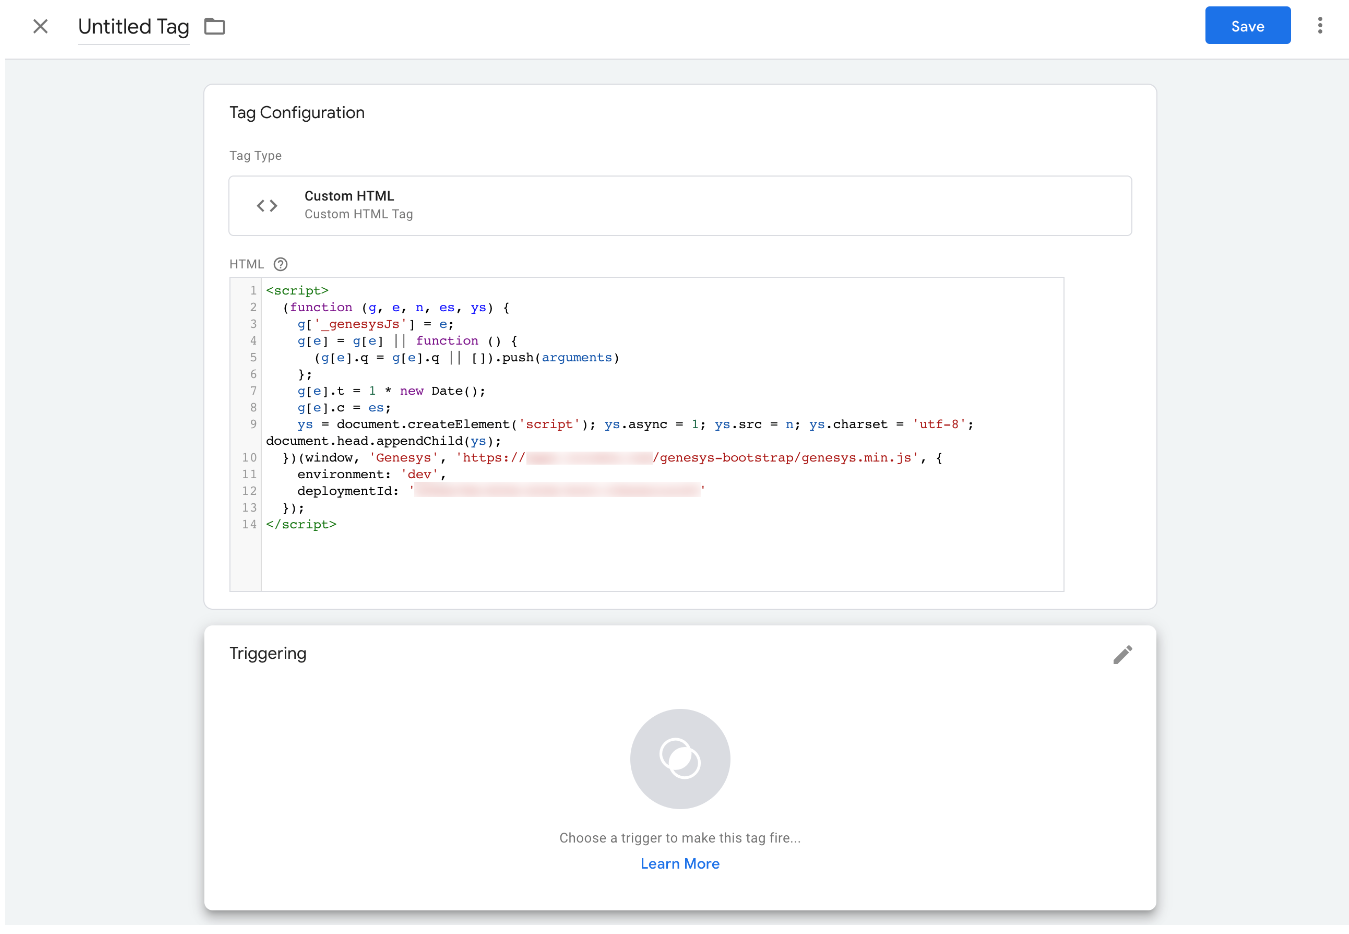
- Save the tag.
- Select the All Pages trigger.

- Save the tag with a meaningful name, such as Messenger Tag.
Click the image to enlarge.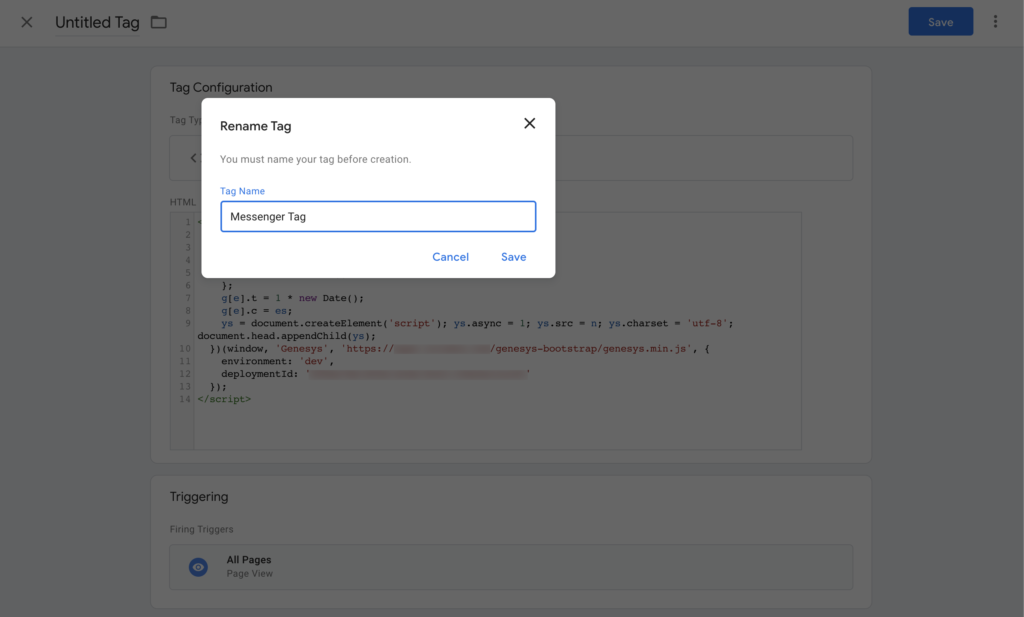
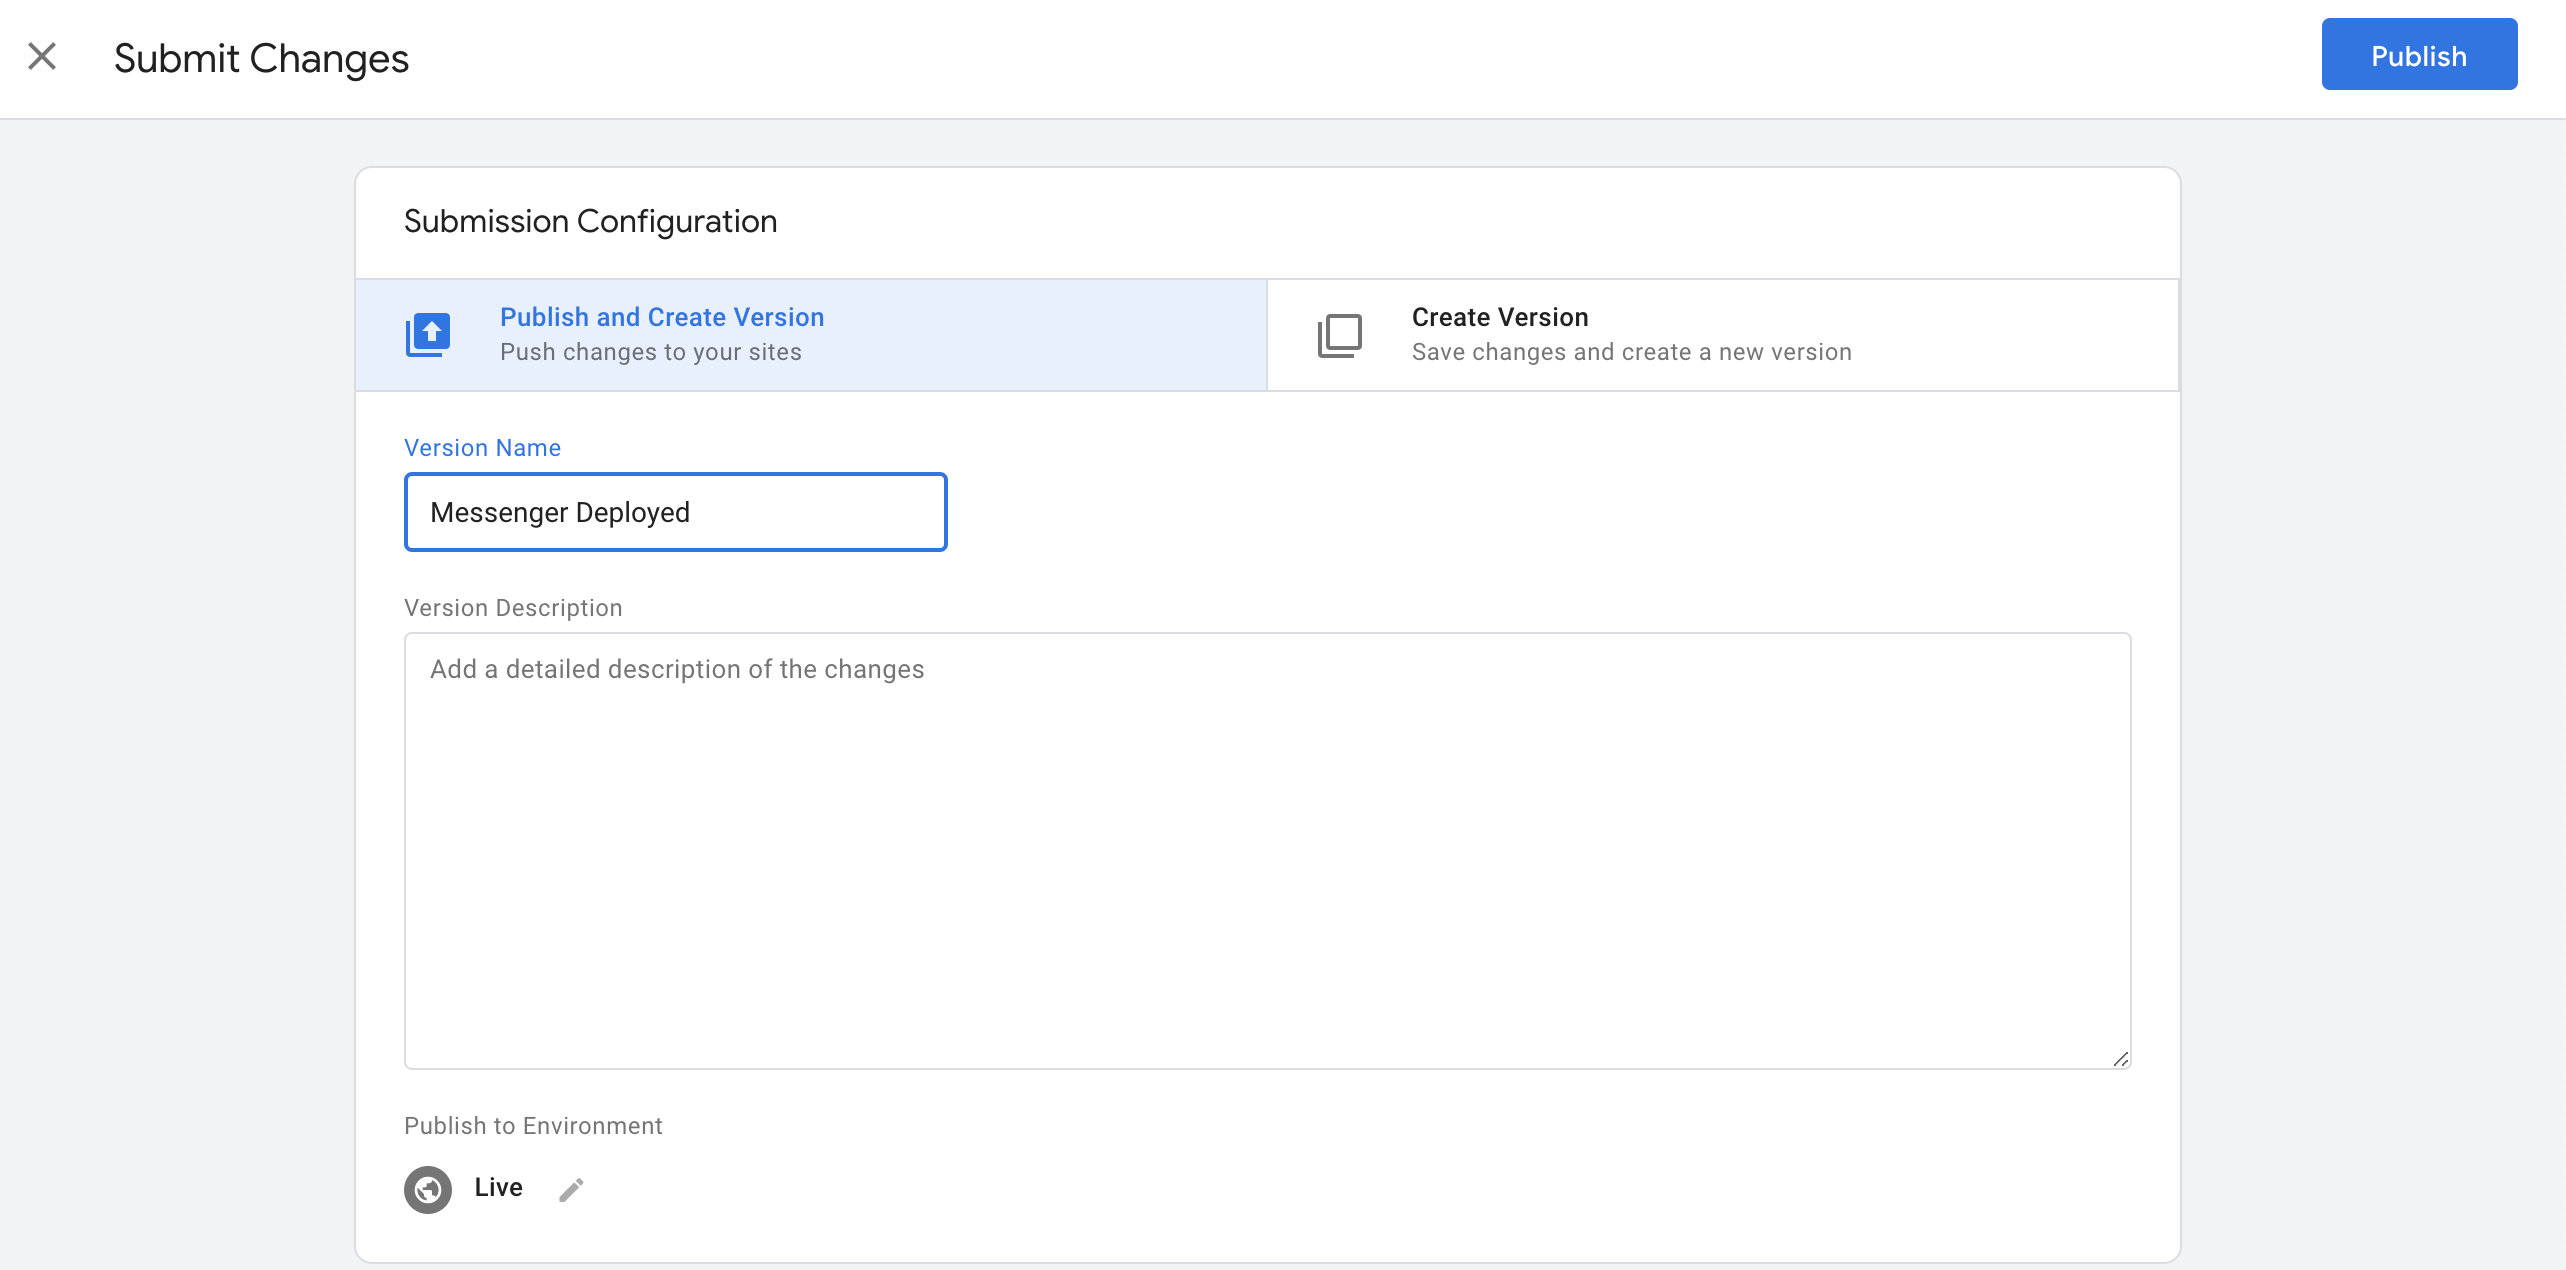
- Click Submit
- Click Publish to publish the tag to all pages on your website.
Click the image to enlarge.


Note:
- To have proper support in mobile browsers, your website should include ideal viewport settings in <meta> tag. For example:
<meta name="viewport" content="width=device-width, initial-scale=1">. For more information on using viewport meta tag to control layout on mobile browsers, see here. - Consider whether your Content Security Policy (CSP) may need to be updated to allow Messenger resources to be set up on your website. For more information about the security policies, see Content Security Policy.