
Create a new internal-custom DNC list
Create an internal-custom do not contact (DNC) list by uploading a .csv file of custom values.
At minimum, the .csv file must contain at least one column of custom values.
A DNC file can contain multiple custom values, for example:
Last Name, First Name,City
Smith,Bill,Boston
Thomas,Terry, Indianapolis
To create an internal-custom DNC list:
- Click Admin.
- Under Outbound, click List Management.
- Go to the Do Not Contact Lists tab, and then click Create New.
- Enter a unique name in the DNC List Name box. DNC list names can contain spaces, numbers, and special characters, but must be unique.
- In the Division box, select a division or accept the default Home division. If you do not assign the list to a custom division, it belongs to the Home division by default. See About Access Control and Divisions overview.

- In the DNC List Type box, select Internal – Custom.
- In the Custom Exclusion Column box, type the name for the column header for this DNC list. This column header name must match the name of the column header in the existing contact list .csv file that will be used in your campaign. The custom exclusion column name and content is matched against the same column name in the contact list when they are associated in your campaign.
- Click Browse. Select a .csv file, and then click Open. The first few rows of data from your .csv file are displayed under Sample Rows.
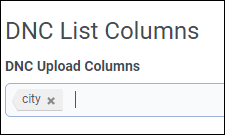
- Under DNC List Columns, in the DNC Upload Columns box, select the columns from your .csv file to be uploaded as columns in your DNC list. The values from the .csv columns are uploaded to the DNC list under the column header name that you created in the Custom Exclusion Column in Step 8.
- If you include an expiration DateTime column in your DNC list, select the DNC expiration column name.
Notes:
- The expiration DateTime format must be
yyyy-MM-ddTHH:mmZ, such as2017-05-20T01:44Zor2021-03-08T12:30Z. An invalid format imports the phone number without an expiration DateTime. - The expiration date cannot be more than 180 days in the future.
- The expiration time must be in Universal Coordinated Time (UTC).
- Contact attempts resume after the expiration DateTime.
- If you do not specify a DateTime in the expiration column, then no expiry exists for that entry.
- If a record includes multiple email addresses, then the expiration DateTime applies to all.
- You cannot delete a record from a DNC list, however to cause the system to skip an included record, add an expiration DateTime from the past.
- The expiration DateTime format must be
- Click Save.
Notes:
- After you save a DNC list, you cannot change the Custom Exclusion column for this DNC list. You must create a new DNC list for a different Custom Exclusion column.
- When uploading entries to an internal custom DNC list from a .csv file, the content cannot exceed 36 characters.