
Configure and activate AudioHook Monitor in Genesys Cloud
These instructions assume that you are an advanced user. However, if you anticipate or encounter issues, or are unfamiliar with the configuration process, best practice recommends that you ask your administrator or a member of your technical support team for assistance.
Before you begin
Before you begin, perform these tasks:
- Install AudioHook Monitor from Genesys AppFoundry.
- Add an AudioHook Monitor instance for each endpoint.
Open the AudioHook Monitor configuration
To configure the AudioHook Monitor, follow these steps:
- In Genesys Cloud, click Admin.
- Under Integrations, click Integrations.
- Select AudioHook Monitor.
- (Optional) In the Details tab, Genesys highly recommends that you enter a unique name for the integration that you want to configure. For example, “AudioHook – Provider Name”.
- Click the Configuration tab.
Configure AudioHook Monitor
When you add your Connection URI, make sure that it begins with wss:// and not https://.
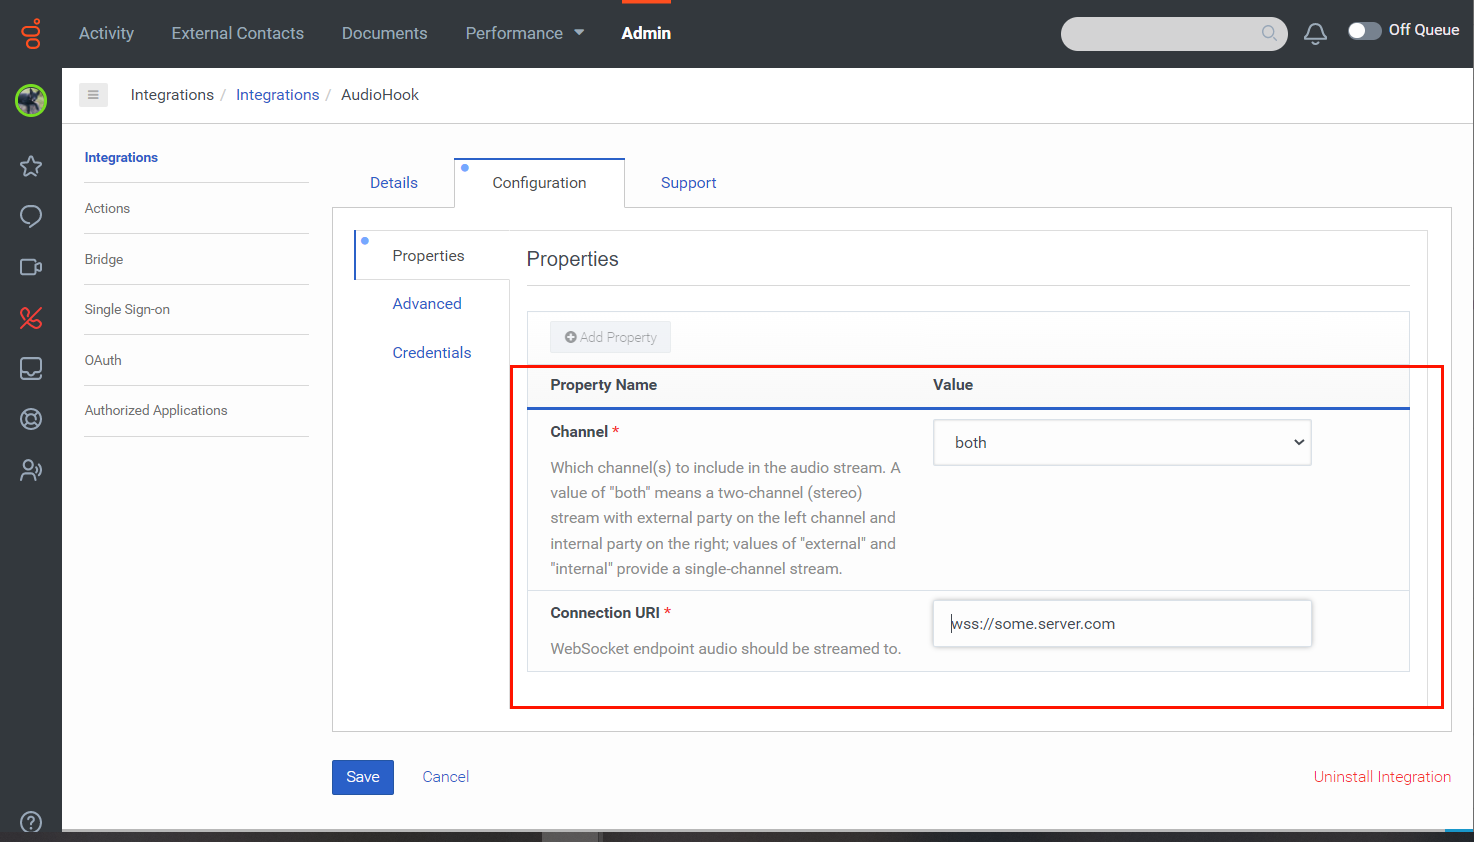
- Click the Properties tab.
- Under Channel, select whether to stream internal (agent), external (customer), or both. Note: A value of “both” means that a two-channel (stereo) stream with an external party on the left channel and an internal party on the right; values of “external” and “internal” provide a single-channel stream. Unless you have an explicit reason to select internal or external only, best practice recommends that you select both. This selection allows AudioHook Monitor to choose the value.
- Under Connection URI, select the WebSocket endpoint in which to stream the audio.
- (Optional) In the Advanced tab, enter any additional values that you want to send to the AudioHook server in the JSON format.
The additional configuration is sent to the AudioHook server as unaltered JSON data using the customConfig property in the Open command.
This image displays example AudioHook Monitor configuration properties.
Click the image to enlarge.
Add AudioHook Monitor credentials
- Click the Credentials tab.
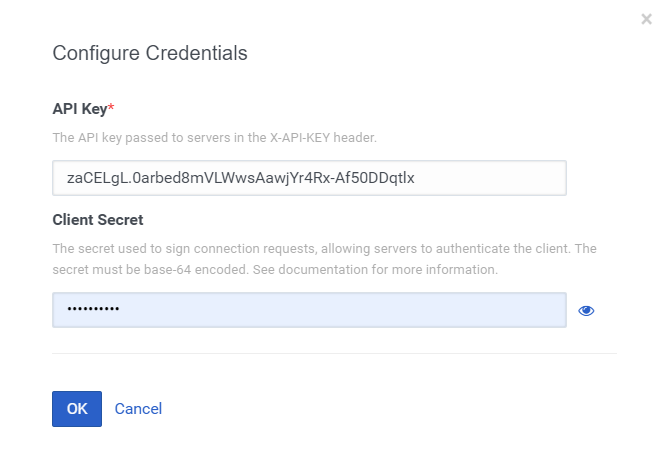
- Click Configure. The Configure Credentials dialog prompts you for the values that you obtained from the endpoint to which you want to connect:
- API Key: The API key that passes to servicers in the X-API-KEY header.
- Client Secret: The value that you use to sign connection requests and allow servers to authenticate the client. Obtain this credential from your service provider.
- Click OK.
- Click Save.
- Select the Details tab.
- To activate the integration, click Inactive. The Change Status dialog appears and asks you to confirm that you want to activate the AudioHook Monitor.
- Click Yes.
This image illustrates example data in the Configure Credentials dialog.
Click the image to enlarge.
After a few seconds, the installation opens a connection check to the server. If the connection check succeeds, then the status changes to Active. If the check fails, then an error appears.
Validate the AudioHook Monitor integration
When you make and save changes under the Configuration tab, make sure that you validate your changes to make sure that you configured the integration correctly. To do so, complete the following steps:
- Set the Status switch to Inactive and click Yes.
- Set the Status switch to Active again and click Yes. If the configuration is correct and Genesys Cloud encounters no errors during the activation process, the integration status changes to Active.
When you activate a new integration or save an integration that is already active, the system runs a connectivity probe that validates the connection. If the connection fails, an error message indicating the cause of the error is shown. If the error occurs more than once, the system adds a prefix to the message indicating the number of times the error occurred. Similarly, if there are multiple unique errors, the system combines them using the logical operator AND.
For example, the error message WebSocket connection failed. (AND) 1399x Received a malformed server message. (AND) Close transaction timed out. gives you the following insights:
WebSocket connection failed– Indicates that the initial open handshake has failed.1399x Received a malformed server message– Indicates that Genesys Cloud received a malformed message 1399 times.Close transaction timed out– Indicates that Genesys Cloud could not close the connection as defined in the AudioHook protocol.