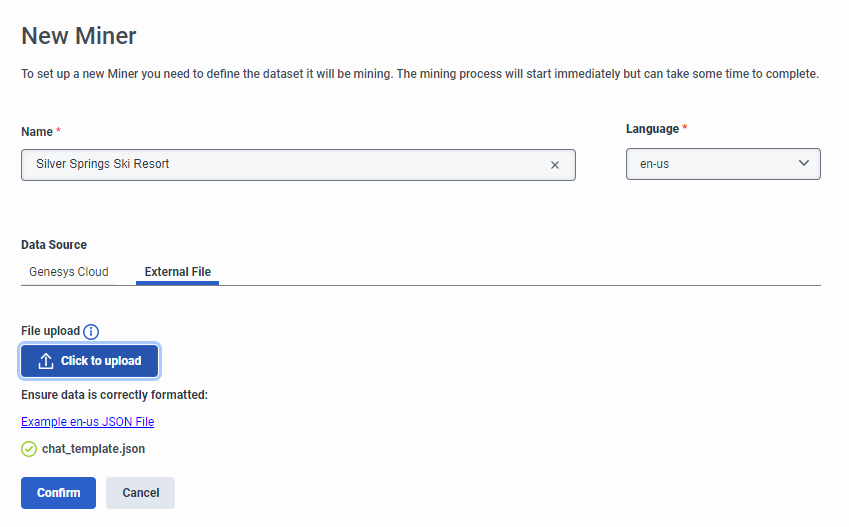
Add a new topic miner
You can access the topic miner from Admin > Quality > Topic Miner. For more information, see Access the topic miner. You can also create a new topic miner by importing a .json file from an external source.
- Under Data Source, click Genesys Cloud.
- Under Date range, use the calendars to select the date range in which the miner searches conversations between the agent and the customer.Note: The conversation limit is 30,000.
- Under Media Type, select Chat, Call, Email, or Message transcripts.
- Click the Participants list and select whether to mine topics from internal agents, external customers, or both.
- Click the Queues list and select up to 50 queues from which to mine transcripts. Note: If you do not specify any queues, the system selects all queues by default.
- Under Data Source, click External File.
- Under File upload, click Click to upload.
- Select and upload the JSON file source.
Note: To download and format conversation data from a preformatted template, click Example en-us JSON file or to download an example, click Example JSON File.
The mining process begins and the Miner Status column displays the progress. If the system encounters an error, you can open the session, review and correct the error, and then restart the session.


