Work with a voice transcript
Note: Configuration is not required for interactions that do not contain an audio recording (for example, chat interactions).
The Transcript tab provides the speaker-separated transcription of the conversation between external (customer) and internal (IVR, ACD, agent, conference, or voicemail) participants. Transcripts provide insights of what took place in the interaction, allowing the user to uncover business problems as well as areas of opportunity.
Notes:
- Voice transcription is not available in all Genesys Cloud supported languages. For more information, see Genesys Cloud supported languages.
- The language model used within the Genesys voice transcription capability is trained based on contact center conversations. As a result, it is best suited to transcribe those types of conversations. Genesys voice transcription is not trained on general conversations and is not meant to be used as a generalized transcription engine.
- To work with a voice transcript, you must first select an interaction whose transcript you want to view. You can select an interaction from the results of an interaction search or a content search.
- Interaction search – The interaction search results are based on metadata only. For more information, see Interactions view.
- Content search – The content search results are based on transcript content, speech analytics data, or both. For more information, see Content Search view.
- If recording segment access control is applied when viewing the Interaction details, only the voice transcript associated with the accessible recording segments is shown.
- When working with voice transcription, sentiment analysis is automatically enabled.
- If the user does not have the Recording > Annotation > View permission, the time synchronization between the audio and the transcript may be inaccurate when audio suppression events like Secure Pause or Hold Suppression take place.
- If Agent Assist is enabled but Voice Transcription is disabled for a queue, the conversation transcript will still be visible in Genesys Cloud. However, sentiment analysis, topic spotting, and sensitive data masking will not be applied.
When working with a voice transcription, you can perform these tasks:
- Click Performance > Workspace > Interactions.
- Click the row of the interaction whose transcript you want to view.
- Click the Transcript tab.
Note: As the interaction recording plays, the corresponding words (up to three), are highlighted with a blue background in the transcript. After the words are spoken, they are grayed out in the transcript. For more information, see Work with an interaction overview.
Click the image to enlarge.
- On the Transcript tab, in the Search field at the top of the transcript, enter the words that you want to find.
- Press Enter.
Notes:
- The Search field under the Transcript tab contains the number of instances of the searched words found in the transcript.
- To move from one found instance to another, use the next and previous arrows in the Search field.
- Every instance of the searched word or words that are found in the transcript are highlighted with a yellow background.
- The words highlighted in orange indicate the current instance of the searched words, out of the total number of instances found in the transcript.
- Local search for Japanese and Chinese is not supported.
The words and sentences in the transcript are divided into speaker sections: customer, IVR, ACD, or agent.
On the left side of the screen, every section is distinguished by a time stamp. This time stamp indicates when the speaker began to speak and two of the following icons representing the speaker.
Click the image to enlarge.
![]()
Click the image to enlarge.
Note: Within the transcript, visual indicators provide information about the dialect or program associated with the transcript content. For example, in the image above, the dialect associated with the transcript is en-US and the program is Topic spotting UI testing. These visual indicators appear in the transcript at the moment the language or program is changed.
To protect the privacy of your customers, automatic redaction is enabled by default to ensure that any sensitive PII or PCI data collected from an interaction is automatically redacted from voice transcripts. For example, instead of a credit card number the transcript includes [![]() card number]. When PII or PCI is data is detected and redacted, the user hears silence in the audio playback where the data was found.
card number]. When PII or PCI is data is detected and redacted, the user hears silence in the audio playback where the data was found.
This list is a complete list of redacted data:
[card number
[card expiry date]
[national id]
[postal code]
[sensitive data]
[phone]
[name]
[location]
[user info]
[email]
A select number of users can access transcripts that are not redacted only if they have the Recording > Recording > View Sensitive Data permission. By default, roles do not come with this permission. This permission must be granted by an administrator manually.
- The transcript API response includes the following entities in the UI:
- “CARD_NUMBER”: “card number”
- “CARD_EXPIRY_DATE”: “card expiry date”
- “SSN”: “national id”
- “ZIPCODE”: “postal code”
- “PII_OTHER”: “sensitive data”
- “PHONE_NUMBER”: “phone”
- “PERSON”: “name”
- “GEO”: “location”
- “USER_INFO”: “user info”
- “EMAIL”: “email”
- In accordance with the Payment Card Industry Data Security Standard (PCI DSS) guidelines, Genesys recommends the use of Secure Pause or Secure Flows to ensure that no PCI data is transcribed and made available to Genesys Cloud users.
- Genesys recommends that you use Secure Pause or Secure Call Flows as the first line of defense. Only Secure Pause and Secure Call Flows are valid by an external Qualified Security Assessor as Level 1 PCI DSS compliant. For more information about PCI DSS compliance, see PCI DSS compliance.
For more information, see Enable automatic redaction of sensitive information.
- Click Performance > Workspace > Interactions.
- Click the row of the interaction whose transcript you want to view.
- Click the Transcript tab.
- Click Copy Transcript
 in the upper right corner of the transcript.
- If a user does not have permission to view sensitive data, the data is masked.
- Genesys Cloud does not currently support directly highlighting and copying transcript text. Doing so may cause formatting issues. To copy transcript text reliably, use the Copy Transcript button in the UI.
The following metadata is copied.
- Interaction Type
- Interaction ID
- Message Type (only available for a message interaction)
- Start Time (User’s timezone)
- End Time (User’s timezone)
- Duration
- Internal Participants
- External Participants
- Transcript:
- Date/Time (User’s timezone)
- Participant Type (Internal/External)
- Participant
- Text
- Interaction Summary
Key points:
- Availability
- The translation option is available on the Interaction Details page when a transcription is present.
- Types of interactions supported
- Voice transcriptions, chats, digital/web messages, and email interactions (body only) can be translated.
Interactions with an HTML toggle enabled are not supported.
- Voice transcriptions, chats, digital/web messages, and email interactions (body only) can be translated.
- User interface elements
- A translation icon (which changes appearance when active) is displayed.
- A label at the top of the transcript panel indicates that translation is in progress and shows the source and target dialects.
- You can select a different target language via a drop-down menu, where languages are listed in their native scripts (for example, Hebrew appears as עברית).
- Considerations
- For voice interactions, only approximately the first 25 minutes (or 10,000 characters) are translated.
- For digital interactions, only the first 10,000 characters are translated.
- The feature is limited to 1,000 translations per organization per day.
- During translation, original text features like topic tags, search functionality, karaoke, sentiment markers, and redactions behave differently. For example, copying the transcript always copies the original text.
- Any redacted text in the original transcript is not translated. Note: sometimes, the redacted entity name might appear in brackets if the translation service handles it that way).
- After initial translation, the translated text will be cached for up to 20 hours, and visible after activating the translation icon.
Work with on demand transcription translation
- Navigate to the interaction that you want to review. Ensure that the interaction contains a transcription (voice, chat, digital message, or email body).
- Locate the translation icon
 . Within the transcript panel, look for the translation icon. This icon is visible only when a transcription is present.
 - Click or toggle the translation icon. Once activated, the icon changes its appearance to indicate that the translation process has started. A label appears at the top of the transcript panel, stating that the text is being translated from the source dialect to your selected target dialect.
- Wait for the translation to complete. A spinning icon appears, usually on the upper right of the interaction page, while the system processes the translation. For voice interactions, expect the translation to appear within 4 seconds for at least half of the requests, and within 10 seconds for nearly all requests. Email translations can take longer.
- Review the translated transcript. Once the translation is complete, the translated text appears underneath each line of the original transcript.
Some elements (for example, topic tags, sentiment markers, and search functionality) remain based on the original text. - Adjust the Target Language (if necessary). If the automatically selected target language is not your preferred dialect, click the drop-down menu in the translation area and choose your desired language. Languages in the drop-down appear in their native format (for example, Hebrew as עברית).

Disable translation
To revert to the original transcript, just toggle off the translation option. The translation label disappears, the icon returns to its original state, and the transcript shows the original language.
- Click Admin.
- Under Quality, click Speech and Text Analytics.
- Enable AI insights for specific queues or flows:
- Locate the AI Insights toggle in Program Settings.
- Turn it ON for the desired Programs, which are assigned to the relevant queues and/or flows, to enable summarization.
- If an interaction includes transcripts from both enabled and non-enabled queues, and/or flows, the entire interaction is not summarized.
- Only new interactions are summarized.
- AI summarization requires that AI Insights be enabled for all programs involved in an interaction’s transcript in order to generate a supervisor summary.
- Quality assurance
- Coaching and training
- Identifying trends in customer interactions
- To work with AI summarization, you must have AI Experience Tokens and Speech and Text Analytics (STA), Workforce Engagement Management (WEM), or GC3.
- The AI Insights section is only visible to customers who have:
-
AI experience tokens
-
A WEM Add-On or GC3 subscription
-
- Users can collapse or expand the AI Insights panel based on preference, and this setting is relevant for all interactions.
-
If suppression is enabled for IVR, hold, or queue wait times, transcripts do not generate for these segments. As a result, summaries do not include any content from these segments. We recommend enabling suppression during these segments to enhance customer privacy. For more information, see: Call recording in Genesys Cloud overview.
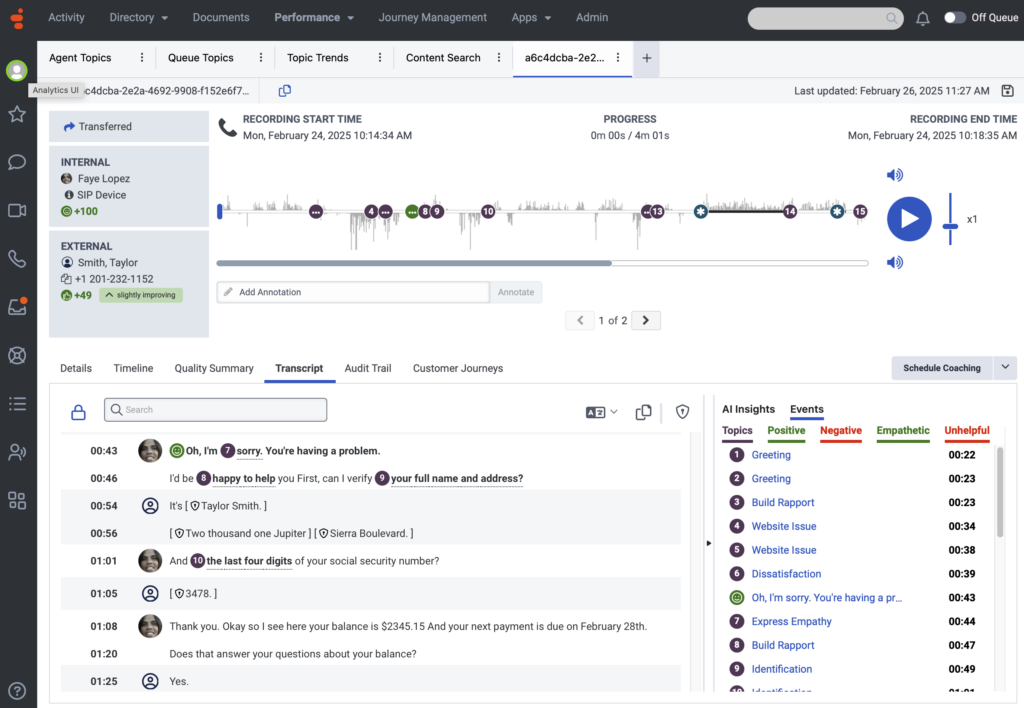
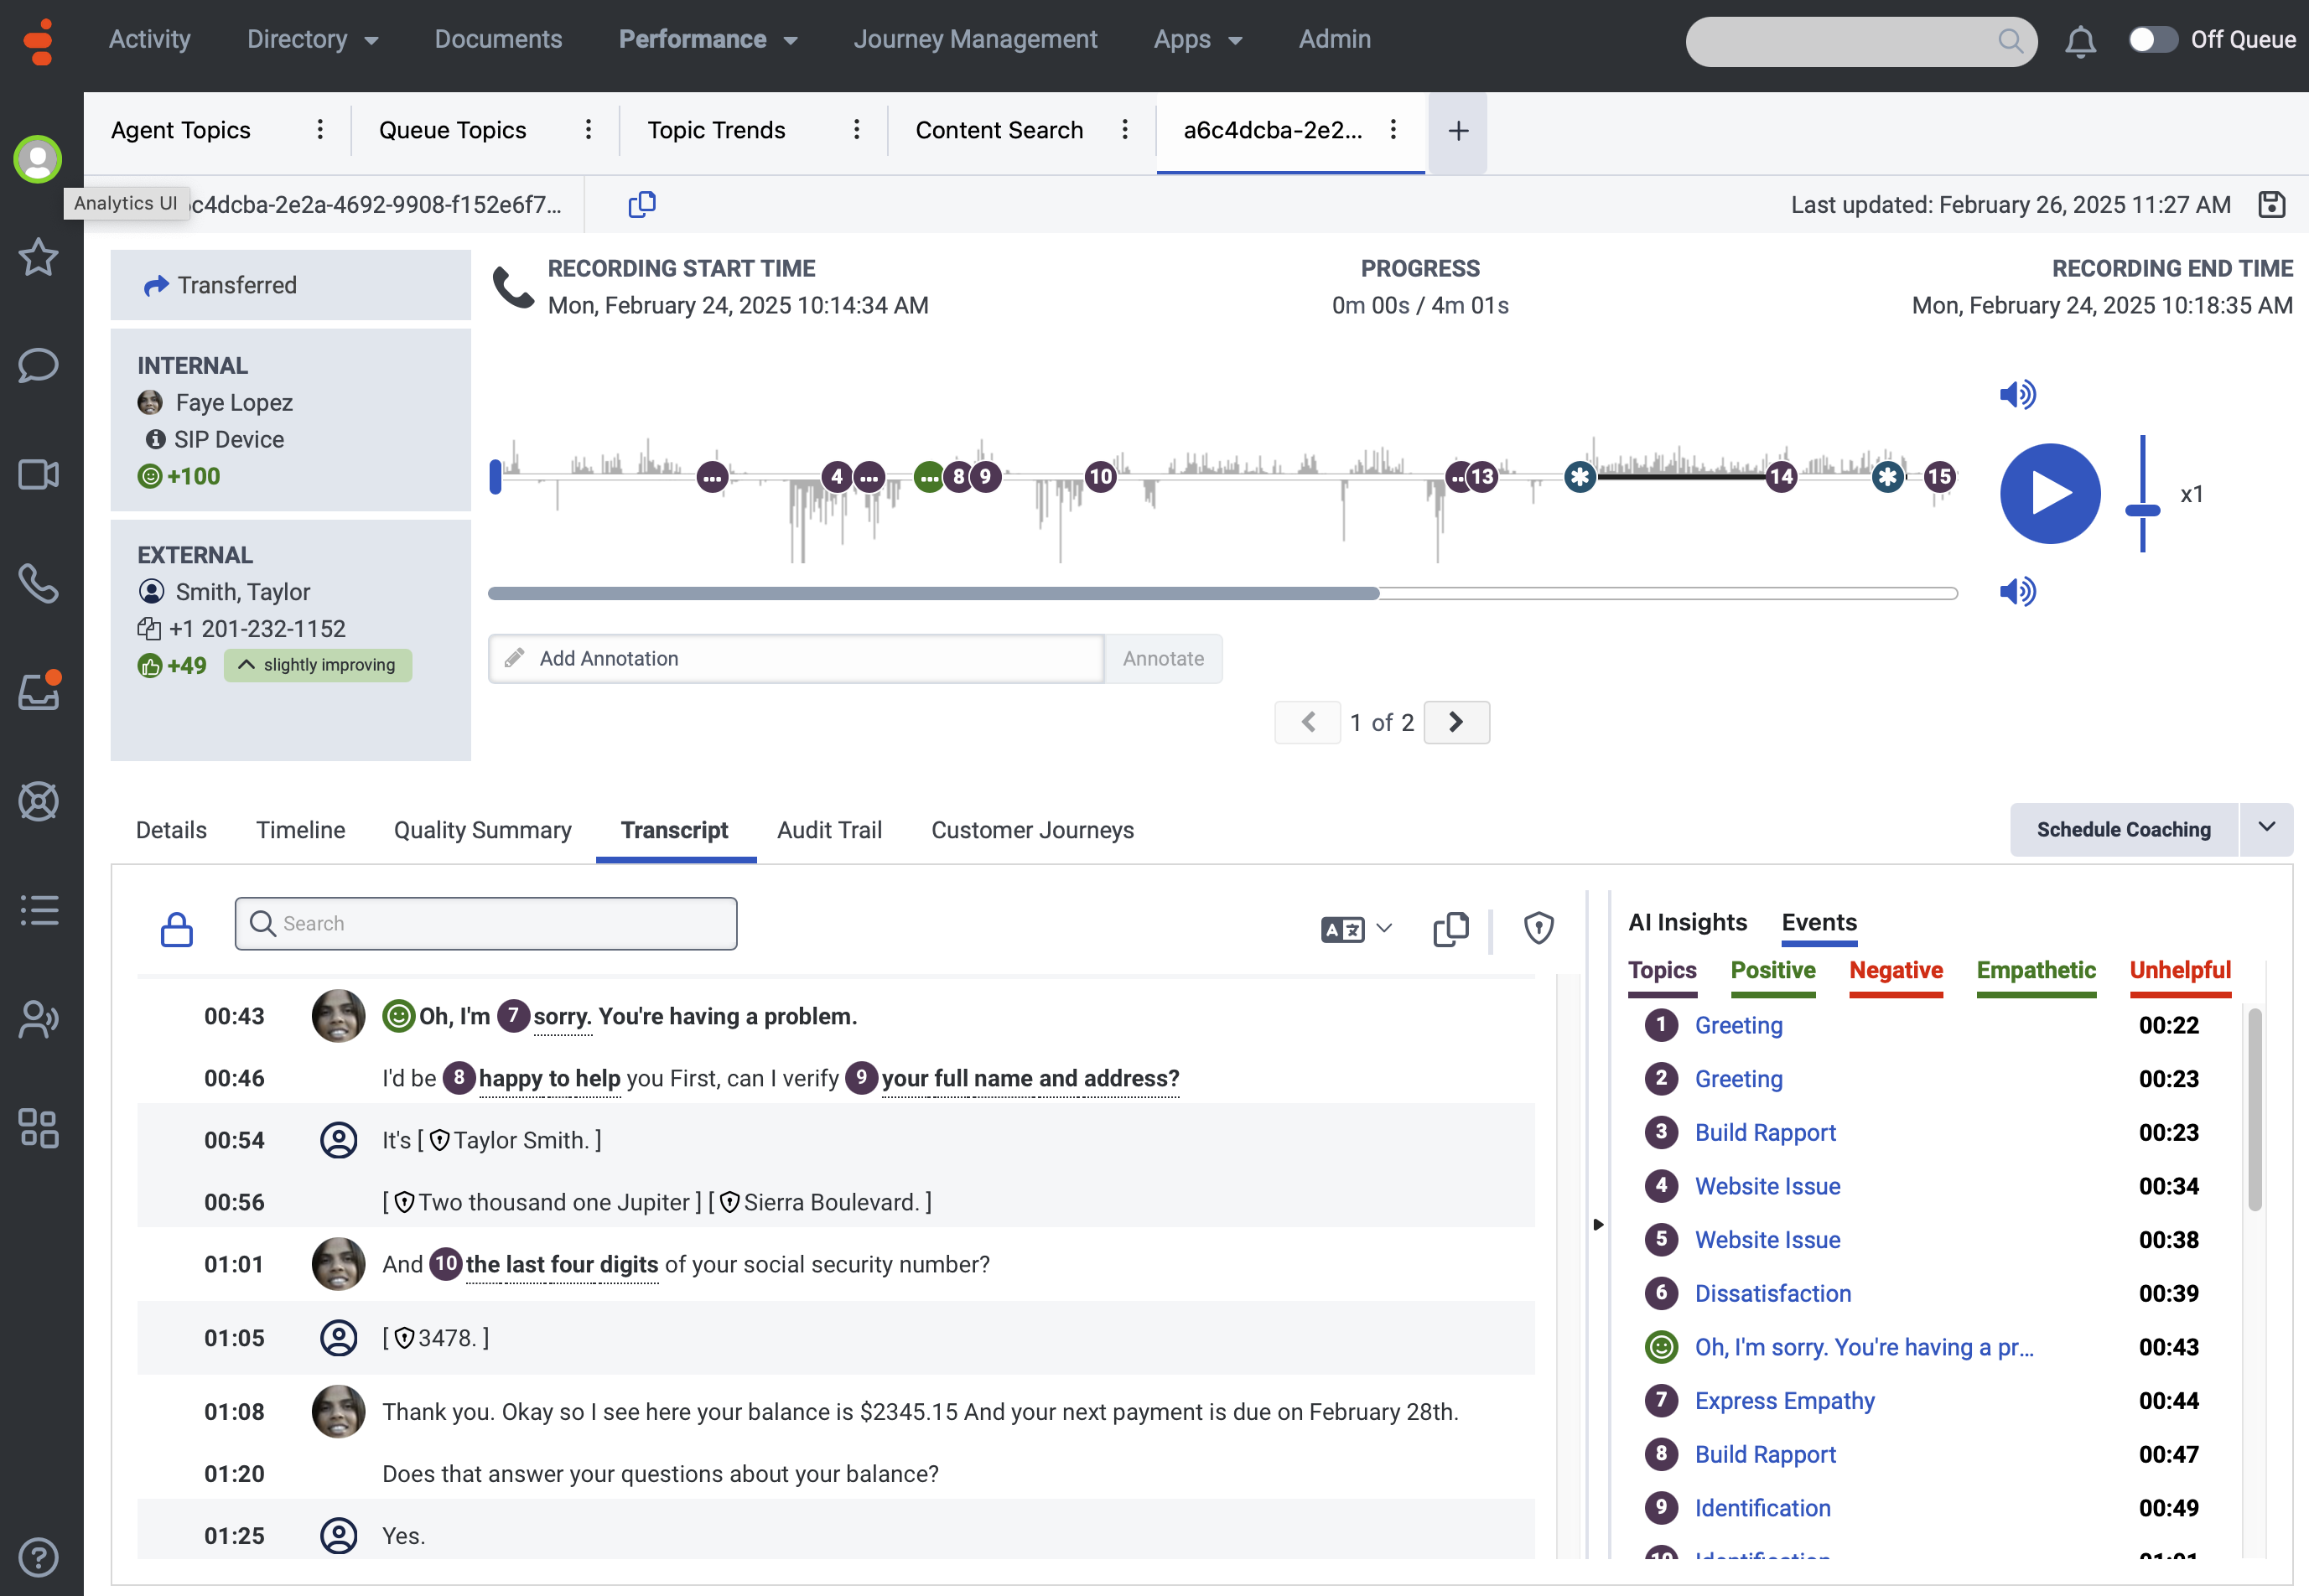
View AI-generated summaries
- Click Performance > Workspace > Interactions.
- Click the row of the interaction whose transcript you want to view.
- Click the Transcript tab, and select an interaction.
- Access the AI Insights tab next to Events, to display the interaction summary. If there are no AI Insights or Events, this panel remains closed by default.
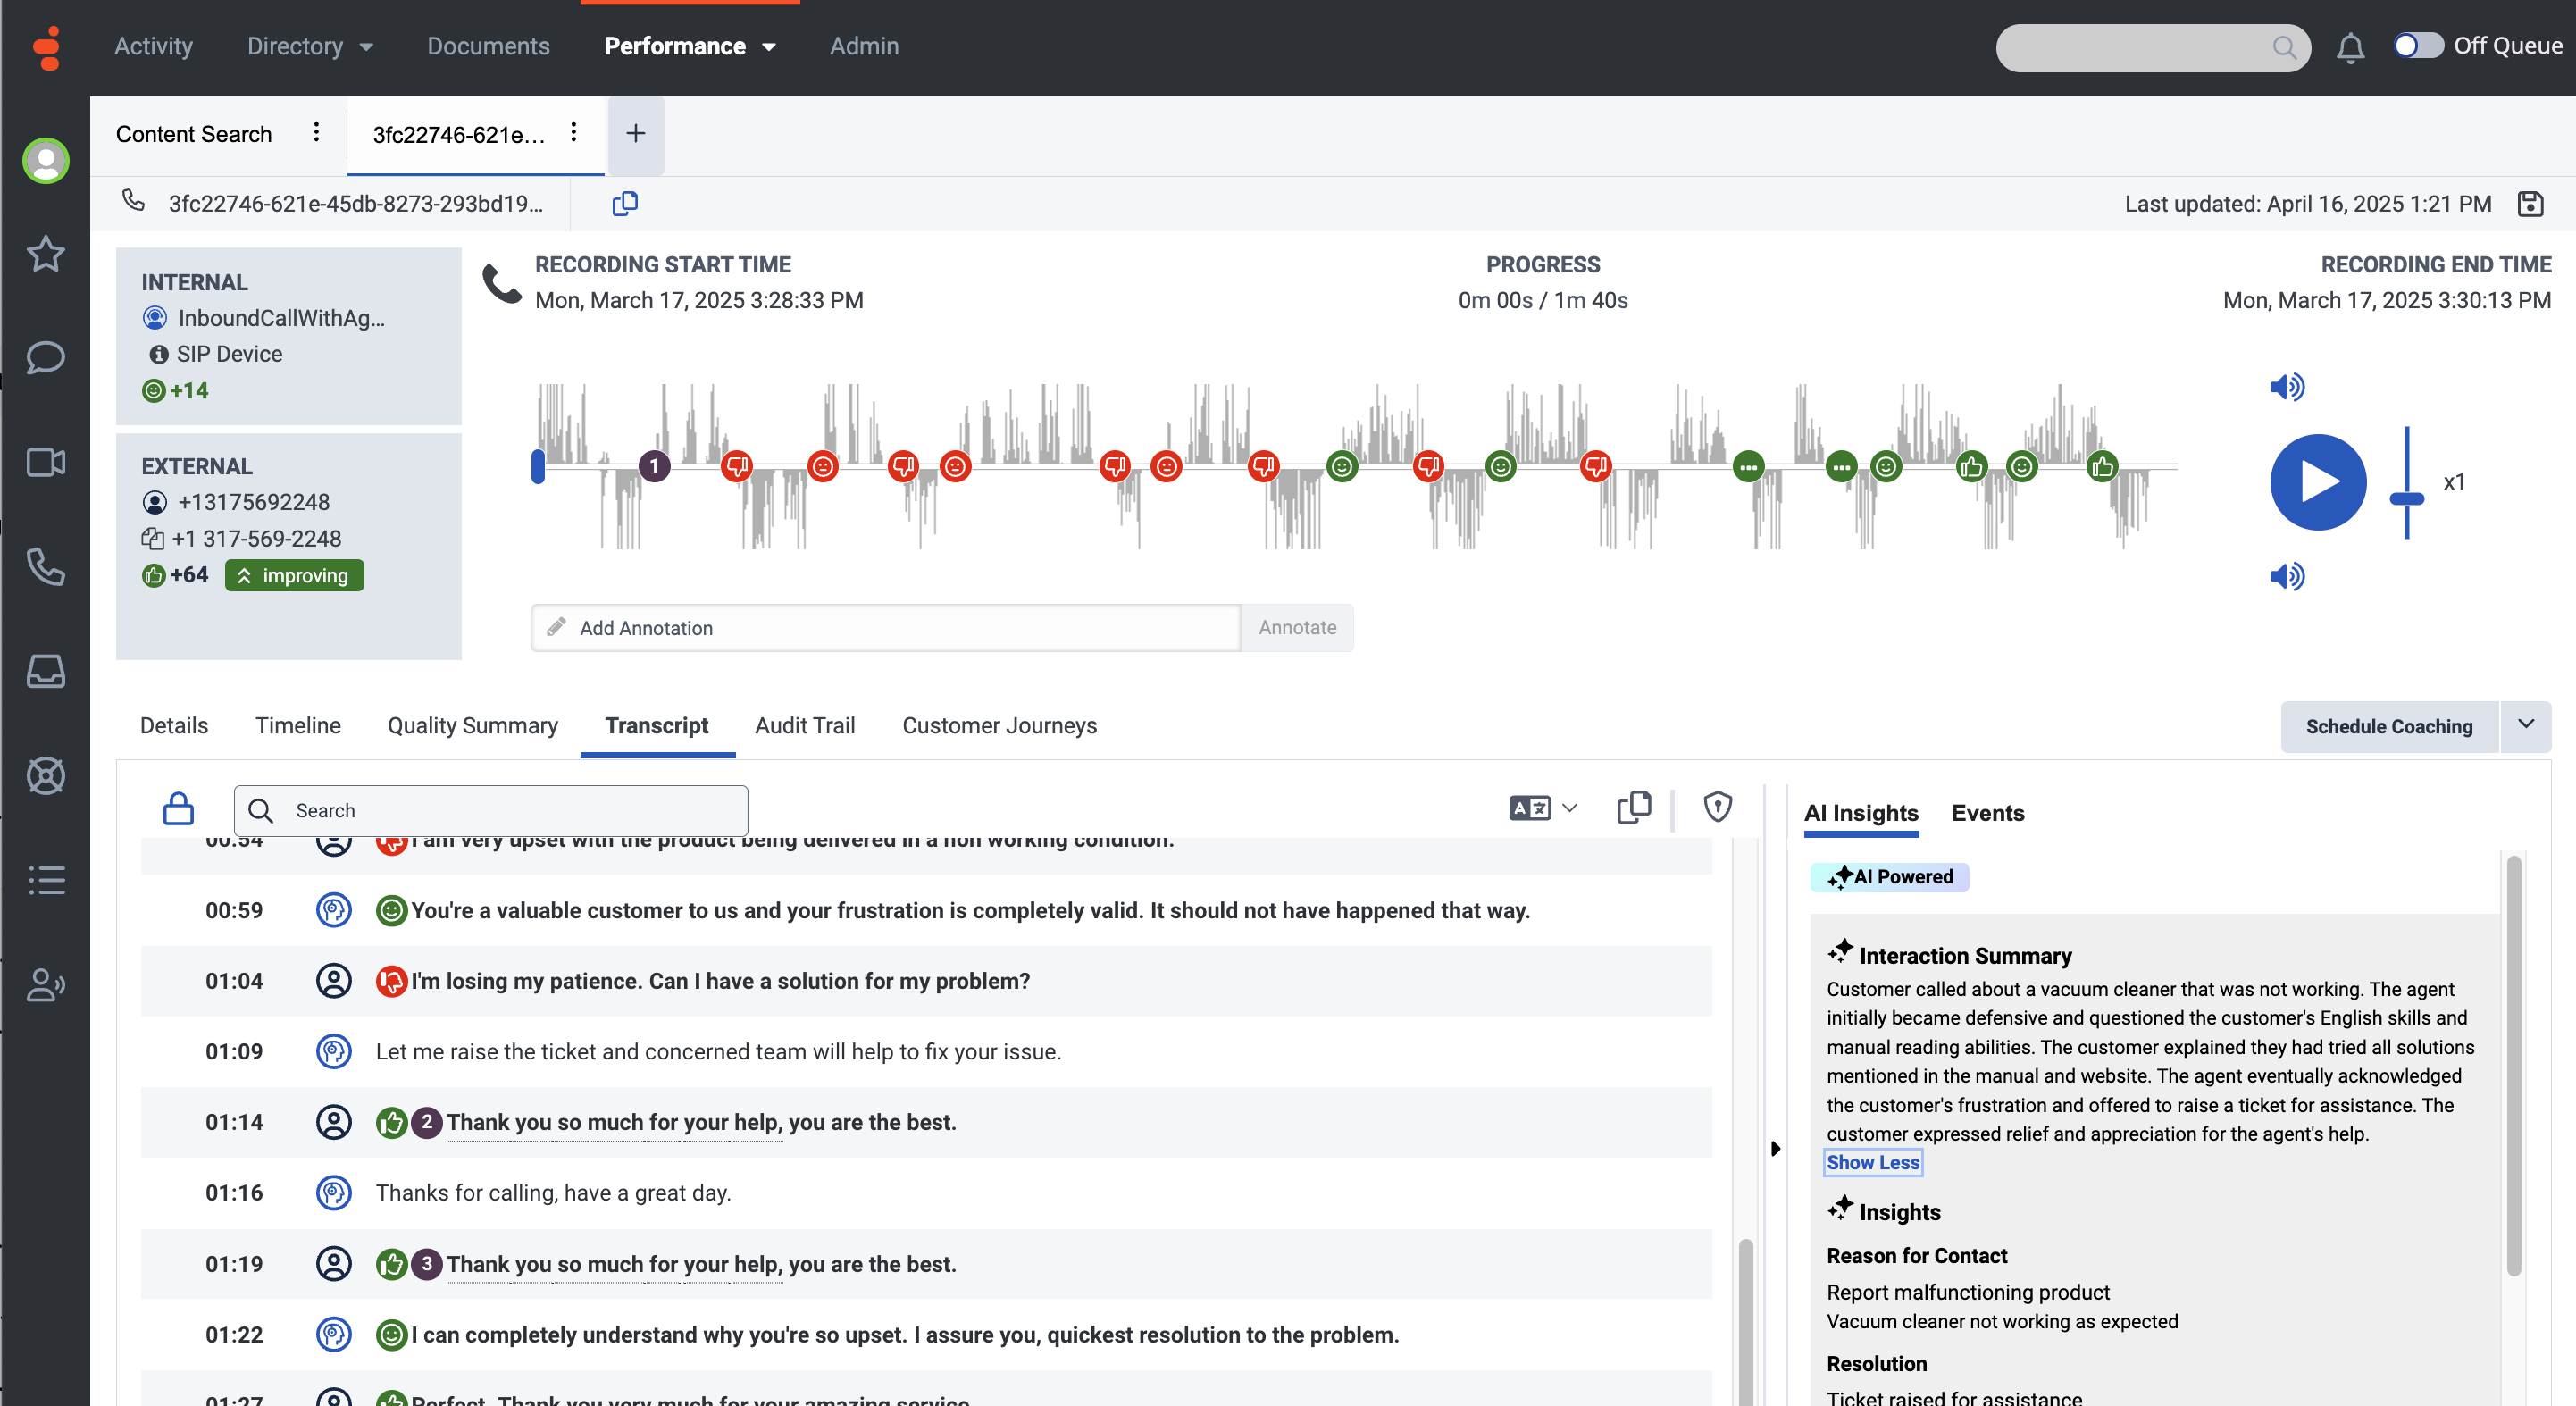
- Review the AI summary:
- The AI summary provides a high-level overview of the entire interaction.
- If an interaction includes multiple agents, a single interaction-level summary is displayed.
Understanding AI summary indicators
- AI generated label: Summaries created by AI are marked as Generated by AI, with a tooltip explaining potential inaccuracies.
- Multiple transcripts: If an interaction includes multiple transcripts, a tooltip explains that the summary is based on all available transcripts.
Key considerations and limitations
- AI summaries are available for voice, chat, and messaging transcripts (email interactions are not summarized).
- Transcript length limitations
- Summaries are only generated for transcripts between 20 and 5,000 tokens (~3,750 words max).
- If a transcript exceeds this limit, it is not summarized.
- Data retention
- The AI summary follows the same retention policy as the recording and transcript.
- If a recording is deleted, the AI summary is also deleted.
- Transcript modifications
- If new transcripts are added or some are deleted from an interaction, the summary is regenerated.
- If all transcripts in an interaction are deleted, the summary and AI Insights are permanently removed.
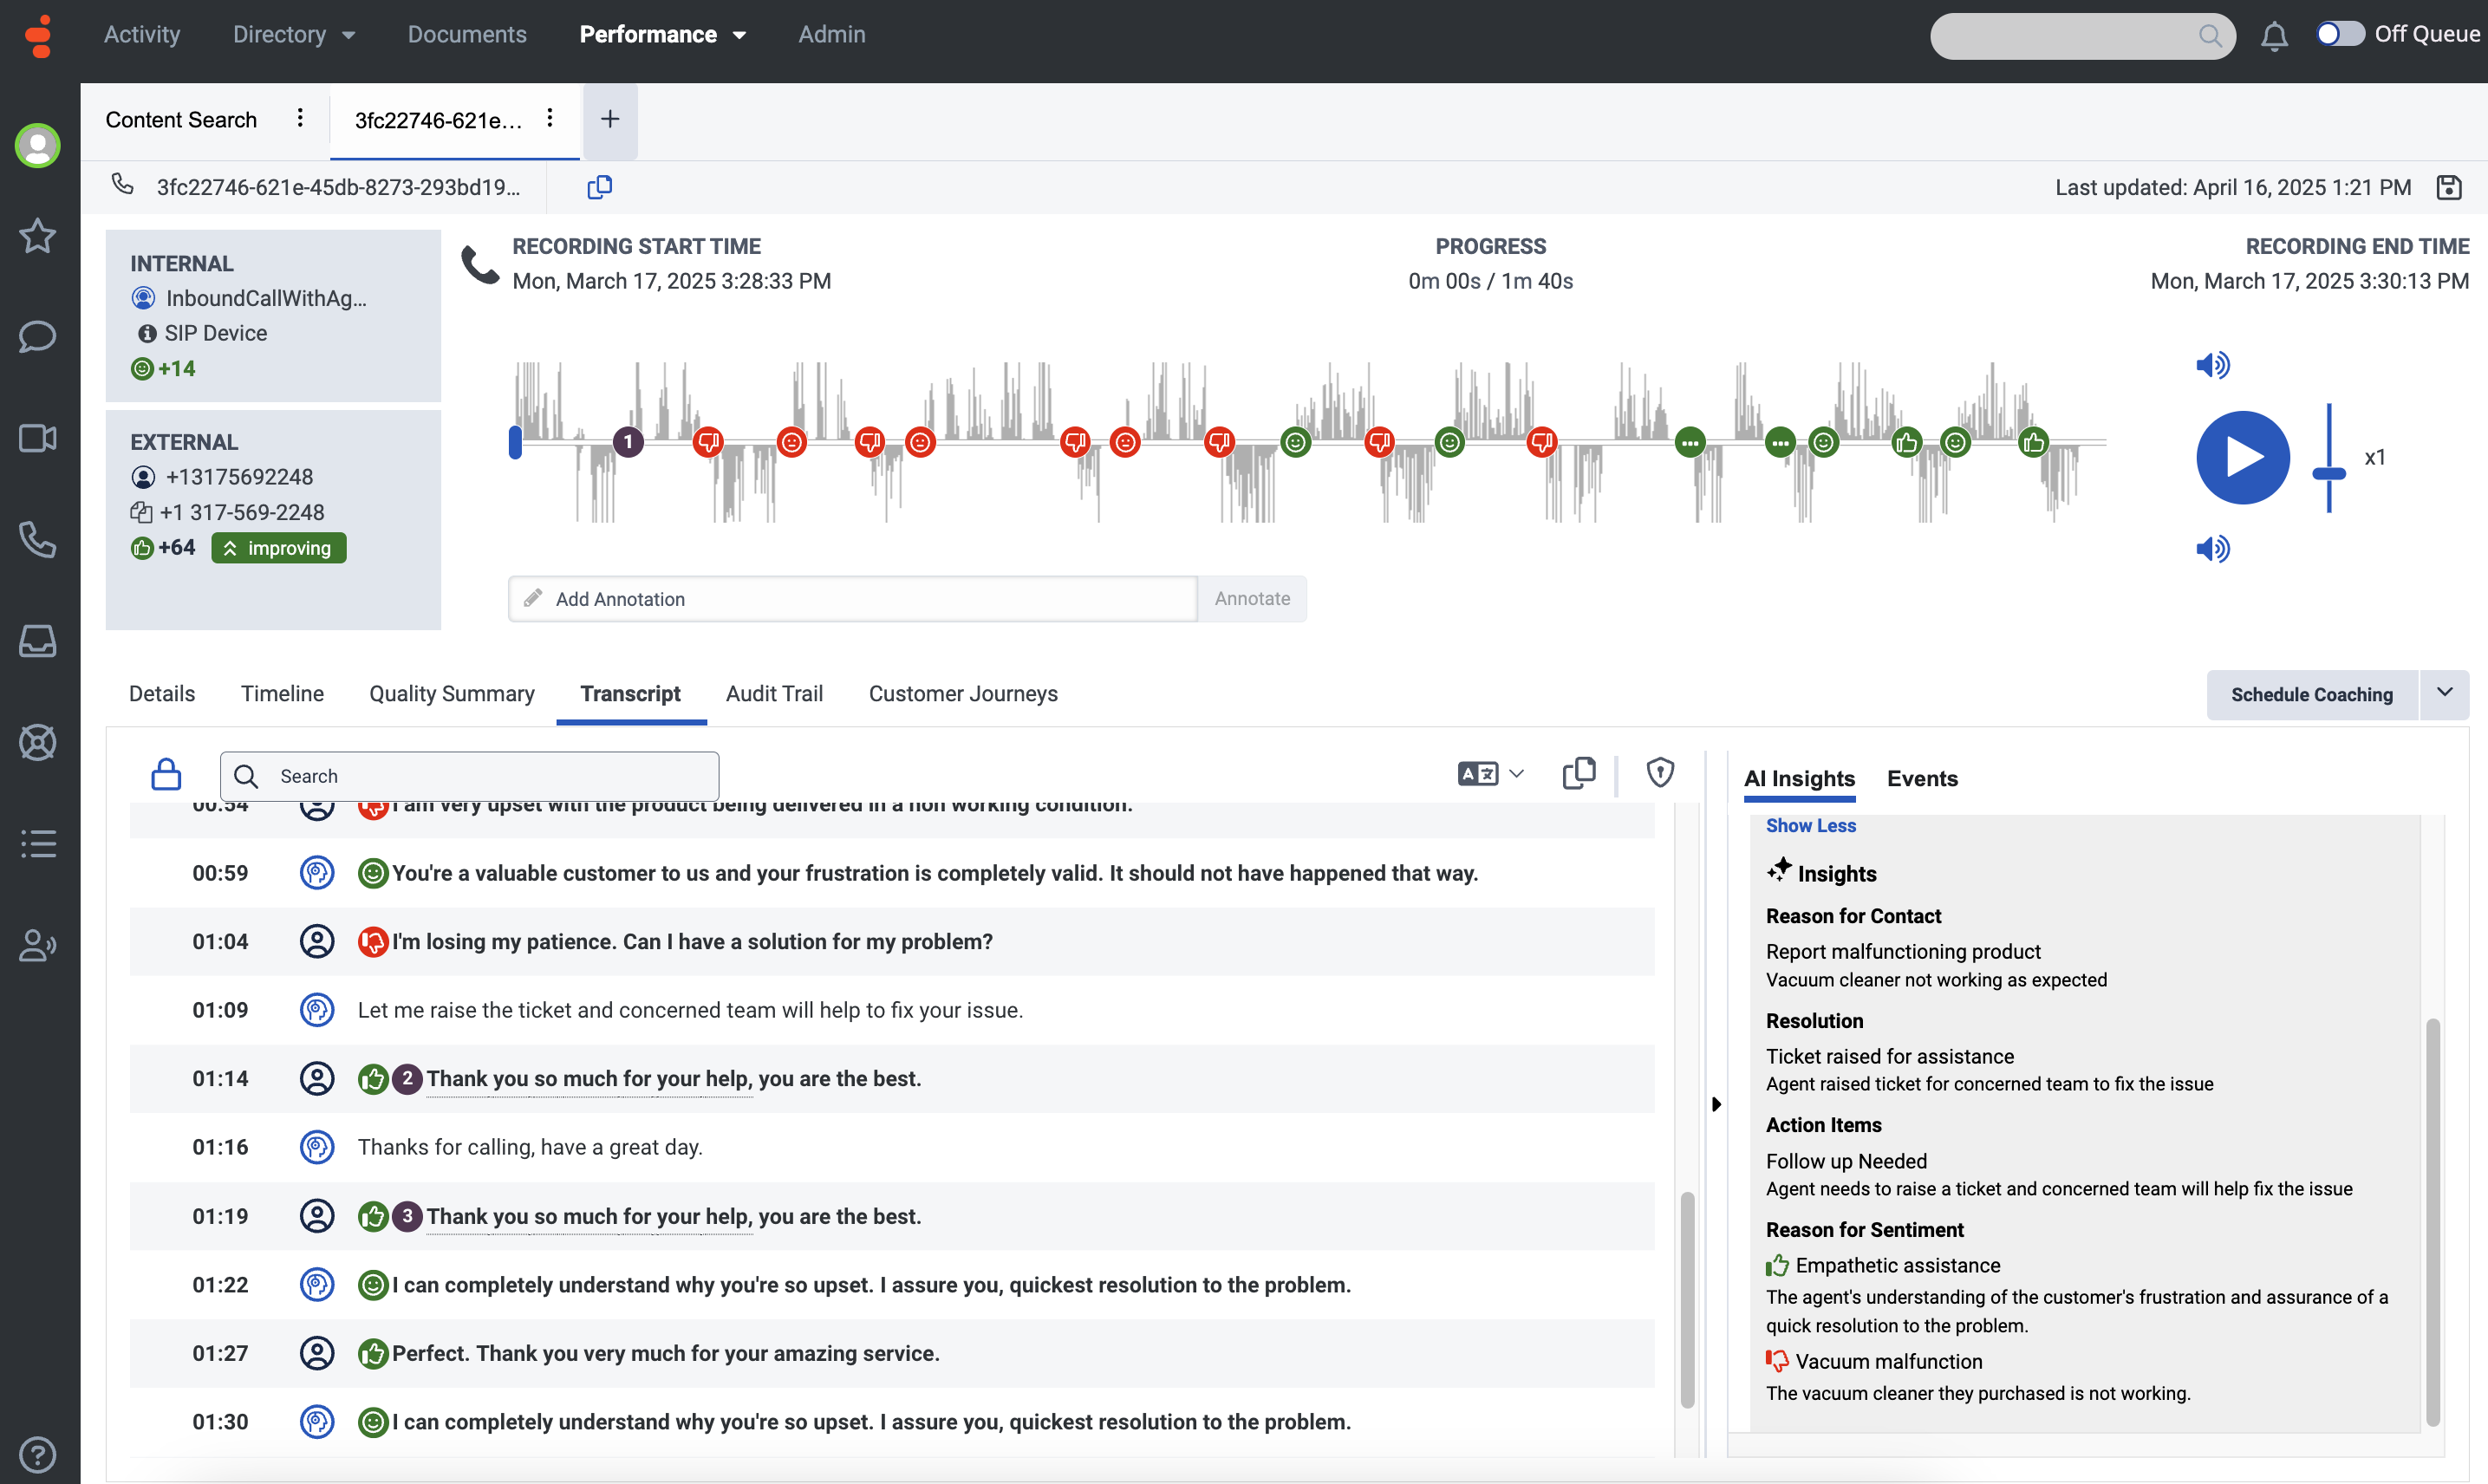
AI Insights equips contact center supervisors with a clear, structured view of each customer interaction, without the need to manually sift through transcripts or recordings. By automatically highlighting key elements of every conversation, it enables faster, more informed decision-making.
AI Insights delivers value through four core components:
- Reason for contact – AI automatically identifies the customer’s primary reason for reaching out (for example, billing inquiries, technical support, cancellations, or other concerns). Each interaction is tagged with a single, high-level contact reason, giving supervisors actionable insight into emerging trends and customer needs across their teams.
- Resolution status – Interactions are assessed for their outcomes and categorized as Resolved, Unresolved, or Partially Resolved. This enables supervisors to quickly identify unresolved issues that may require follow-up, and to spot coaching opportunities where agents could improve resolution rates.
- Action items – To ensure nothing gets overlooked, AI highlights important follow-up tasks, like updating customer records, sending confirmations, or escalating cases. This helps streamline post-call workflows and keeps teams aligned on next steps.
- Reasons for sentiment – Rather than just assigning a sentiment label (positive, neutral, or negative), AI Insights pinpoints the specific factors influencing how customers feel. It surfaces up to three positive and three negative sentiment drivers per interaction (for example, such as long wait times, agent empathy, policy friction, or product dissatisfaction), giving supervisors direct context into customer experience and emotional tone.
By combining these insights, Genesys Cloud helps contact center leaders proactively manage quality, coach effectively, and drive better outcomes at scale.
AI Insights empowers contact center supervisors to take faster, smarter action with clear, actionable intelligence from every interaction. Instead of reviewing entire transcripts or call recordings, supervisors can:
- Understand customer intent and outcomes at a glance — Quickly see why customers reached out and whether their issues were resolved, partially resolved, or left open.
- Identify root causes of negative experiences — Pinpoint what’s driving dissatisfaction—such as long wait times, policy confusion, or product issues, without manually combing through calls.
- Provide more targeted coaching — Link customer sentiment to specific agent behaviors or interaction moments to deliver precise, effective feedback.
- Detect trends and friction points — Spot patterns across interactions, such as recurring complaints or process inefficiencies, that may be impacting customer satisfaction.
- Prioritize follow-ups intelligently — Focus on the cases that matter most by understanding both the outcome and the emotional drivers behind each interaction.