
Content Search view
To search for interactions with transcripts, click Performance > Workspace > Speech and Text Analytics > Content Search.
Available columns
To view the available columns, see the Content Search view section in the View available columns in performance views by category article.
To view the consolidated list of available columns in the performance views, see Consolidated view of available columns in performance views.
To view the list of available columns in the performance views by category, see View available columns in performance views by category.
Extra columns for export
The export file contains three extra columns: Interval Start, Interval End, and Interval Complete.
| Column | Description |
|---|---|
| Interval Start |
The start of the selected interval. For example, an interval of January 1–January 31 has the interval start of January 1. |
| Interval End |
The end of the selected interval. For example, an interval of January 1–January 31 has the interval end of January 31. |
| Interval Complete |
Boolean true or false value. The Boolean value is true if the entire interval is in the past. The Boolean value is false if the current date is within the intervals. For example: If today’s date is February 15, the Boolean value is true for the interval of January 1–January 31. If today’s date is February 15, and the interval is February 1–February 28, the Boolean value is false. |
Set a default time zone in the workspace
You can set the default time zone in the analytics workspace before viewing any analytics view.
To set the default time zone in the workspace, follow these steps:
- Click Performance > Workspace.
- On the left side, from the Time zone drop-down menu, select the required time zone as the default time zone for the analytics workspace.
The Content Search view displays interactions that contain a transcript of the conversation between external (customer) and internal (IVR, ACD, agent, conference, or voicemail) participants based on the filter criteria. Use this view to search for interactions that contain specific words that are included or not included in a transcript. You can also use this view to filter interactions with transcripts by more interaction details. You can see only one row for each unique conversation ID.
Click the image to enlarge.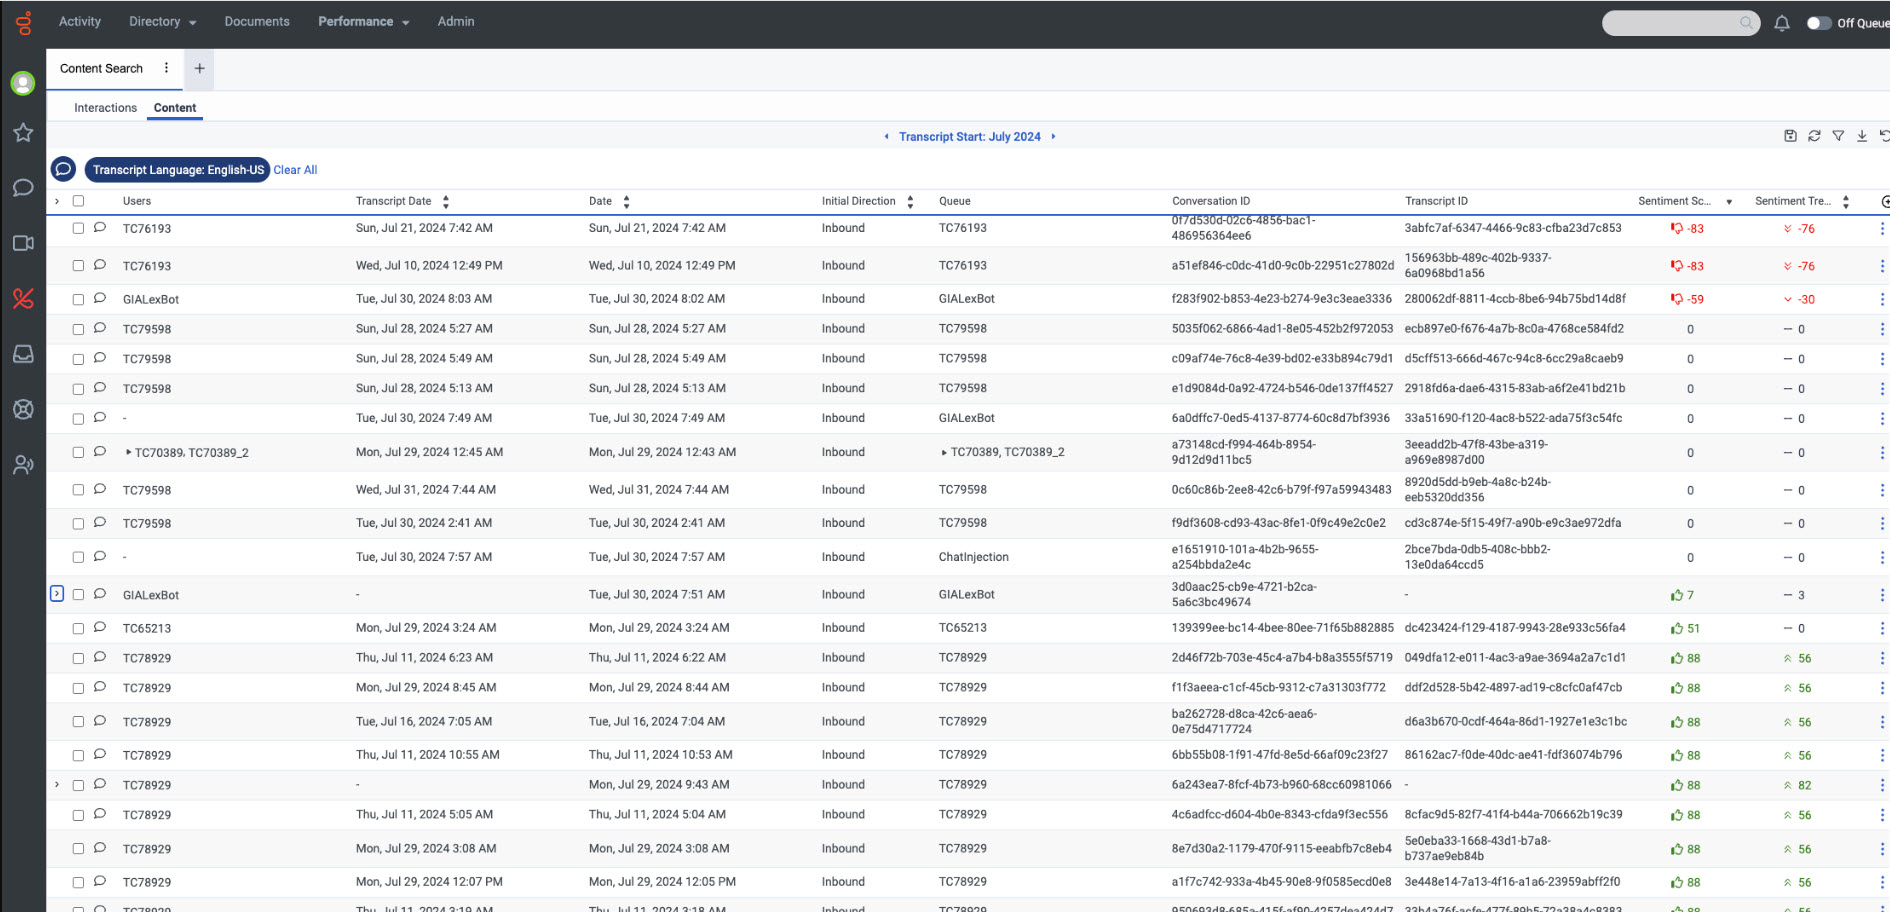
If multiple transcripts are mapped to a single conversation ID, the related transcript details nest under the main row as subrows.
Click the image to enlarge.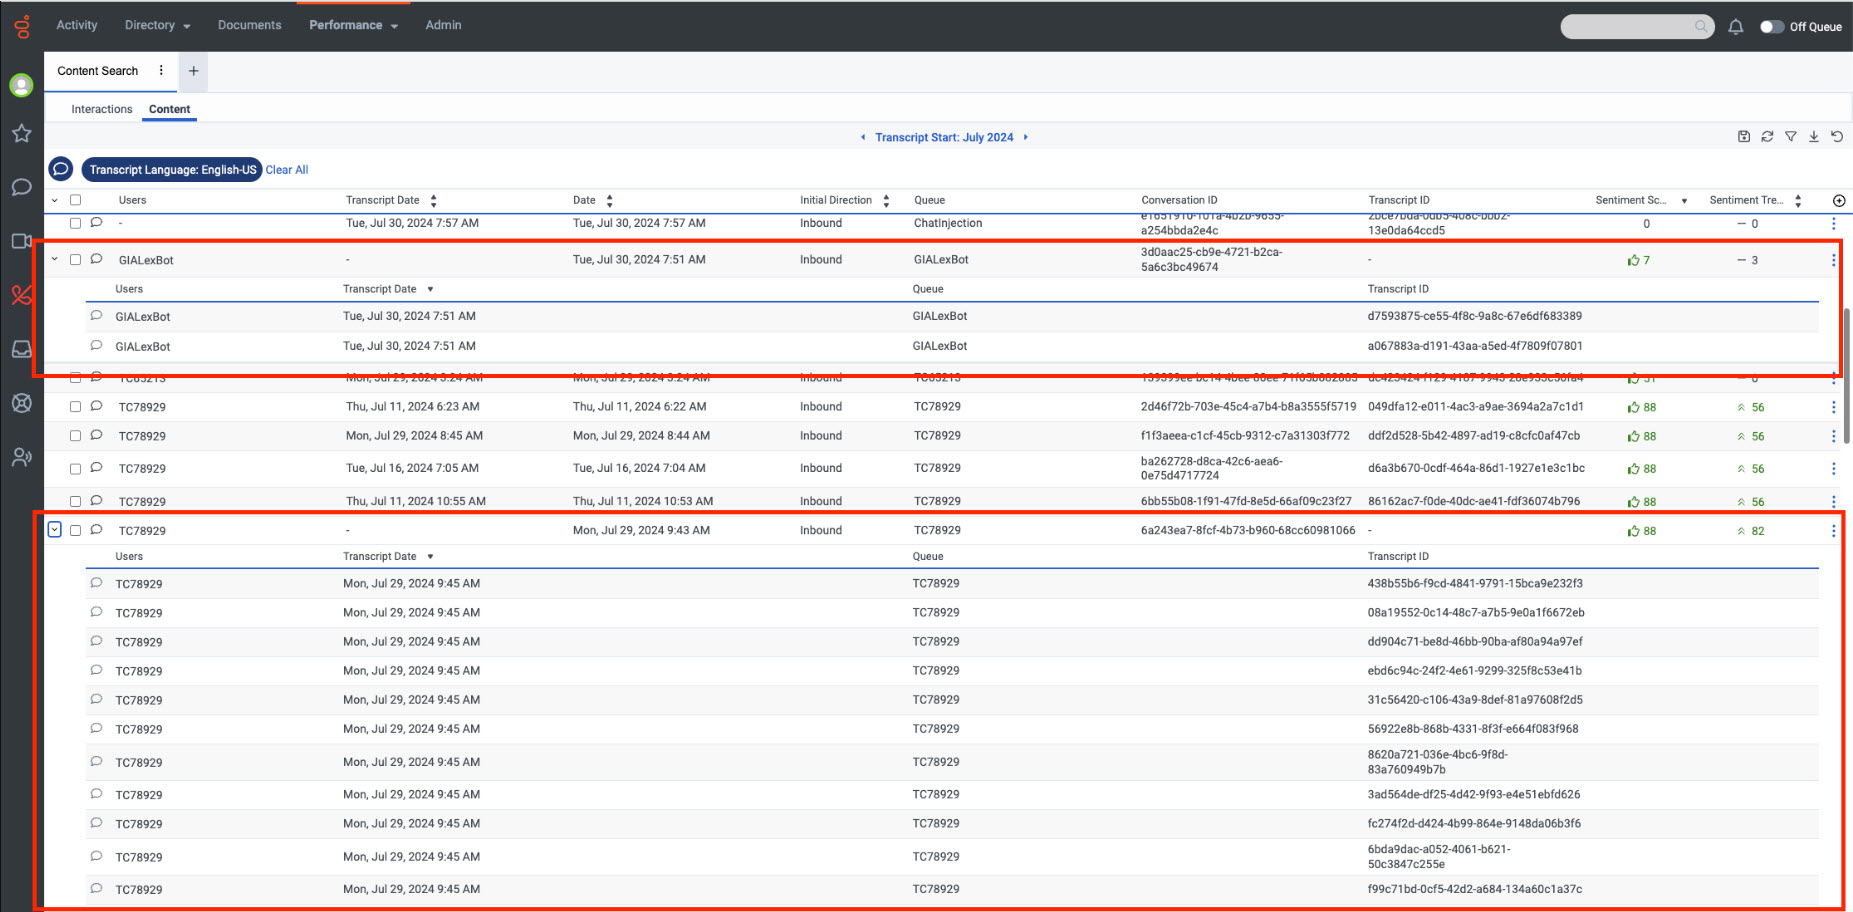
- Depending on your configuration, digital transcripts are tagged with UNKNOWN as the language. If you do not see the expected search results and you use a specific transcript language, set the transcript to UNKNOWN and retry the search.
- A conversation and a transcript are not on a 1:1 correlation. A conversation can have multiple transcripts within it. For example, for digital conversations, each message is generated as a separate transcript.
- For the FedRAMP region, the content search uses the dialect the user has selected in organization settings as the default dialect for search.
- For async interactions, such as email and messaging, it takes up to 72 hours for Speech and Text Analytics metrics, such as topics and sentiment, to update in the reporting aggregate views.
- The number of interactions in the Content Search view is greater than the number of interactions in the Topic Trends Summary view. This difference occurs because the number of interactions in the Topic Trends Summary view equals the number of completed interactions, and the number of topics in the Content Search view equals the number of interactions that started during the selected date range. Also, the data shown in the Topic Trends Summary view is based on the number of interactions, and the data shown in the Content Search view is based on the number of transcripts.
To view more information about an interaction, click the interaction and view the interaction detail page in a new tab or select the required interaction and click View Interactions. You can jump between the interaction tabs to see the interaction list view and the interaction detail view. The title of the interaction detail view tab shows the truncated Interaction ID and has a fixed width as all other tabs in the workspace. When you hover over the tab name, a tooltip with the untruncated Interaction ID appears.
- When switching between the interaction detail view tabs, the recording playback stops working.
- When switching between the interaction detail view tabs, the following features on the interaction detail view tab continue to work as expected:
- Monitor/coach/Barge a live call
- Interaction download
- Quality management/evaluations
- Schedule Coaching
- Audit Trail tab
- The number of interaction detail view tabs that can be opened at a time is limited to a maximum of 20 tabs. If the user opens a new tab by clicking an interaction while 20 tabs are open, the new interaction detail tab opens in the existing tab.
Click More in the title of the interaction detail view tab and choose the required task to perform any of the following:
| Columns | Description |
|---|---|
| Reload | Reloads the current tab alone. |
| Duplicate | Creates a duplicate copy of the current tab. |
| Close | Closes the current tab alone. |
| Close all tabs | Closes all the open tabs. |
| Close other tabs | Leaves the current tab open and closes all the other open tabs. |
To rename the title of the interaction detail view tab:
- Click Save View on the right side. The Save view pane appears.
- Click the Save To drop-down list and perform one of the following steps:
- To save the view as a new view, click New and in the View Name field, enter a name for the view.
- To overwrite the existing view’s current settings, click the existing view’s name.
- Click Save. The title of the interaction detail view tab changes.
Protect or release recordings
To retain recordings for potential litigation, you can protect interaction recordings from deletion when complying with legal directives.
To protect recordings, follow these steps:
- From the Interactions list, select the interactions that you want to protect.
- Click Protect Recordings. The selected interactions are protected from deletion. For more information, see Protect recordings from deletion for a legal hold directive.
To release recordings, follow these steps:
- From the Interactions list, select the interactions that you want to protect.
- Click Release Recordings. The selected interactions are protected from deletion. For more information, see Protect recordings from deletion for a legal hold directive.
You can copy an interaction’s Conversation ID to the clipboard and use it to filter interactions or share it with others including Customer Care.
Here's how to copy the Conversation ID to the clipboard.
- In an interaction's row, click More .
- Click Copy Conversation ID.

To add multiple interactions to the filters, select the required interactions and click Add to filters.
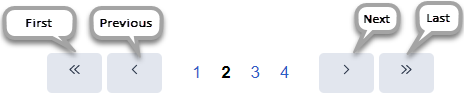
To navigate through the pages, use the Previous ![]() , Next
, Next ![]() , First
, First ![]() , and Last
, and Last ![]() icons on the pagination control. To jump multiple pages at a time, click the First
icons on the pagination control. To jump multiple pages at a time, click the First ![]() and Last
and Last ![]() icons.
icons.
To save the view with your filter and column settings, click Save .
To export the data in the view, click Export . Currently, only historical data, typically > one day old, is exported due to the source and volume of interaction data. When there is a difference between what is shown in the view and what is exported, you receive a partial result indication. The export file shows the partial result date and time including the most recent available transaction.
This view does not update as new interactions occur. To see new interactions, click Refresh .
Customize the view
To show only certain data, customize the Content Search view. For example, you can choose to show only specific columns or filter to see certain types of interactions. Your customizations remain in effect even if you leave and return to the view. You can also save your filter and column settings as a saved view to switch quickly between different data of interest in the same view.
To show or hide columns:
- Click the Pick columns icon on the right side. The Add/Remove Column pane appears.
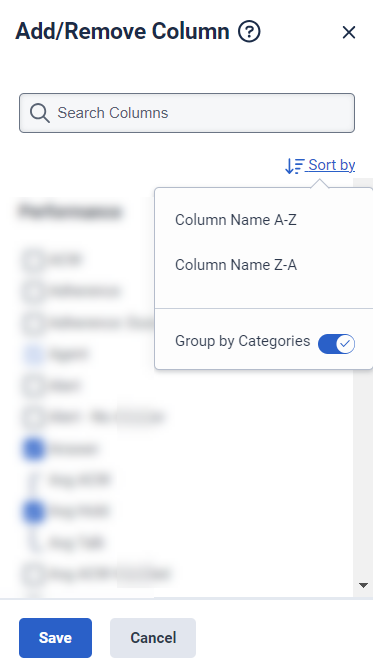
- (Optional) To sort the columns in ascending or alphabetical order, click Sort by > Column Name A-Z.
- (Optional) To sort the columns in descending or reverse alphabetical order, click Sort by > Column Name Z-A.
- (Optional) To categorize or uncategorize the columns, click Sort by and enable or disable the Group by Categories toggle. Click the image to enlarge.
- Search or scroll to select the columns you want to view. Note: You can also use keyboard navigation to choose the columns.
- Click Save. The selected columns appear on the screen. Note: The column selections appear only after saving the changes and do not apply to the table immediately.
To rearrange the columns, click a column header and drag it.
To reset a view to default column settings, click Reset view to defaults ![]() .
.
You can select up to 20 columns.
For more information about the metrics shown in the columns, see the Available Columns section in this article.
Reconnect to a closed email
You can reconnect to a closed email from the Content Search view page.
To reconnect to a closed email interaction:
- Click Performance > Workspace > Speech and Text Analytics > Content Search.
- Select the required interaction to reconnect to the closed email.
- Click the More menu corresponding to the required interaction.
- Click the Reconnect conversation icon. The interaction is routed to the conversation roster of the agent reconnecting the closed email. You can reply to it as you do with any other open email interaction.
For more information about replying to an email, see Reply to or forward an email message interaction.
- You cannot reply to or reconnect an expired conversation. Expired conversations include the following:
- Conversations that have been inactive for 30 days or more.
- Conversations for which the threading time has expired. For more information, see Configure organization-level email threading timeline
- Conversations in organizations where threading is disabled.
- You cannot reconnect to a conversation that is in a live or connected state. You can only reconnect disconnected conversations.
- When you reconnect a conversation and reply to its email, the conversation timeline displays a new segment in which the participant appears as user.
- When you reconnect and reply to an email, Genesys Cloud considers the reply to be outbound.
You can sort data to locate the specific information needed quickly.
To sort data by a specific column, click the column you want to sort by or click the sort ascending or descending button next to the specific column name. Currently, the sorting functionality is available only for the following columns:
- Date
- Transcript Date
- Sentiment Score
- Sentiment Trend
- Initial Direction
- Conversation Duration
For more information about the metrics shown in the columns, see the Available Columns section in this article.
- The custom date range option in this view has a maximum length of 31 days.
- When the interactions start, the date range filter applies. Current interactions that started before the date range do not appear in the interactions list.
- If you filter for a date and go back more than six-quarters (558 days), expect the performance to be slow when looking for data past that duration.
To customize analytics views, use the date filter.
To filter metrics by date or configure a custom date range, use presets.
To use a preset to filter metrics, complete the following steps:
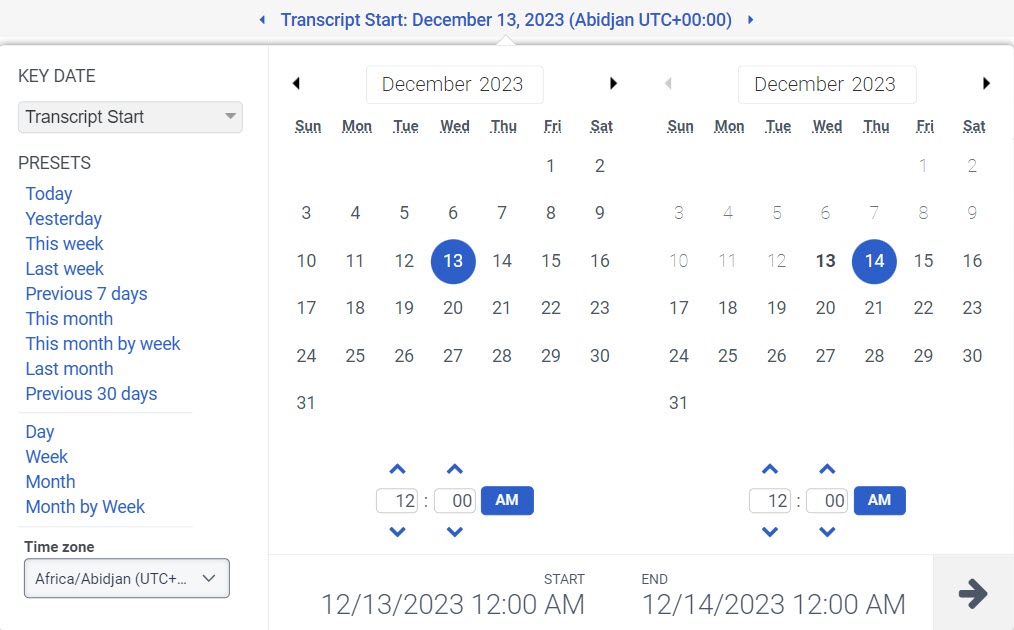
- Click the date to display the date filter.
- Under KEY DATE select Transcript Start or Conversation Start.
- In the Presets list, select a preset date option.
Date presets
| Presets | Description |
|---|---|
|
Transcript Start |
Sorts the search results according to when the transcript begins. |
|
Conversation Start |
Sorts the search results according to when the conversation begins. |
| Today | Shows data for the time period that includes the current interval. |
| Yesterday | Shows data for the previous day. |
| This week | Shows data for a Sunday through Saturday time period. |
| Last week | Shows data for the previous week, Sunday through Saturday. |
| Previous 7 days | Shows data for the previous seven days. |
| This month | Shows data for the current month, with no extra days. |
| This month by week | Shows data for the current calendar month starting on Sunday and ending on Saturday, including extra days if the month does not start on Sunday or end on Saturday. |
| Last month | Shows data for the previous calendar month with no extra days. |
| Previous 30 days | Shows data for the previous 30 days. |
| Day | Shows data for a single 24-hour day. |
| Week | Shows data for a Sunday through Saturday time period. |
| Month | Shows data for the exact month with no extra days. If the current month is selected, you will see the data up to the current date. |
| Month by Week | Shows data for a calendar month starting on Sunday and ending on Saturday, including extra days if the month does not start on Sunday or end on Saturday. |
To use a custom date range to filter metrics, complete the following steps:
- Click the date to display the date filter.
- Select a start date and an end date on the calendar, and click the filter arrow .
To view data for a different time period using the same date presets, click the arrows on either side of the date display. ![]()
For example, to view data for the previous day, click the Day preset, and then click the arrow on the left side of the date.
To view data for a different time zone using the same date presets, from the Time zone drop-down menu, select the required time zone. You can create and save reports with the same selected time zone.
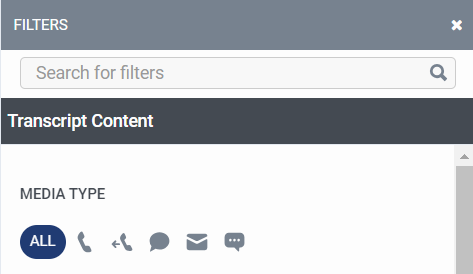
To filter by the transcript content:
- Click Toggle filters panel .
- Click Transcript Content.
- Search or scroll to select the filter you want to use.
Content search filters
| Filter | Description |
|---|---|
| Media Type |
|
| Transcript Dialect |
Filter interactions for transcripts in the selected language. This filter is a default filter that cannot be cleared. The transcript languages currently supported are English-US, Spanish-US, English-AU, English-UK, English-ZA, Spanish-ES, English-IN, German-DE, French-FR, French-CA, Portuguese-BR, Italian-IT, Portuguese-PT, Polish-PL, Dutch-NL, Korean-KR, Japanese-JP, Arabic-SA, Arabic-AE, Arabic-IL, Arabic-BH, Arabic-EG, Arabic-TN, Arabic-WW, English-IE, English-HK, English-NZ, English-SG, German-CH, Swedish-SE, Danish-DK, Finnish-FI, Norwegian Bokmal-NO, Hebrew-IL, and Unknown Dialect. |
| Detected Topic |
Choose one of the following:
For more information about the out-of-the-box topics, see Out-of-the-box topics. You can add more topics that can be detected. Select the preferred topics and filter the data based on the selected topics. By default, the Includes option is enabled. Select single or multiple topics in the same level and view the filtered results. The topics in this level are OR’d together. Use the +AND with topics option to add another level of topics that must be AND’d together. This option allows you to perform layering analysis on the interactions. |
| Words or Phrases |
Displays interactions that contain specific words in a transcript. Filter for specific words that are an Exact match, Similar to, or Not similar to. Filter for multiple words by entering more words and searching again. Enter the word or words that you want to find in the search field. You can select the preferred words or phrases and filter the data based on the selected words or phrases. By default, the Exact match option is enabled. You can select single or multiple words or phrases in the same level and view the filtered results. The words in this level are OR’d together. You can use the +AND with words or phrases option to add another level of words or phrases that must be AND’d together. This option allows you to perform layering analysis on the interactions. Notes: You can search for words or phrases in transcripts for up to 60 days from the date of the interaction or search for topics and sentiment scores for up to 1.5 years from the date of the interaction. As the date range selector in the UI is still limited to 30 days, you need to review your search results 30 days at a time.
|
| Participant |
Displays the interactions that contain the specific words in a transcript. Choose one of the following:
Note: The Participant filter requires a transcript word or phrase value.
|
| Sentiment Score |
Filter interactions by the customer’s overall sentiment from -100 to +100. This score weighs all positive and negative markers throughout the interaction. To highlight the customer parting experience with the contact center, more weight is awarded to events that took place toward the end of the interaction. |
| Empathy Score |
Filter interactions by the agent’s overall empathy score from -100 to +100. This score gauges an agent’s level of empathy and emotional intelligence during customer interactions. This score reflects the agent’s ability to understand and relate to the customer’s emotions and concerns. For more information about agent empathy analysis, see About agent empathy analysis. |
| Sentiment Trend |
Filter interactions by the customer’s overall sentiment from -100 to +100. This score weighs all positive and negative markers throughout the interaction. To highlight the customer parting experience with the contact center, more weight is awarded to events that took place toward the end of the interaction. |
| Transcript Duration |
Filter interactions by the transcript duration that is above or below or within the prescribed time in H:M:S. |
| Detected Category |
Filter interactions for transcripts in the selected category. You can add more categories to detect. Select the preferred categories and filter the data based on the selected categories. When you select both the detected category and another option to filter the data, the outcome is the result of an AND operation performed on both filters. For example, if you select Category 1 and Topic A to filter the data, then the filtered result is the match criteria of both Category 1 and Topic A. |
| Program |
Filter interactions for transcripts in the selected program. |
You can search for interactions that contain either PCI data, PII data, or both.
To filter by sensitive data:
- Click Toggle filters panel .
- Click Sensitive Data.
- Select the required filter that you want to use.
- Contains PCI Data (Yes) – Search for interactions that contain PCI data.
- Contains PCI Data (No) – Search for interactions that do not contain PCI data.
- Contains PII Data (Yes) – Search for interactions that contain PII data.
- Contains PII Data (No) – Search for interactions that do not contain PII data.
To filter by information about the interaction:
- Click Toggle filters panel .
- Click Interactions.
- Select the required filter that you want to use.
Interaction filters
| Filter | Description |
|---|---|
| User | Displays information associated with the selected users. Filter for multiple users at one time by entering other users and searching again. To see and select inactive users in the User filter search, select Include inactive users. To see and select deleted users in the User filter search, select Include deleted users. |
| Queue | Displays interactions associated with the selected queues. |
| Flows | Displays interactions associated with the selected IVR flows. |
| Division |
Filters interactions for a specific Division. See About access control. This filter is a filter default that cannot be cleared. |
| Initial Direction | Displays information about interactions with the selected initial direction. |
| ANI | Displays interactions with the selected ANIs.
|
| DNIS | Displays information for interactions with the selected original DNIS number. This DNIS number was dialed at the beginning of the interaction.
|
|
From |
Displays information for interactions sent from the selected phone number or email addresses.
|
|
To |
Displays information for interactions sent to the selected phone number or email address.
|
|
Total Handle |
Filter interactions by the total handle time that is above or below or within the prescribed time in H:M:S. |
|
Conversation Duration |
Filter interactions by the conversation duration that is above or below or within the prescribed time in H:M:S. |
|
Conversation ID |
Filters for interactions matching the specific conversation ID. Like the other interaction filters, this filter returns interactions that happened within the specified date range filter. The search includes the Conversation ID when the user searches for the content. |
|
Transcript ID |
Filter interactions that match the specific transcript ID. |
|
External Tag |
Filter interactions that match the specific external tag. |
|
Wrap-up |
Filter interactions that match the specific wrap-up code. |
To filter interactions by acoustic metrics:
- Click Toggle filters panel .
- Click Acoustic Metrics.
- Select the required filter that you want to use.
Acoustic Metrics filters
| Filter | Description |
|---|---|
| Total Customer Talk |
Filter interactions by the total customer talk time that is above or below or within the prescribed time in H:M:S. |
| Total Agent Talk | Filter interactions by the total agent talk time that is above or below or within the prescribed time in H:M:S. |
| Total Overtalk | Filter interactions by the total overtalk time that is above or below or within the prescribed time in H:M:S. |
| Total Silence | Filter interactions by the total silence time that is above or below or within the prescribed time in H:M:S. |
| Total ACD | Filter interactions by the total ACD time that is above or below or within the prescribed time in H:M:S. |
| Total IVR | Filter interactions by the total IVR time that is above or below or within the prescribed time in H:M:S. |
| Total Hold/Music | Filter interactions by the total hold/music time that is above or below or within the prescribed time in H:M:S. |
| Customer Talk% | Filter interactions by the customer talk percentage ranging from 0 to +100. |
| Agent Talk % | Filter interactions by the agent talk percentage ranging from 0 to +100. |
| Overtalk % | Filter interactions by the overtalk percentage ranging from 0 to +100. |
| Overtalk Instances | Filter interactions by the overtalk instances ranging from 0 to 2. |
| Silence % | Filter interactions by the silence percentage ranging from 0 to +100. |
| ACD % | Filter interactions by the ACD percentage ranging from 0 to +100. |
| IVR % | Filter interactions by the IVR percentage ranging from 0 to +100. |
| Hold/Music % | Filter interactions by the hold/music percentage ranging from 0 to +100. |