
Social Listening Posts view
The following permissions:
- socialmedia > postDetail > All Permissions
- socialmedia > postDetail > View (view social listening posts section under Analytics Workspace)
- socialmedia > message > Escalate (manually escalate an ingested post to an agent for response)
- Messaging > Integration > View (view the list of integrations that you created and manually escalate a post by selecting an integration)
- socialmedia > topic > View (view the social listening topics in the filters section)
The Social Listening Posts view provides a unified view of all public posts and comments captured through your configured data ingestion rules across different platforms, including Open Messaging, X (formerly Twitter), Instagram, Google Business Profile, and Facebook.
Navigation
To see social listening posts, click Performance > Workspace > Social > Social Listening Posts.
To see social listening posts, perform the following:
- Click Menu > Analytics > Analytics Workspace.
- In the Default section, search for Social Listening Posts and then click the view name to open it.
Set a default time zone in the workspace
You can set the default time zone in the analytics workspace before viewing any analytics view.
To set the default time zone in the workspace, follow these steps:
- Click Performance > Workspace.
- Click Menu > Analytics > Analytics Workspace.
- On the left side, from the Time zone drop-down menu, select the required time zone as the default time zone for the analytics workspace.
Social Post Insights and Metrics
This view provides the following key insights about each ingested post or comment:
Post Details
Each post displays the following basic information:
- Username: The account or user who created the post or comment.
- Timestamp: When the post or comment was published.
Note: Some platforms do not always provide these details. These details appear only when available.
Sentiment
An emoji indicates the sentiment of each post — showing whether it’s positive, negative, or neutral. This sentiment is automatically detected using our AI-powered sentiment analysis models, helping you quickly gauge how people feel about your brand or topic.
Engagement Metrics
Engagement metrics show how people interact with social media posts, indicating the attention or interest a post receives. These insights help you measure audience engagement and identify posts that are performing well. These metrics include:
- Likes – Someone liked the post.
- Comments – Someone replied to or commented on the post.
- Shares – Someone shared the post with others.
- Views – Someone watched a video or viewed the post.
List of platforms and their engagement metrics:
| Platforms | Engagement metrics |
|---|---|
| X |
Supports engagement metrics, including likes, shares, and comments. |
|
|
|
|
|
Google Business Profile |
Does not support the likes engagement metrics. |
View Post
Each entry in the view includes a view post link. Click View Post to view the original post on its native social media platform.
View Review
Each entry in the view includes a view review link. Click View Review to view the original post on your Google Business Profile locations where the review has been added. The Google Business Profile supports only the reviews made on your Google Business Profile locations and does not support ratings.
View Information
Each entry in the view includes an information icon. Click View Review to view the information about the topic and the data ingestion rule used to retrieve this data.
Media
Media refers to the images and videos in the public posts. By default, media is blurred when our AI algorithms detect that the media is not safe for work. To view or hide the media, perform any of the following:
- To view the media, click Show content.
- To hide the media, click Blur content.
Manual post escalation
Administrators or supervisors with the necessary permissions can escalate a particular post to an agent for a response if it requires the agent’s attention. To manually escalate a post, perform the following:
- In the upper right corner of the required post to be escalated, click Escalate
 icon. The Integrations window opens.
Note: The integrations configured for that platform by the admin appear in the integrations list. If the admin has not added any integrations for a post, that post cannot be escalated. - Select the required integration from the drop-down menu. Upon successful escalation, a successful in-app notification appears.
Note: A social post can be escalated only once.
Data Coverage
This view allows you to monitor social media content based on specific data coverage rules for each platform.
| Platforms | Data Captured |
|---|---|
| X |
You can track all public posts and comments based on the data ingestion rules you have created. |
|
|
|
|
|
Google Business Profile |
|
Data Retention
All public social posts ingested into Genesys Cloud are stored for 60 days from the date they were collected. After 60 days, these posts are automatically removed from the system and will no longer be visible. For example, if a post was ingested on June 1, it will be automatically deleted after July 31.
If a post or comment has been escalated to an agent, it is not deleted after 60 days. Instead, it will be retained according to your organization’s retention policy. The escalations can be done by any of the following ways:
- Automatically, based on a configured escalation rule.
- Manually, when a user escalates a specific post or comment to an agent for a response.
Save view
To save the view with your filter and column settings, click Save .
Refresh view
This view updates automatically except when you use filters from the Filters pane. To see the most current data, click Refresh .
Customize the view
To show only certain data, customize the Social Listening Performance view using any combination of filters. For example, you can choose to show only certain filters to see certain types of data. You can also save your filter and column settings as a saved view to switch quickly between different data of interest in the same view.
To filter by information about the interaction, click Toggle filters panel , and then search or scroll to select the filter you want to use.
Interactions filters
| Filter | Description |
|---|---|
| Topic |
Choose the required topic from the list of topics created with different data ingestion rules. You can view all the deleted topics and data ingestion rules when no topic is selected. You cannot view all the deleted topics or data ingestion rules when applying a filter. |
| Posts |
Choose the required escalation type:
|
| Sentiment |
Choose the required sentiment type:
|
| Platform |
Choose the required platform:
|
| Country |
Choose the required country. |
| Language | Choose the required language from the list of supported languages. Note: As the language detection accuracy for smaller posts (fewer than five words) is low, Genesys Cloud skips the language detection algorithm for the smaller posts and marks the language as Unknown. |
| Words or Phrases |
Displays posts that contain specific words or phrases. Filter for specific words or phrases that include or exclude certain words or phrases. Select the word or words that you want. Filter for multiple words by entering more words and searching again. You can select the preferred words or phrases and filter the data based on the selected words or phrases. By default, the Includes option is enabled. You can select single or multiple words or phrases in the same level and view the filtered results. The words in this level are OR’d together. You can use the +AND with words or phrases option to add another level of words or phrases that must be AND’d together. This option allows you to perform layering analysis on the posts. |
| Content Type |
Save your filter settings for quick access later.
To customize analytics views, use the preset date ranges.
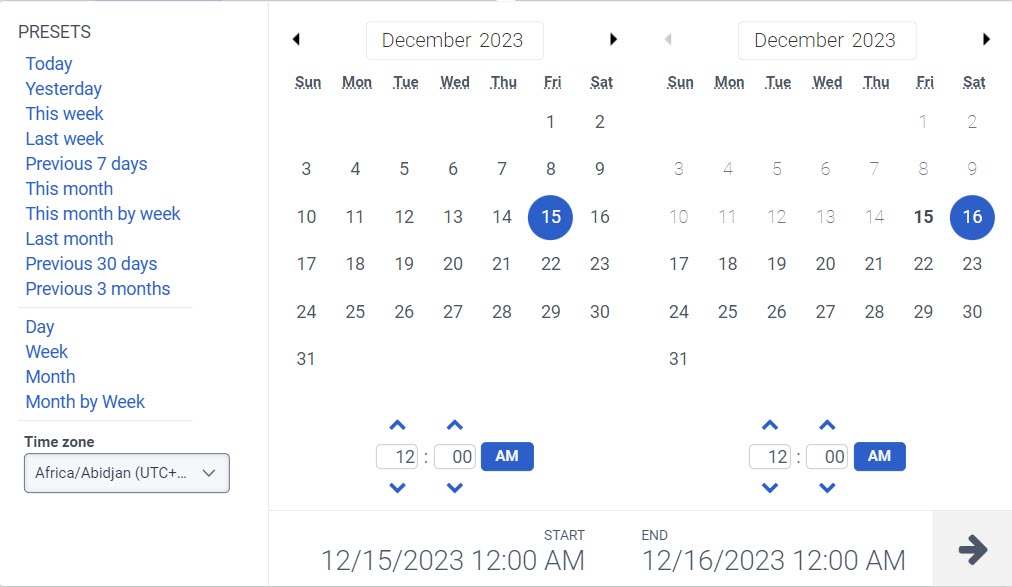
To filter metrics by date or configure a custom date range, use presets. When filtering metrics for this view, select any custom date range up to 6 weeks.
To use a preset to filter metrics, complete the following steps:
- To display the date filter, click the date.
- In the Presets list, select a preset date option.
Date presets
| Presets | Description |
|---|---|
| Today | Shows data for the current day. |
| Yesterday | Shows data for the previous day. |
| This week | Shows data for the current week, that is, Sunday through Saturday. |
| Last week | Shows data for the previous week, Sunday through Saturday. |
| Previous 7 days | Shows data for the previous seven days. |
| This month | Shows data for the current month, with no extra days. |
| This month by week | Shows data for the current calendar month starting on Sunday and ending on Saturday, including extra days if the month does not start on Sunday or end on Saturday. |
| Last month | Shows data for the previous calendar month with no extra days. |
| Previous 30 days | Shows data for the previous 30 days. |
| Previous 3 months | Shows data for the previous 3 months. For example, Nov 1, 2022 – Jan 31, 2023. |
| Day | Shows data for a single 24-hour day. |
| Week | Shows data for a Sunday through Saturday time period. |
| Month | Shows data for the exact month with no extra days. If the current month is selected, you can see the data up to the current date. |
| Month by Week | Shows data for a calendar month starting on Sunday and ending on Saturday, including extra days if the month does not start on Sunday or end on Saturday. |
- To use a custom date range to filter metrics, complete the following steps:
-
- Click the date to display the date filter.
- Select a start date and an end date on the calendar, and click the filter arrow .
- To view data for a different time period using the same date presets, click the arrows on either side of the date display. For example, to view data for the previous day, click the Day preset, and then click the arrow on the left side of the date.
To sort the social listening posts by date, in the upper left corner, choose any one of the required sorting types from the Newest first drop-down:
- Newest first (Default)Select this option to sort the social listening posts by the most current or newest date.
- Oldest firstSelect this option to sort the social listening posts by the oldest date.
- Due to Instagram’s privacy policies, user profile information, including usernames or profile pictures, is displayed only when the user directly interacts with your brand.
- If a user only comments on a public post or reel without sending a direct message, their profile details are not visible in this view.
- For the Open Messaging channel, post types are not available.
- Public data can be escalated only once. Repeat escalations are not allowed. If you attempt to escalate the same post or comment again, you’ll see an error message, or the escalate icon will appear disabled.