
Scheduled Exports view
Use the Scheduled Exports view to see the list of Performance view exports that are scheduled to run. From this list, you can also enable or disable, copy, rerun, edit, renew, and delete a scheduled export.
Available columns
To view the available columns, see the Scheduled Exports view section in the View available columns in performance views by category article.
To view the consolidated list of available columns in the performance views, see Consolidated view of available columns in performance views.
To view the list of available columns in the performance views by category, see View available columns in performance views by category.
To see the Scheduled Exports view, click Performance > Workspace > Others > Scheduled Exports.
To see the Scheduled Exports view, from a Performance view, click Export and in the Export pane, click Schedule > View existing export schedules. For more information, see Export view data.
Genesys Cloud sends daily email notifications to users with expired exports or exports expiring soon.
Customize the view
To show only certain columns and to manage your exports, customize the Scheduled Exports view.
To show or hide columns:
- Click the Pick columns icon on the right side. The Add/Remove Column pane appears.
- (Optional) To sort the columns in ascending or alphabetical order, click Sort by > Column Name A-Z.
- (Optional) To sort the columns in descending or reverse alphabetical order, click Sort by > Column Name Z-A.
- (Optional) To categorize or uncategorize the columns, click Sort by and enable or disable the Group by Categories toggle. Click the image to enlarge.
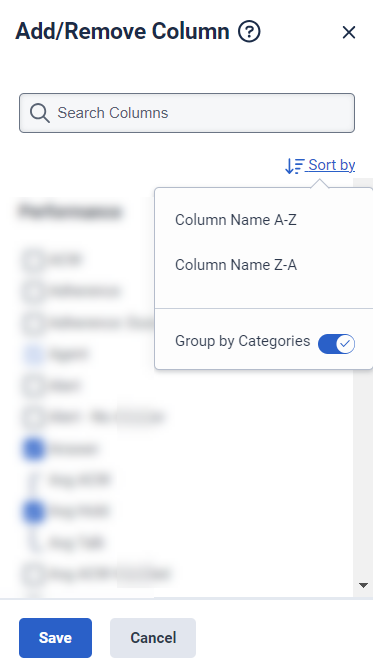
- Search or scroll to select the columns you want to view. Note: You can also use keyboard navigation to choose the columns.
- Click Save. The selected columns appear on the screen. Note: The column selections appear only after saving the changes and do not apply to the table immediately.
To rearrange the columns, click a column header and drag it.
To reset a view to default column settings, click Reset view to defaults ![]() .
.
You can select up to 20 columns.
For more information about the metrics shown in the columns, see the Available Columns section in this article.
This view does not update automatically. To see the most current data, click Refresh .
To reset a view to default column settings, click Reset view to defaults .
- In a scheduled export row, click More .
- Click Enable/disable schedule .
To copy the export static link URL to your clipboard:
- In a scheduled export row, click More .
- Click the copy link to copy the export URL to your clipboard.
You can refresh the data set before the next scheduled time and rerun the scheduled export.
To rerun a scheduled export:
- In a scheduled export row, click More .
- Click Run now .
You can now edit the scheduled timings of the scheduled exports and generate the static link for the scheduled exports.
To edit a scheduled export now:
- In a scheduled export row, click More .
- Click Edit Schedule . The Export Schedule pane opens.
- Choose a Time period.
- Interval breakdown exports only: Select a Granularity according to the selected time period.
- Select a Recurrence for the export to run. Note: The recurrence options vary based on the chosen time period. Choose the options for your selections, such as Run on hours, Minutes past the hour, Request Time, Run on Days, Day of week, Day of month, and Day of quarter. The day of the month is set to go up to 28 to ensure that the recurrence applies to all the months. Delivery time can vary depending on the amount of data requested and the number of concurrent exports the platform runs.
- (Optional) Toggle Generate static link to enable or disable the static link option to store the exported file in a centralized location. For more information, see Generate static link.
- Click Scheduled Export. The Scheduled Export successfully updates.
Scheduled exports can be active for a maximum of 100 days.
To reset the 100-day timer:
- In a scheduled export row, click More .
- Click Renew schedule .
- In a scheduled export row, click More .
- Click Delete schedule .
Limits
Consider these data export and view constraints:
- The maximum number of enabled schedules per user is 20, and it cannot be increased beyond 20. You can disable an existing scheduled export and create a new scheduled export when reaching the maximum number of enabled schedules.
- Genesys Cloud automatically deletes the exported file from your inbox 10 days after you create it.
- You can export up to 2,500 entities at a time in aggregate Performance views. Use primary filters to break down your export into separate export files. For example, you can filter the agents by Agent name, Role, Reports to, Location, Group, or Division.
- When you export via the View as group option in the aggregate detail views, you can export up to 100 Queue IDs or 300 User IDs. If you exceed these limits, a warning message appears, preventing the export. Consider reducing the number of queues or user IDs in your group to filter out the number of entities in your view when exporting to a file.
- You can export a maximum of 1,000,000 rows.
- Several columns cannot be included when exporting CSV files or PDF reports. For more information, see Available Columns in Agents Status Summary view and Agents Performance Summary view.
- The export displays time values in milliseconds, seconds, HH:MM:SS, and H:M:S. You can select the required time value and export the views.
- If a scheduled export fails two consecutive times, Genesys Cloud automatically disables the scheduled export. To reactivate the scheduled export, users must manually re-enable or recreate the export after resolving the issue.
- For more information about limits, see Genesys Developer Center.