
Navigate the time-off limits page
This article describes the areas of the administrator’s time-off limits page and how to customize the view.
Time-off limits definitions
The following table describes the areas of the time-off limits page.
| Area | Definition |
|---|---|
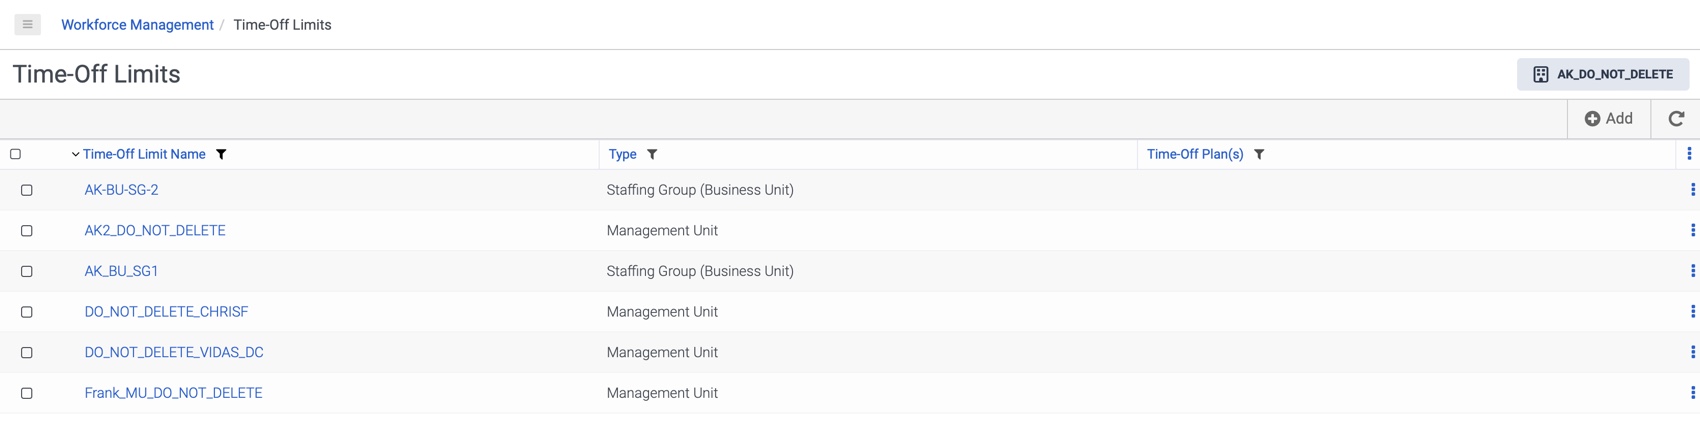
| Business Unit/Management Unit list |
Business Unit/Management unit for which to display time-off limits. |
| Add |
Opens the Add time-off limits page to create a new time-off limit. |
|
Refreshes the Time-Off Limits page. |
|
| Time-Off Limit Name | Name of the time-off limit created. |
| Type |
Management unit or staffing group to which the time-off limit is mapped. |
| Time-off Plan(s) |
Time-off plan or plans to which the time-off limit is associated. |
Click a time-off limit to further view the time-off details.
Time-off details page definitions
The following table describes the areas of the time-off details page for the selected time-off limit.
| Area | Definition |
|---|---|
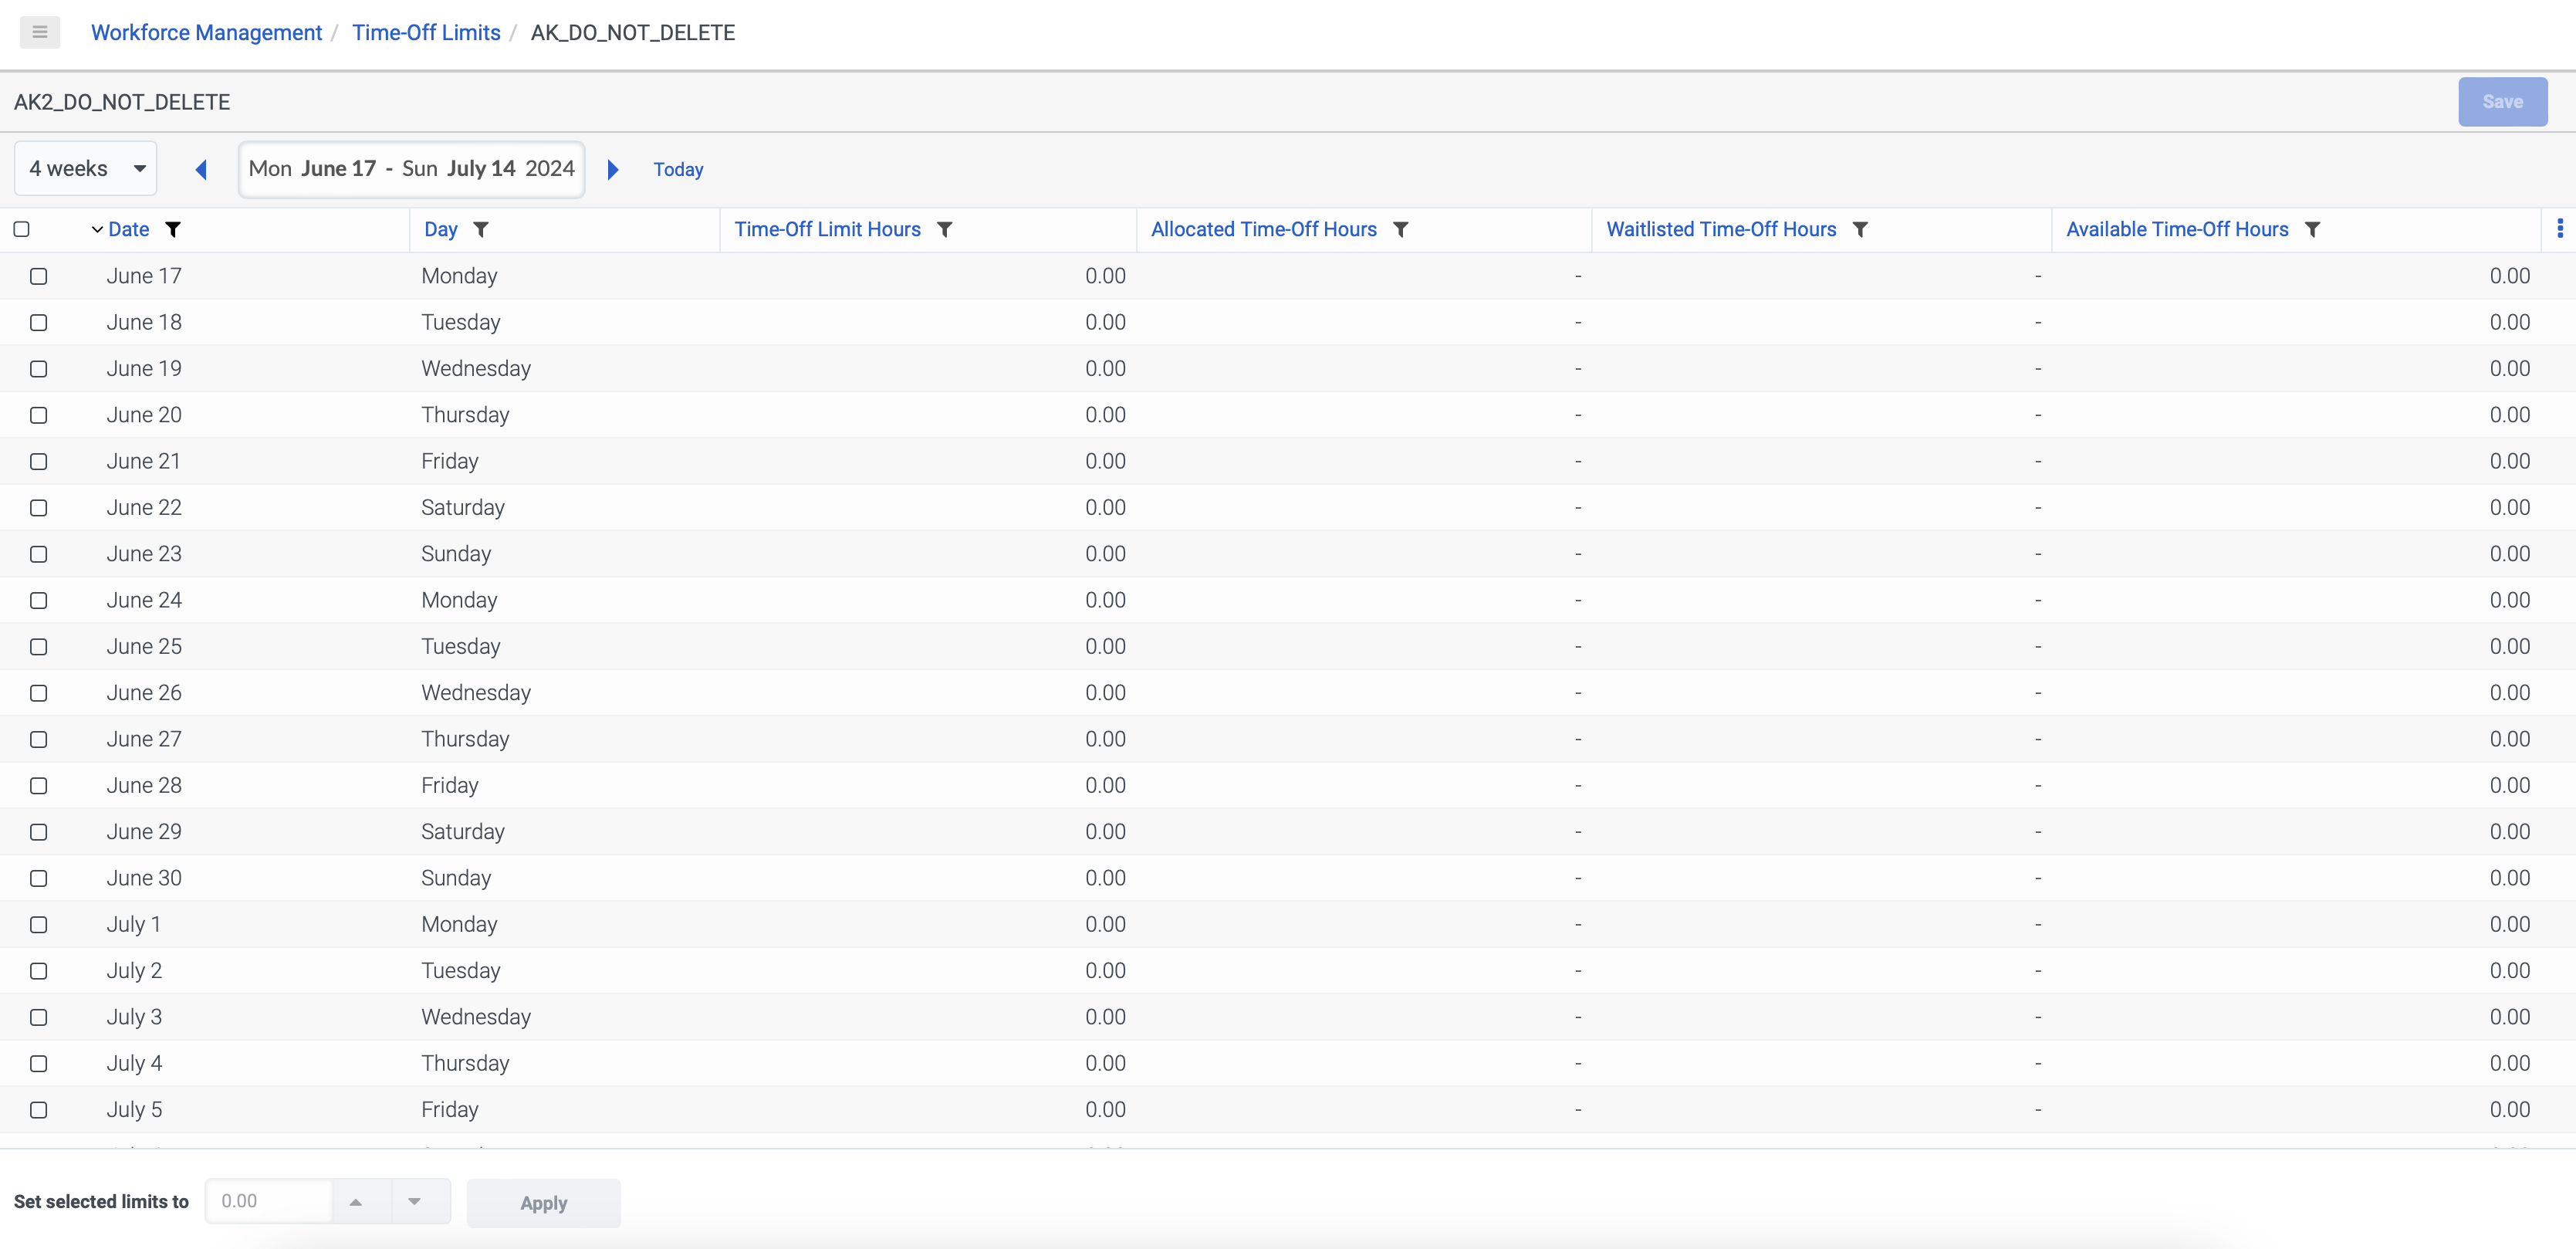
| Name |
Denotes the name of the management unit or staffing group for which the time-off details are displayed. |
| [Time period] |
Time period for which to view time-off limits:
|
| View by date range |
Date range for which to view time-off limits. The range measurement is based on the time period that you selected. |
| Date |
Date to which the time-off limit applies. |
| Day |
Day of the week to which the time-off limit applies. |
| Time-off limit hours |
Maximum time-off hours available for the corresponding date and the mapped management unit/staffing group. Notes:
|
| Allocated time-off hours |
Number of time-off hours currently approved for the corresponding date and the mapped management unit/staffing group. |
| Waitlisted time-off hours |
Number of time-off hours currently waitlisted for the corresponding date and the mapped management unit/staffing group. |
| Available time-off hours |
Remaining number of hours left within the time-off limit. |
Customize the view
The following options are available for customizing the view.
Sort the view
To sort time-off limits in ascending or descending order by a specific column, click the column heading. An arrow to the left of a column heading indicates that the view is sorted by that column.
Filter the view
To view time-off limits that match specific criteria only:
- Click the arrow next to the column heading by which to filter the view.
- Click the operator icon and then click the operator to use.
- In the filter box, type the value to use to filter the view. If you are filtering on a date column, you can click the date in the calendar.
Change column placement
To switch places between two columns:
- Click the arrows next to the column heading where you want another column to appear.
- Click Change Column and then click the name of the column to move to the current position. The columns switch places in the view.
Hide a column
To hide a column from the view, click the arrow next to the column heading and then click Hide Column.
Unhide a column
To unhide a column:
- Click the three dots in the column header row and then click Show/Hide Columns.
- In the Show/Hide Columns dialog box:
- To add all columns in the Available Columns list to the Visible Columns list, click Add All.
- To remove all columns in the Visible Columns list to the Available Columns list, click Remove All.
- To move an individual column from one list to the other, click the column name.
Reset view
To reset the view to its default state, click the three dots in the column header row and then click Reset Defaults.