
Edit a contact list entry
Display the properties of a contact list
- Click Admin.
- Under Outbound, click List Management.
- Click the Contact Lists tab.
- In the Name column, select the contact list name.
The contact list properties display.
Edit the properties of a contact list
- To rename the contact list, type a new name in the Contact List Name
- To change the division of the contact list, in the Division box, select a different division. The default is Home Division.
- To upload contacts from a delimiter-separated file, switch the Use File Specification Template toggle to Yes, and select a file specification template. For more information, see Create a File Specification template.
- Use Append additional contacts from a .csv or Excel file to import a contact list from a file. For more information, see Append records to a contact list.
- To trim whitespace in your contact list, switch the Trim leading/trailing whitespace toggle to Yes. The default is No.
Contact List Columns
- The Phone Columns box displays the contact list column names and type.
- If your contact list has a column that contains the time zone of a phone number, select that column from the Time Zone Column box. This step is a prerequisite for configuring contactable time sets. If you plan to use automatic time zone mapping, skip this step.
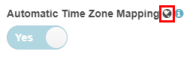
- If you configured the contact list for automatic time zone mapping, click the globe icon to preview the mapping results.
Advanced
- (Optional) Select an entry from the Attempt Control list. Attempt controls restrict the number of calling attempts to a contact record or phone number on a specific day or in total. Note: Attempt control is supported only for phone numbers, not email addresses. For more information, see How to limit contact attempts.

When your editing is complete, click Save.
Actions for a contact list
Use the following actions to export a contact list, clear the contacts from a contact list, or use the contact list editor to manage contacts in a contact list.
| Action | Description |
|---|---|
| Export | To export all contacts, click Export. |
| Clear List | To delete all contacts from the contact list, click Clear List. |
| Edit Contacts | To open the contact list editor, click Edit Contacts. For more information, see Edit contacts in a contact list. |