Configure authentication
Prerequisites
- Genesys Cloud OAuth client with the correct permissions
Certain features in Genesys Cloud for Salesforce require additional authentication. These features that require authentication include routing Salesforce emails, campaign management, and Omni-Channel sync of secondary statuses. After you configure authentication for one feature, you do not need to configure it for other features.
- In Salesforce, click Setup.
- Search for Installed Packages.
- Under Build, click Installed Packages.
- On the Installed Packages page, click Configure next to the Genesys Cloud for Salesforce package that you want to configure.
The managed package settings page appears. For more information, see Managed package settings.
- Click Shared Settings.
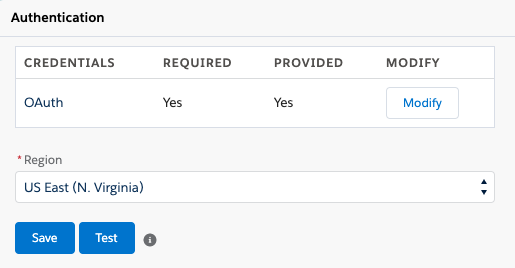
- In the Authentication section, click Modify.
- Enter the Client ID and Client Secret from your OAuth client in Genesys Cloud.
- Click Save.
- Select the Region of your Genesys Cloud organization.
If you change Region, click Save.
- Click Test.
Note: If you change Region and do not click Save, the Test button is unavailable.

You are now ready to configure Routing of Salesforce Emails, Campaign Management, or Omni-Channel sync for secondary statuses.
For more information, see Create an OAuth client, OAuth client permissions, Managed package settings, About Routing of Salesforce Emails, About Campaign Management, and Configure Omni-Channel sync.
For more information about the integration, see About Genesys Cloud for Salesforce.

