Series: Configure Agent Assist
Configure Google Cloud Platform permissions for your Agent Assist Google CCAI project
- Genesys Cloud discontinues development and support of the Google Agent Assist offer on January 24, 2024. Customers will still be able to use the feature until the end-of-life (EOL) date on August 31, 2024.
- Customers who wish to use Google CCAI Agent Assist with Genesys Cloud can utilize the replacement product, AI Connect for Google, which is being developed by the Genesys Innovations Team, and will be available on or before May 31, 2024. For more information, please reach out to ps_expertapps_sales@genesys.com.
- This documentation is for Agent Assist Google CCAI. This feature is limited to North America region. For Genesys Agent Assist, which is available worldwide, please refer to the Genesys Agent Assist documentation.
This article describes how to configure a Google Cloud Platform (GCP) project with the relevant permissions to integrate with Genesys Agent Assist Google CCAI.
Step 1: Copy your Agent Assist Google CCAI with Google Cloud integration service ID
This section describes how to copy the required service account ID in Genesys Cloud.
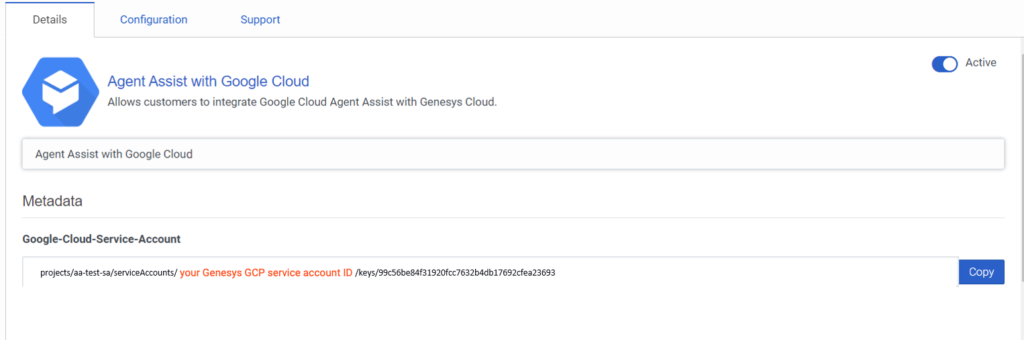
The installation of the Agent Assist Google CCAI for Google Cloud integration generates a new Genesys GCP service account. The service account ID appears as part of the text string on the Details tab under Google-Cloud-Service-Account.
Copy the text between serviceAccounts/ and /keys. Use the copied text for Step 2.
Click the image to enlarge.
Step 2: Give IAM permissions to the Genesys GCP service account
This section describes how to use the Google IAM console to give the required Dialog API permissions to your Genesys GCP service account.
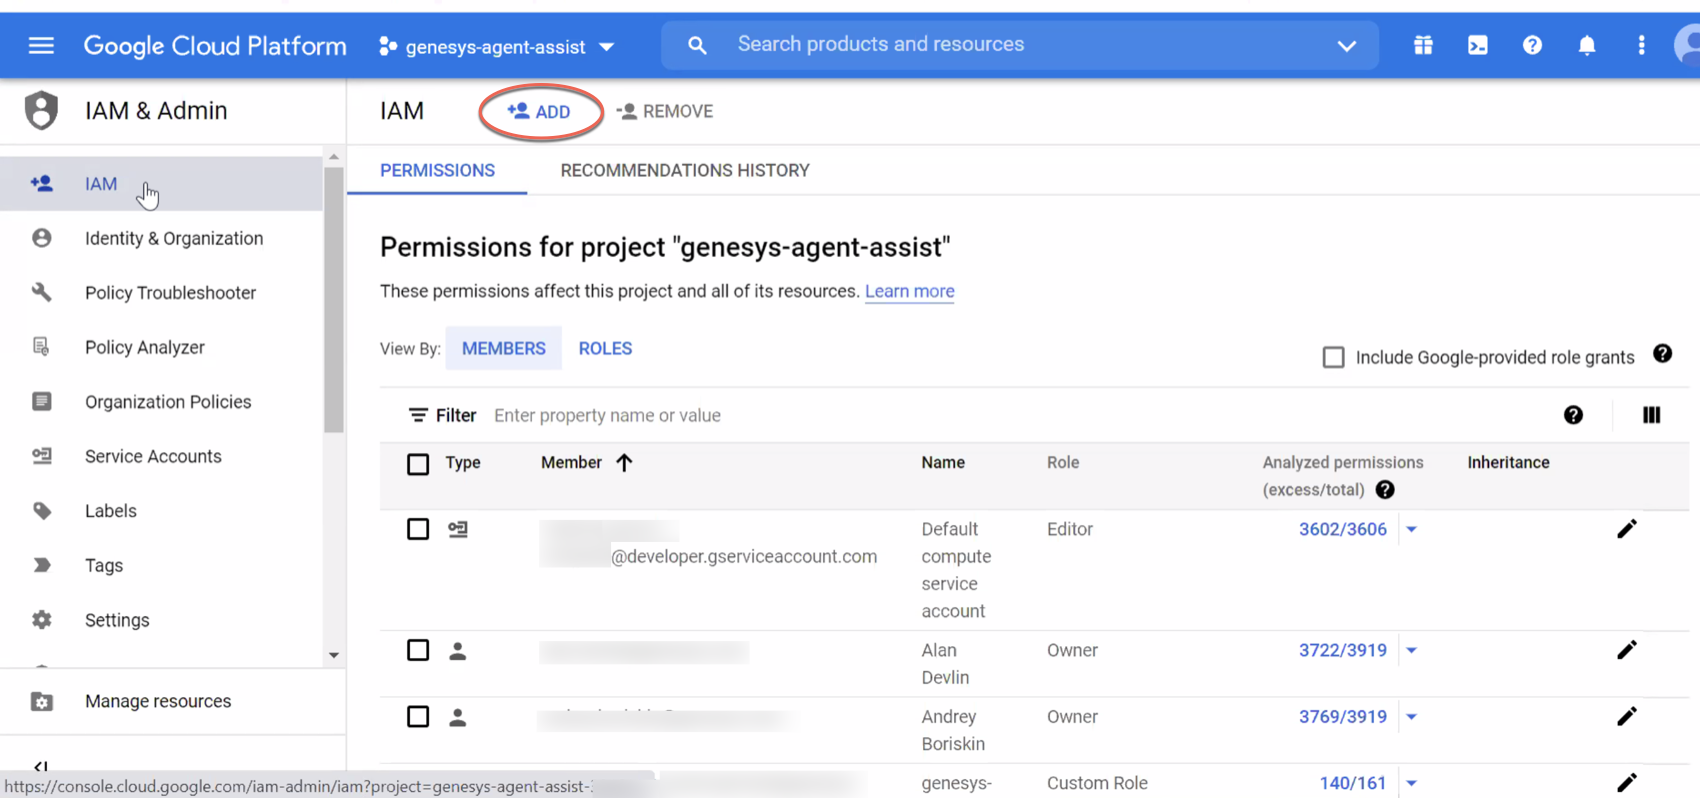
- Navigate to GCP > IAM > Permissions.
- Click Add to open the Add Members, Roles dialog of the genesys-agent-assist project.
- Click New Members and paste the Genesys GCP account to the New Members list.
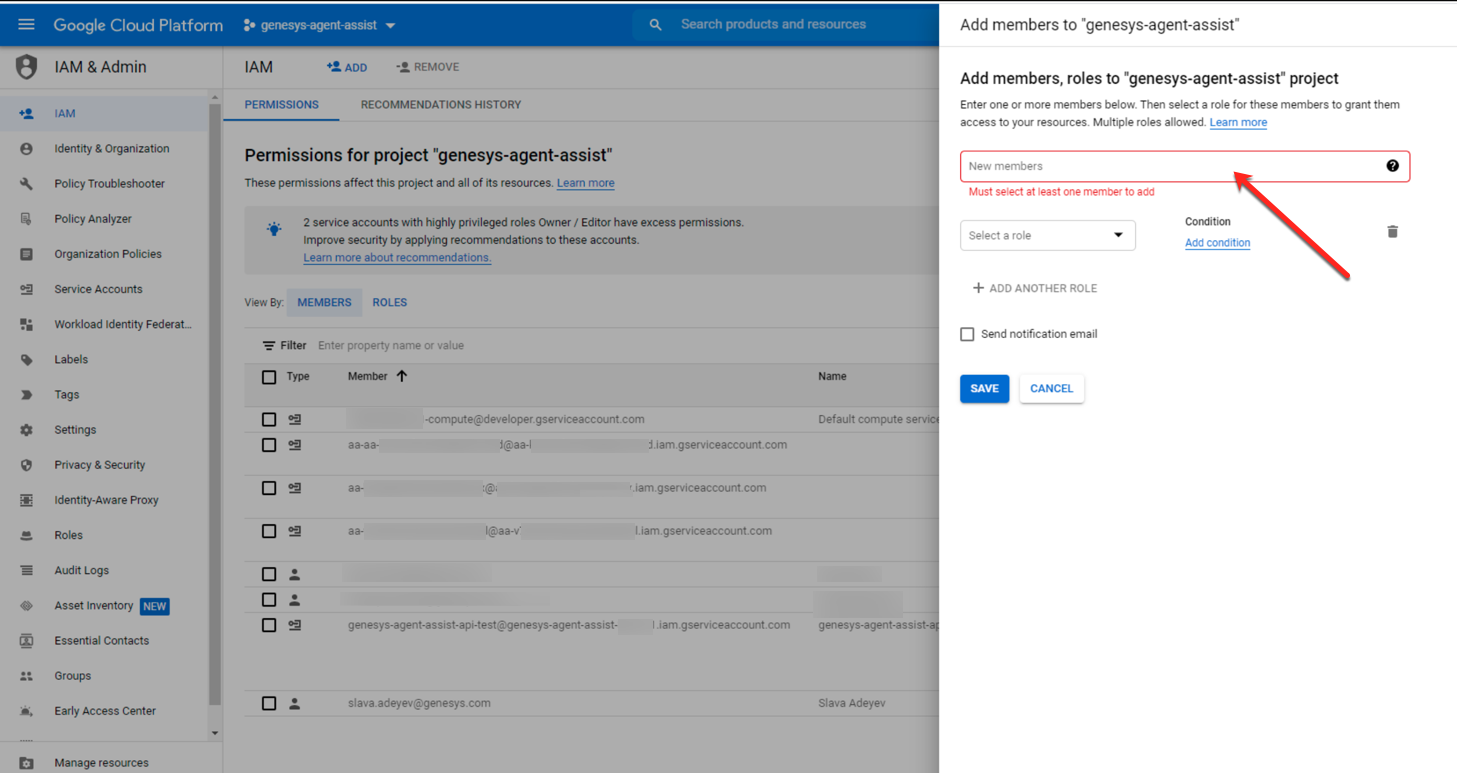
- Click Select role or Add another role and search for “dialogflow”. Add the following roles to the Genesys GCP account:
- Dialogflow API Client
- Dialogflow API Admin
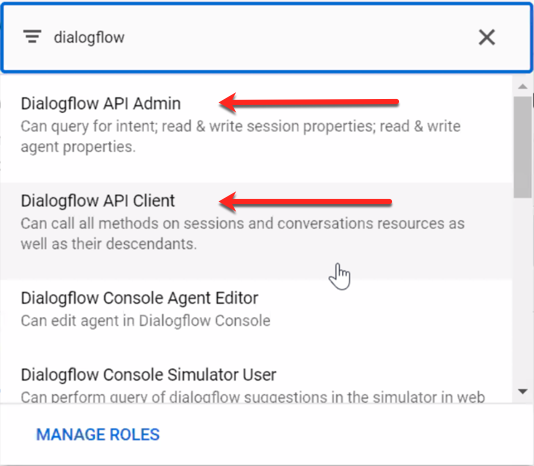
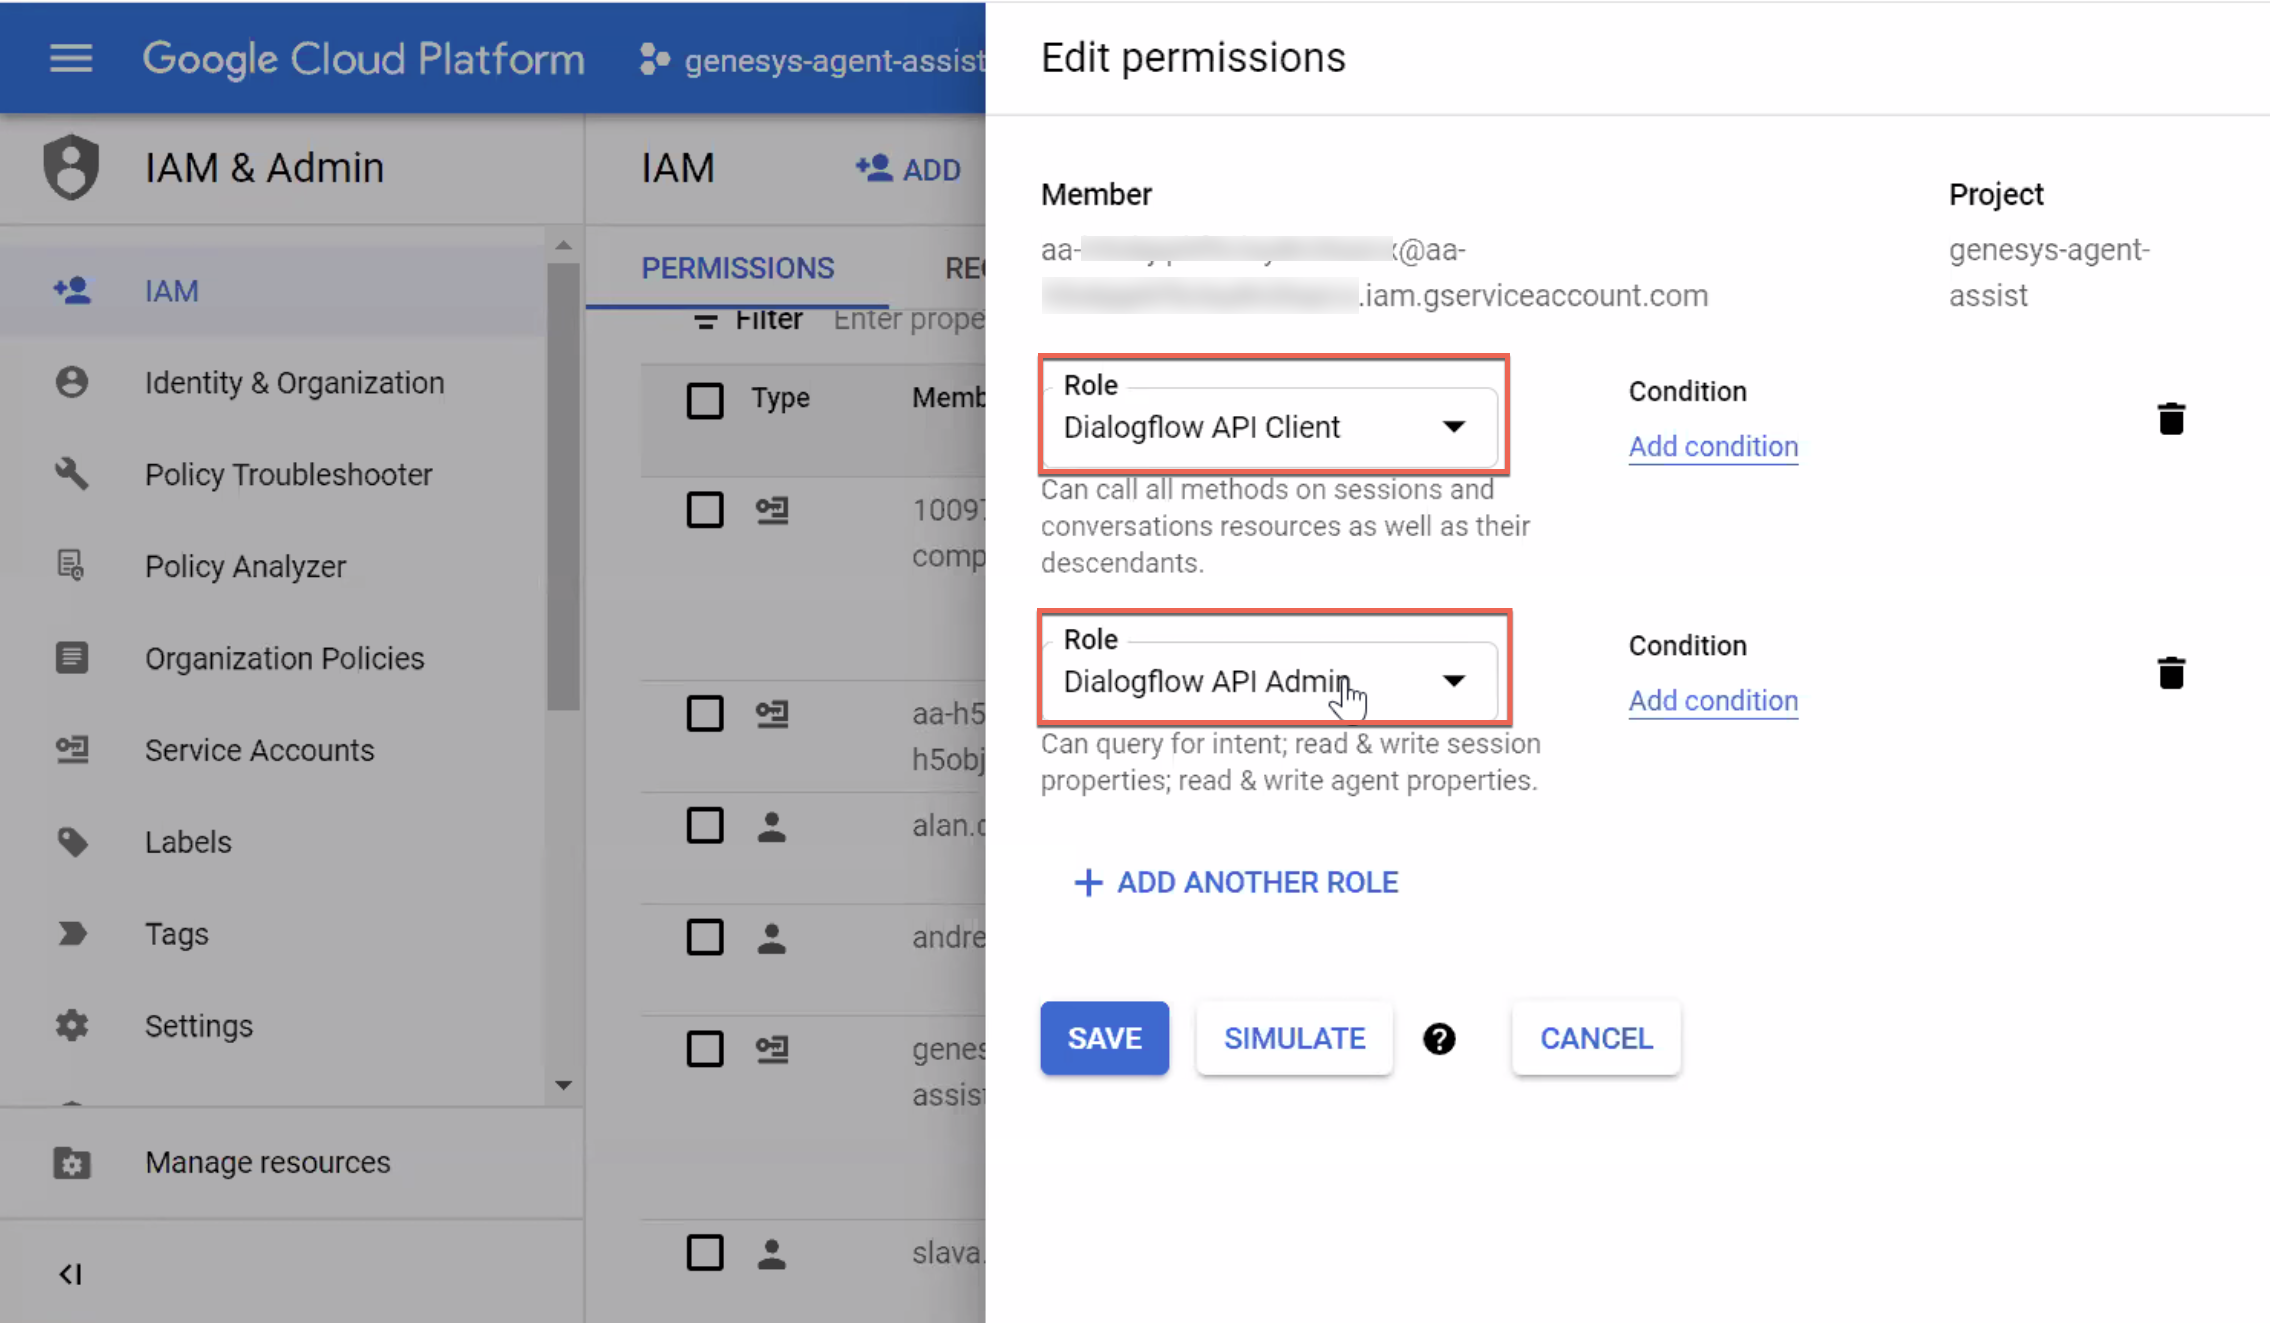
- Save your changes. If you check the Genesys GCP service account’s permissions, they now look like:
