
Navigate the Shift Trades panel
When you open your schedule, click the Shift Trades panel to view, create, and manage shift trades, specify whether to allow other agents to send shift trade offers to you, and view the following information:
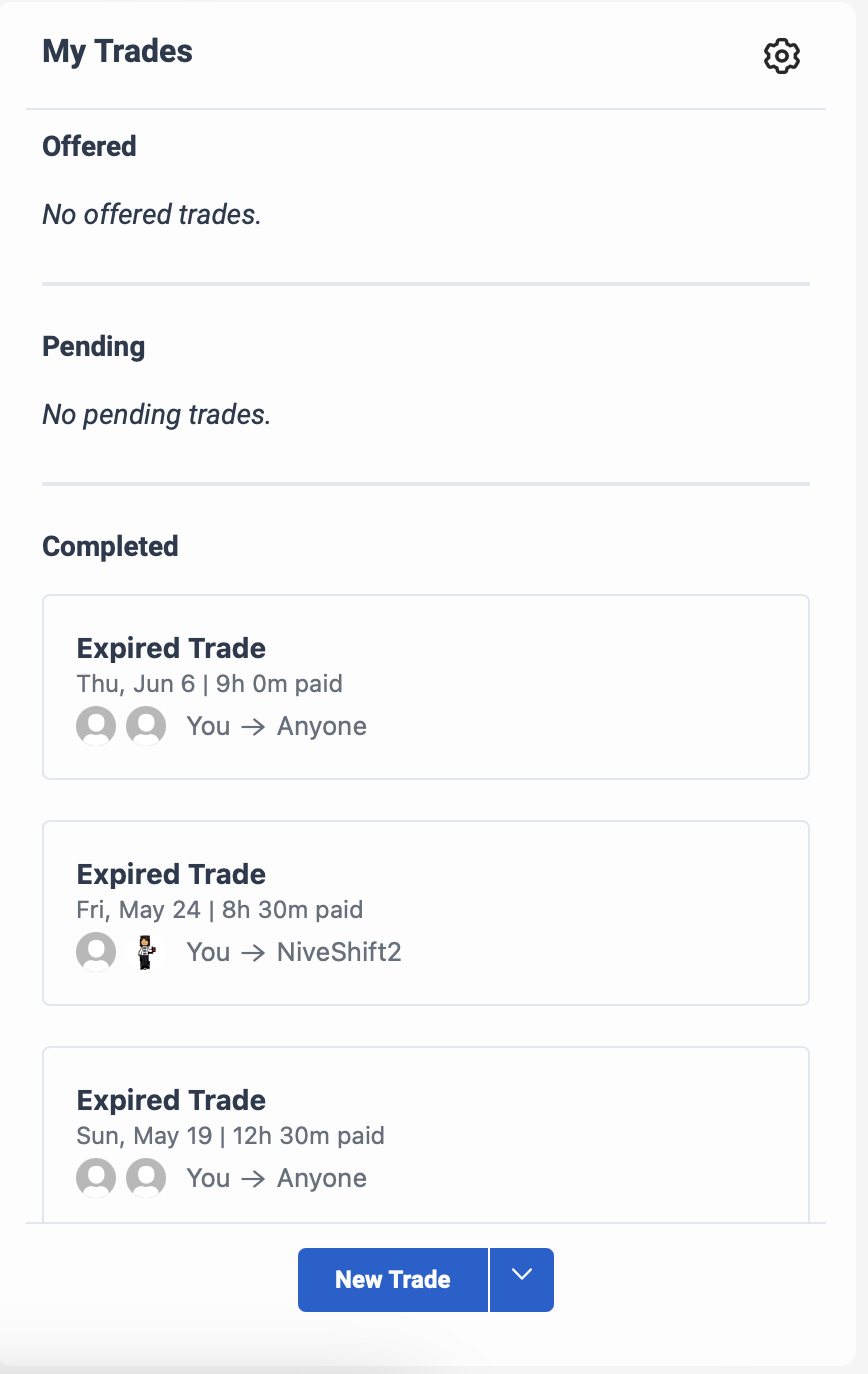
- My Trades. This list includes all of your shift trades that are either unmatched or pending administrator review for any week.
- Offered: This list includes the shift trades other agents offered to you. You can select the offer and trade from this option.
- Pending: This list displays the trades that are pending for approval by the system or the supervisor.
- Completed: This list displays trades that are completed and need no further action.
Note: To access this panel, make sure that you are in the Week view.
The My Trades view includes any trades that are offered to you, still pending, and waiting for action by an administrator or other agent within the last 30 days. This view also displays completed trades and a visual image of you and the agent that you worked with to trade a shift.
Click the image to enlarge.
Access the Shift Trades panel
To open the Shift Trades panel, perform the following steps:
- Access your schedule:
- To access your schedule from the agent activity view, click Activity > Schedule tab.
- To access your schedule from the agent dashboard:
- Click Performance > Workspace > My Performance.
- Click the Schedule tab.
- If you open your schedule from the Activity > Schedule tab, then to see the most current data, click Refresh . This view does not update automatically.
- Click Shift Trades . The My Trades panel opens.
- To allow or prevent other agents to send trade offers to you, follow these steps:
- Click Settings .
- To allow trade offers from other agents, enable the Allow others to send trade offers directly to you check box. By default, this option is enabled.
- To prevent trade offers from other agents, clear the Allow others to send trade offers directly to you check box.
- Click Update.
- Click the New Trade arrow for access to actions that you can further perform. For more information, see Create a new trade.
- Trade: Select the shift that you want to trade using your schedule.
- From the list of shifts displayed, select a shift.
- Select whether to trade with anyone or a particular user.
- Select the days as required from the:
- Willing to Accept shifts: Choose the dates and times during which you will accept a shift.
- Shift Start and End range to work: Select the shift start and end date range during which you will accept trades.
- Expiration Date details: Set the date and time for this trade to expire if no other agent accepts.
- Based on the selection, if there are matches, then click View Matches and select the matching shift. Note: The matches include both shift trades – offers from other users and alternative shifts.
- Based on the selection, if there are matches, then click View Matches and select the matching shift.
- If there are no matches found, click Next.
- Click Submit Trade. The trade is submitted for further processing or select the pending trade you would like to cancel. Select Cancel to cancel the pending trade.
- Browse Shifts: Select an offered shift from the list available to view and trade. For more information about browsing shifts, see Browse and select shifts to trade.
- Drop: Select the shift that you want to drop. For more information about dropping a trade, see Drop a shift for someone else to pick up.
- Add: Select the day for which to view the available shifts to add to your shifts. The details of available shifts are displayed before you make your selection. For more information about adding a trade, see Pick up an extra shift.
- Trade: Select the shift that you want to trade using your schedule.