
Add contracts to custom actions for integrations
When creating a custom action, first add an action and then add contracts. The contracts define the information that you provide to the action for its execution and the response that it ultimately returns. For more information, see Create a custom action for integrations.
- You cannot change the contracts after you publish the action.
- Contracts do not support the $ref keyword.
- Click the Setup tab.
- Click the Contracts tab.
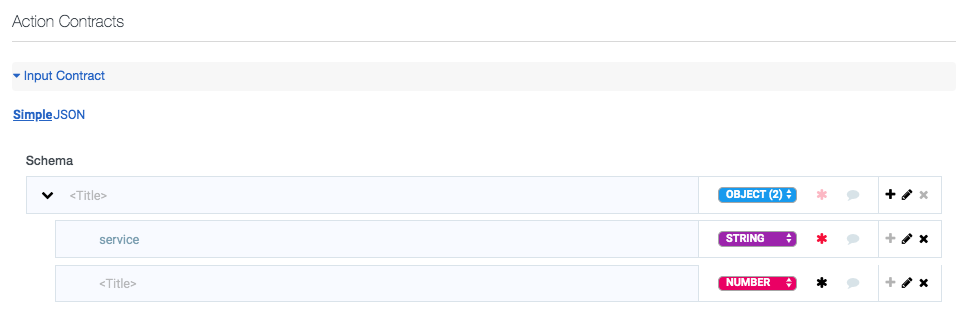
- Under Input Contract, click Simple or JSON to configure the contract. Genesys recommends that you use the Simple input method.
The input contract defines the information that you provide to the action for execution.
Notes:- The input contract accepts an object with key-value pairs. The key-value pairs are limited to the following data types: string, integer, number, Boolean, null. The input contract does not support nested objects.
- Property names in the input contract must start with a letter (a-z, A-Z) and only contain letters, numbers (0-9), hyphens (-), or underscores (_). Do not use the reserved terms orgId, integrationId, and rawRequest, or you will overwrite existing properties with these names and cause the data action to fail.
Use the interface to add an object and object properties. The interface correctly formats and structures the JSON schema for you.
Genesys recommends that you add titles and descriptions for easier identification in Architect workflows.
Title: The title of the schema item that you want to add.
Data type selector: Assigns the data type to the schema item. The top-level item in the schema can only be an object. Object properties can be strings, numbers, integers, Booleans, or null.
Asterisk : Indicates if item is required. The top-level item in a schema is required by default.
Chat : Turns dark and shows the description when you hover over the icon, if you added a description. (You can add a description in the expanded configuration options. Click Pencil .)
Plus : Adds a new row for an object property. You can add numerous properties. The configuration options in the interface are similar to the top-level object, except different data types are available (string, number, integer, Boolean, or null).
Pencil : Opens an interface with more configuration options. These options vary depending on the data type selected. To save your configurations, click the checkmark .
Delete : Deletes the row. After you click the checkmark , click the checkmark to confirm the deletion or click Delete to cancel the deletion.
You can copy the input contract from other actions or use the following example as a guide for creating the JSON schema.
Input contract
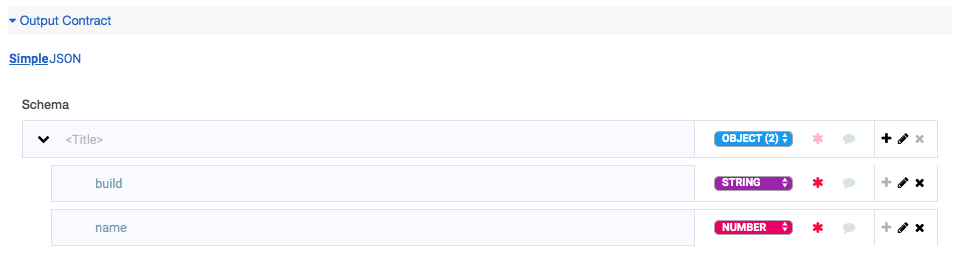
{ "$schema": "http://json-schema.org/draft-04/schema#", "type": "object", "required": [ "service" ], "properties": { "service": { "type": "string" } } } - Under Output Contract, click Simple or JSON to configure the contract. Genesys recommends that you use the Simple input method.
The output contract defines the information that the action returns after successful execution.
Note: The output contract does not support nested arrays.Use the interface to add objects and object properties or arrays and array items. The interface correctly formats and structures the JSON schema for you.
Genesys recommends that you add titles and descriptions for easier identification in Architect workflows.
Title: The title of the schema item that you want to add.
Data type selector: Assigns the data type to the schema item. Top-level items in the schema can be objects or arrays. Object properties or array items can be strings, numbers, integers, Booleans, or null.
Asterisk : Indicates if item is required. The top-level item in a schema is required by default.
Chat : Turns dark and shows the description when you hover over the icon, if you added a description. (You can add a description in the expanded configuration options. Click Pencil .)
Plus : Adds a new row for object properties or array items. You can add numerous object properties or array items. The configuration options in the interface are similar to the objects or arrays, except different data types are available (string, number, integer, Boolean, or null).
Pencil : Opens an interface with more configuration options. These options vary depending on the data type selected. To save your configurations, click the checkmark .
Delete : Deletes the row. After you click the checkmark , click the checkmark to confirm the deletion or click Delete to cancel the deletion.
You can copy the output contract from other actions or use the example below as a guide for creating the JSON schema.
Output contract
{
  "$schema": "http://json-schema.org/draft-04/schema#",
  "type": "object",
  "required": [
    "build",
    "name",
    "status"
  ],
  "properties": {
    "build": {
      "type": "string"
    },
    "name": {
      "type": "string"
    },
    "status": {
      "type": "string"
    }
  }
}
Next, add configuration.
For more information, see About custom actions for integrations.
For more information about the integrations, see About the data actions integrations.