
Enable automatic Scheduled log capture for users
Troubleshooting issues with incomplete information can be difficult. Console logs provide Product Support with a full picture of an issue. When problems occur, these logs provide visibility into the actions and events of a user on Genesys Cloud.
As an administrator, apart from requesting that users manually gather console logs, you can enable automatic Scheduled log capturing for specific users in Genesys Cloud for 24 hours. When enabled, you can inspect or download the available console logs in the Log Capture page. These tasks are further elaborated in the procedures that follow.
Users can also directly send their last 5 minutes of console logs for their administrators to review. For more information, see Send On Demand capture logs to administrators. This method of log capture does not work with embedded clients, or if the user clears their browser cache before submitting logs.
- Log capture only gathers logs that Genesys Cloud generates, and does not collect logs from any other open browser or tab.
- Logs may contain sensitive information.
- The logs are encrypted in transit and encrypted in storage.
- Captured logs are automatically deleted after 10 days.
- You can enable log capture only for five users at one time.
- Only users with the appropriate permissions can view and download log captures.
- The user who downloads logs to share with Product Support or any other third-party partners must review the logs and remove any sensitive information before sharing.
- Log capture currently works only with the Genesys Cloud desktop and web clients. For integrations such as Genesys Cloud Embeddable Framework, Genesys Cloud for Chrome, Genesys Cloud for Firefox, Genesys Cloud for Microsoft Teams, Genesys Cloud for Salesforce, and Genesys Cloud for Zendesk, you can either use the server-side logs or gather logs manually. For more information, see Gather console logs and Gather console network logs.
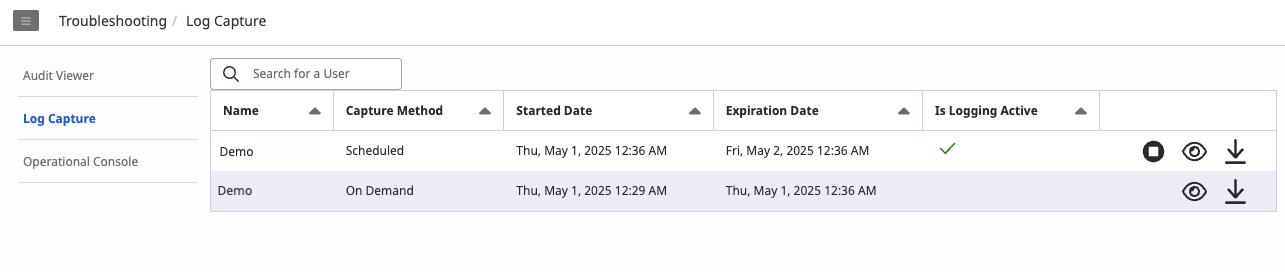
Capture Method column
The Capture Method column in the Log Capture page indicates the method used to capture the log. When an administrator enables the logs on the Log Capture page or the People page, the Capture Method column displays the value Scheduled. Whereas when users send the logs using the Log Capture option on the Activity view or the Send Logs Now option on the Log Capture tab of the Help panel, the Capture Method column displays the value On Demand.
Enable Scheduled log capturing on the Admin Home page
- Click Admin.
- Under Troubleshooting, click Log Capture.
- In the Search for a User box, type one or more characters to begin the search. The characters are not case-sensitive. As you type a user name or user’s email, the names that match your criteria appear in the list.
- On the hover text that displays the user’s name, click Enable. The console logs for the user appear on the Log Capture page for 10 days until automatic deletion. The log capturing is active for 24 hours and indicated by a green check mark () in the Is Logging Active column. The check mark does not indicate that logs for the user are gathered yet.
Click the image to enlarge.
Enable Scheduled log capturing on the People page
- Click Admin.
- Under People & Permissions, click People.
- Navigate to the user that you want to modify.
- Click More .
- From the menu that appears, click Set Log Capture. The console log for the user appears on the Log Capture page. To view the Log Capture page, click Admin and under Troubleshooting, click Log Capture.
Inspect logs
On the Log Capture page, click Inspect logs for user to open the user’s logs page for troubleshooting. You can filter logs by time, text, or type.
- Click the date range hyperlink to open the calendar view, enter the required date and time range, and click the right arrow icon to filter by time.
- In the Filter entries box, type one or more characters to begin the search. The characters are not case-sensitive. As you type, the log entries that contain that text are displayed.
- To exclude the view of an entry type in the logs, clear the Debug, Info, Log, Warn, or Error check box, as needed.
Download logs
To download logs to your system, perform one of the following steps:
- On the Log Capture page, click Download logs for user .
- On the Log Capture page, click Inspect logs for user to open the user’s logs page, filter the entries as required, and then in the lower right corner, click Download.
You can upload the downloaded file to the Support ticket along with any other requested info. Use My Support to open and manage your support cases.