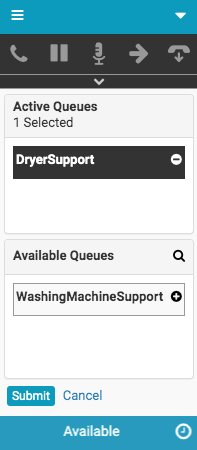
Change your queue participation
If your administrator has given you access in Genesys Cloud, then in the client you can add or remove yourself from participation in a queue.
- You can only change your participation in a queue if you have the associated permission for the division that the queue is a part of.
- When you remove your participation in a queue, you remain a member of a queue, but you do not receive interactions from that queue.
- Click Menu > More .
- Click Queue Activation.
- Under Available Queues, click Plus next to the queue name that you want to add.
Tip: To search for a queue by name, click Search and enter the queue name.

The queue moves from the Available Queues list to the Active Queues list.
- Click Submit.
- Click Menu > More .
- Click Queue Activation.
- Under Active Queues, click Minus next to the queue name that you want to remove.
Tip: To search for a queue by name, click Search and enter the queue name.

The queue moves from the Active Queues list to the Available Queues list.
- Click Submit.
For more information, see Queue activation.
For more information about the integrations, see About Genesys Cloud Embeddable Framework, About Genesys Cloud for Salesforce, About Genesys Cloud for Microsoft Teams, and About Genesys Cloud for Zendesk.

