Accept and complete interactions
The following permissions:
- Routing > Agent > OnQueue
- Routing > Queue > Join
- Routing > Queue > Search
- Routing > Queue > View
When you go on queue, you are ready to accept interactions. The Interactions panel opens and shows new interactions.
Depending on how administrators configure queue and organization settings, you can receive more than one interaction or type of interaction at the same time. For more information about working with multiple interactions, see Manage multiple interactions.
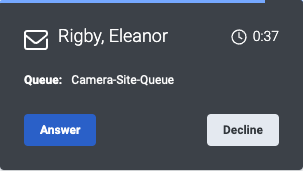
- To accept an incoming interaction, click Answer.
 Notes:
- In the interaction alert, the counter indicates the amount of time the interaction has been in the queue.
- After you accept an interaction, at the top of the active interaction, Genesys Cloud displays the contact information for the interaction and its duration.
- At the top of the interaction alert, the blue bar shortens to show the amount of time you have to accept the interaction.
- Interact with the customer.
- After the interaction ends, complete any after contact work (ACW) and click Done.
For more about working with the different types of interactions, see the following articles:

