
Configure a Yealink headset
Genesys Cloud provides support for Yealink headsets. You can use Yealink headsets in the Genesys Cloud desktop app, embedded clients, or when you run Genesys Cloud from the Chrome web browser. Genesys Cloud does not support Yealink headsets in other browsers.
Call controls
Genesys Cloud WebRTC only supports the built-in call controls on Yealink headsets when you run Genesys Cloud from the Chrome web browser. Genesys Cloud WebRTC does not support call controls in the desktop app or the embedded clients.
The call control feature enables you to use the controls on the headset to perform basic call operations.*
- Answer call
- Hang up a call
- Put a call on hold
- Remove a call from hold
- Mute a call
- Unmute a call
- Reject a call
*Available call controls depend on the capabilities of your particular Yealink headset model.
To use the built-in call controls on a Yealink headset, you must have a WebRTC phone assigned to you and you must connect your Yealink headset via a wired USB connection or a Yealink USB dongle-either Bluetooth or DECT.
Set up the headset in the Genesys Cloud desktop app
To use a Yealink headset in the Genesys Cloud desktop app, you must use the latest version of the app.
- Open the desktop app.
- In the title bar, click the Genesys Cloud icon.
- Select Check For Updates.
After making sure that you use the latest version of the Genesys Cloud desktop app, follow these steps.
- From the sidebar, click Calls . The Phone Details panel opens.
- From the Phone Details panel, click Settings . The Phone Settings panel opens. In the Audio Controls – Profile Name box, Use Computer settings appears.
- Connect your headset to a USB port on your computer.
- When Genesys Cloud prompts you to create a device profile, click Yes.
- In the microphone and speaker boxes, verify that your headset appears as the default selection.
- In the Audio Controls – Profile Name box, enter a name for the headset.
- Click Save.
Set up the headset in the Chrome web browser
The Yealink headset can now use the WebHID feature that is built into Chrome (version 89.x or later).
To check your Chrome version, follow these steps.
- Open Chrome.
- Click Customize and control Google Chrome .
- Click Help.
- Click About Google Chrome.
After you ensure that you have the latest version of the Chrome web browser, follow these steps.
- From the sidebar, click Calls . The Phone Details panel opens.
- From the Phone Details panel, click Settings . The Phone Settings panel opens. In the Audio Controls – Profile Name box, Use Computer settings appears.
- Connect your headset to a USB port on your computer.
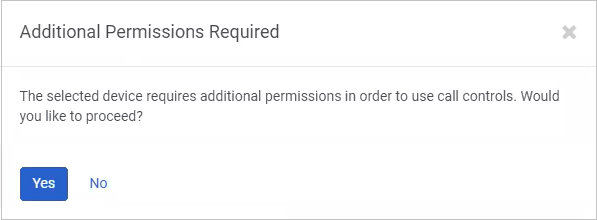
- When the Additional Permissions Required prompt appears, click Yes.
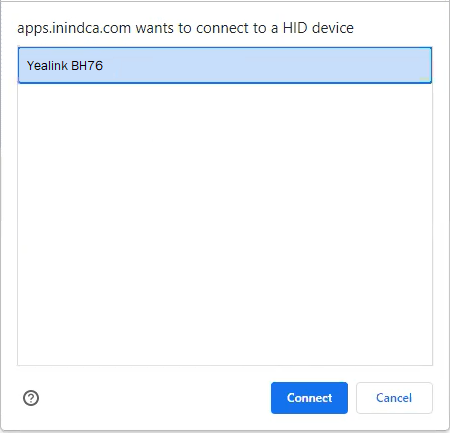
- When Chrome displays the WebHID connection prompt, select your device and then click Connect.
- When Genesys Cloud prompts you to create a device profile, click Yes.
- In the microphone and speaker boxes, verify that your headset appears as the default selection.
- In the Audio Controls – Profile Name box, enter a name for the headset.
- Click Save.
You can now use the call controls built into your Yealink headset. In the future, Genesys Cloud automatically sets up your headset profile as long as your headset is connected to your computer’s USB port.