
Series: Architect tutorial for advanced users
Advanced lesson: Obtain the caller’s phone number
You can create a menu that confirms the caller’s phone number, and allows the caller to enter a different number if necessary.
For more information about obtaining details from a phone number, see About the phone number data type.
Objectives:
Create a menu and build an audio sequence that automatically collects the caller’s phone number, reads the number back to the caller for confirmation, and gives the caller the option of entering a different phone number.
Estimated time to complete: 15 minutes
Prerequisites
- Review Work with tasks.
- Create a practice flow that includes a main menu.
- Ensure that your organization has at least one configured queue in which to transfer a call. For more information on creating queues, see Queue administration or the Suggested content.
Additional resources
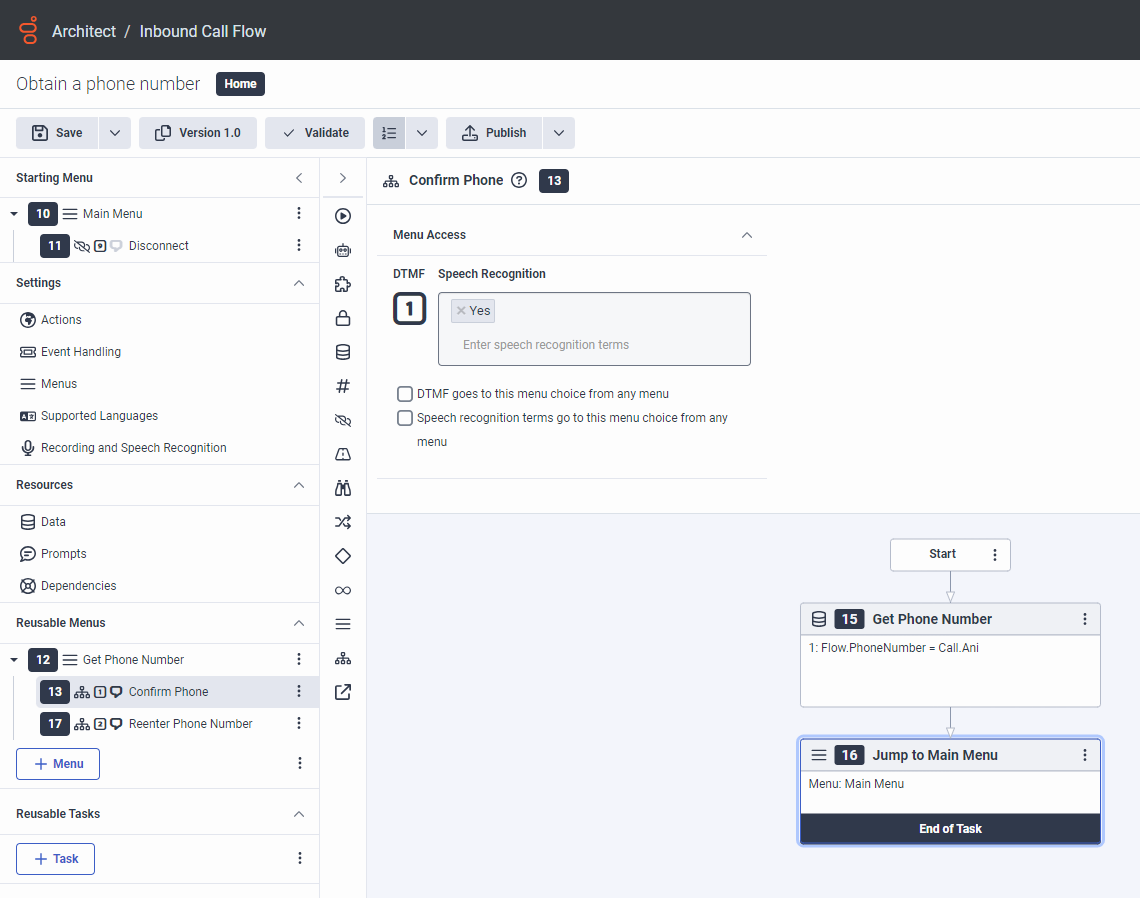
Confirm Phone Number task
Click the image to enlarge.
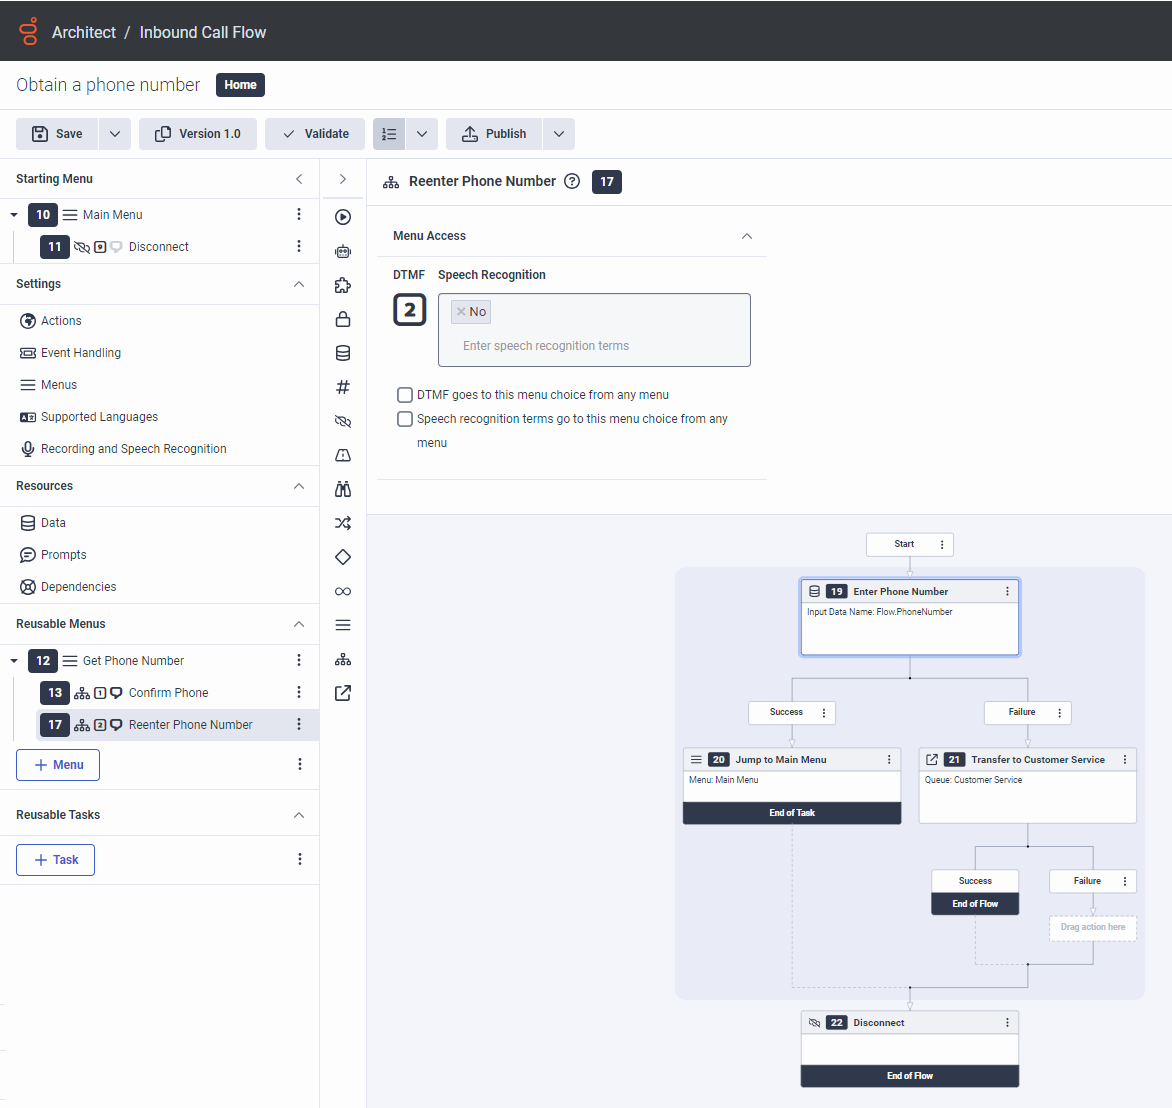
Reenter Phone Number task
Click the image to enlarge.
Tasks
- Open the practice flow.
- From the Toolbox, expand the Menu category and drag a Menu action to the Reusable Menus area.
- Name the menu Get Phone Number and set up the audio sequence:
- In the Menu Prompt area, click the Edit Audio Sequence button. The Edit Audio Sequence button opens.
- In the Text to Speech box, type I see that you are calling from.
- Click the Add Data button and in the Data list select the Call.Ani variable.
- In the Select Options list that appears, select As phone number.
- Click the Add TTS button and in the Text to Speech box, type If this is the number listed on your account please say “yes” or press one to confirm, otherwise say “no” or press two to enter the correct number.
- Click Close.
- From the Toolbox, expand the Task category and drag a Task action into the Get Phone Number reusable menu.
- Name the task Confirm Phone and complete the following steps:
- Select a DTMF of 1.
- Add Yes as a speech recognition term.
- In the task editor’s Toolbox, expand the Data menu and drag an Update Data action into the task editor, just below the Start box.
- In the Update Data design area, complete the following steps:
- Name the action Get Phone Number.
- Click Add update statement and from the menu that appears, select String.
- In the Variable Name box, type Flow.PhoneNumber.
- In the Value To Assign box, type Call.Ani.
- From the Toolbox, expand the Task category and drag a Jump to Menu below the Get Phone Number action.
- In the Name box, type Jump to Main Menu.
- In the Menu list, select Main Menu.
Practice tasks