Web messaging and supported content profile
You can define and use a supported content profile in a web messaging deployment to enable the exchange of file attachments between your online customers and business. To use supported content profiles in web messaging, ensure to configure and enable supported content profiles in the:
- Messenger Configuration, where you can enable or disable inbound attachments from your online customers.
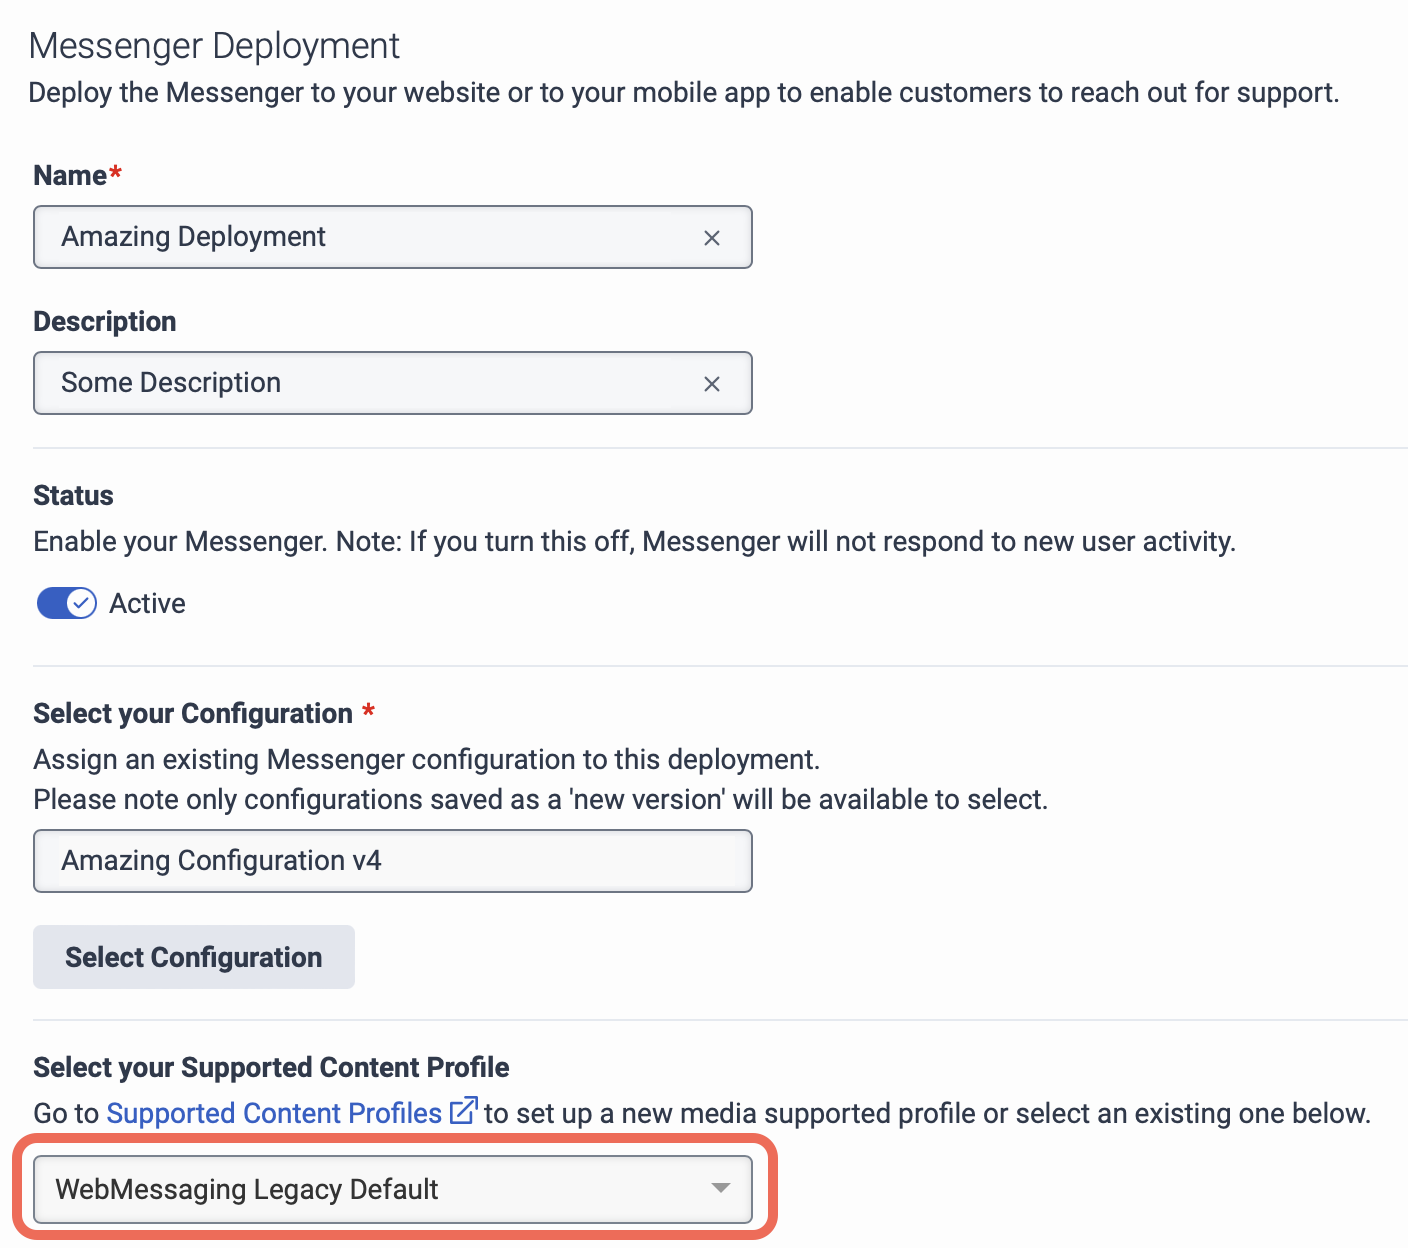
- Messenger Deployment, where you can select the valid content profile to determine the permitted inbound and outbound attachments.
Your existing Messenger deployment configurations would have been automatically assigned with a default content profile with the naming convention WebMessaging Legacy Default. If this is present, this content profile is created by the system and includes image file-types as a baseline to ensure continuity with your existing operations. You can change or remove this content profile at any point in time.
Click the image to enlarge.
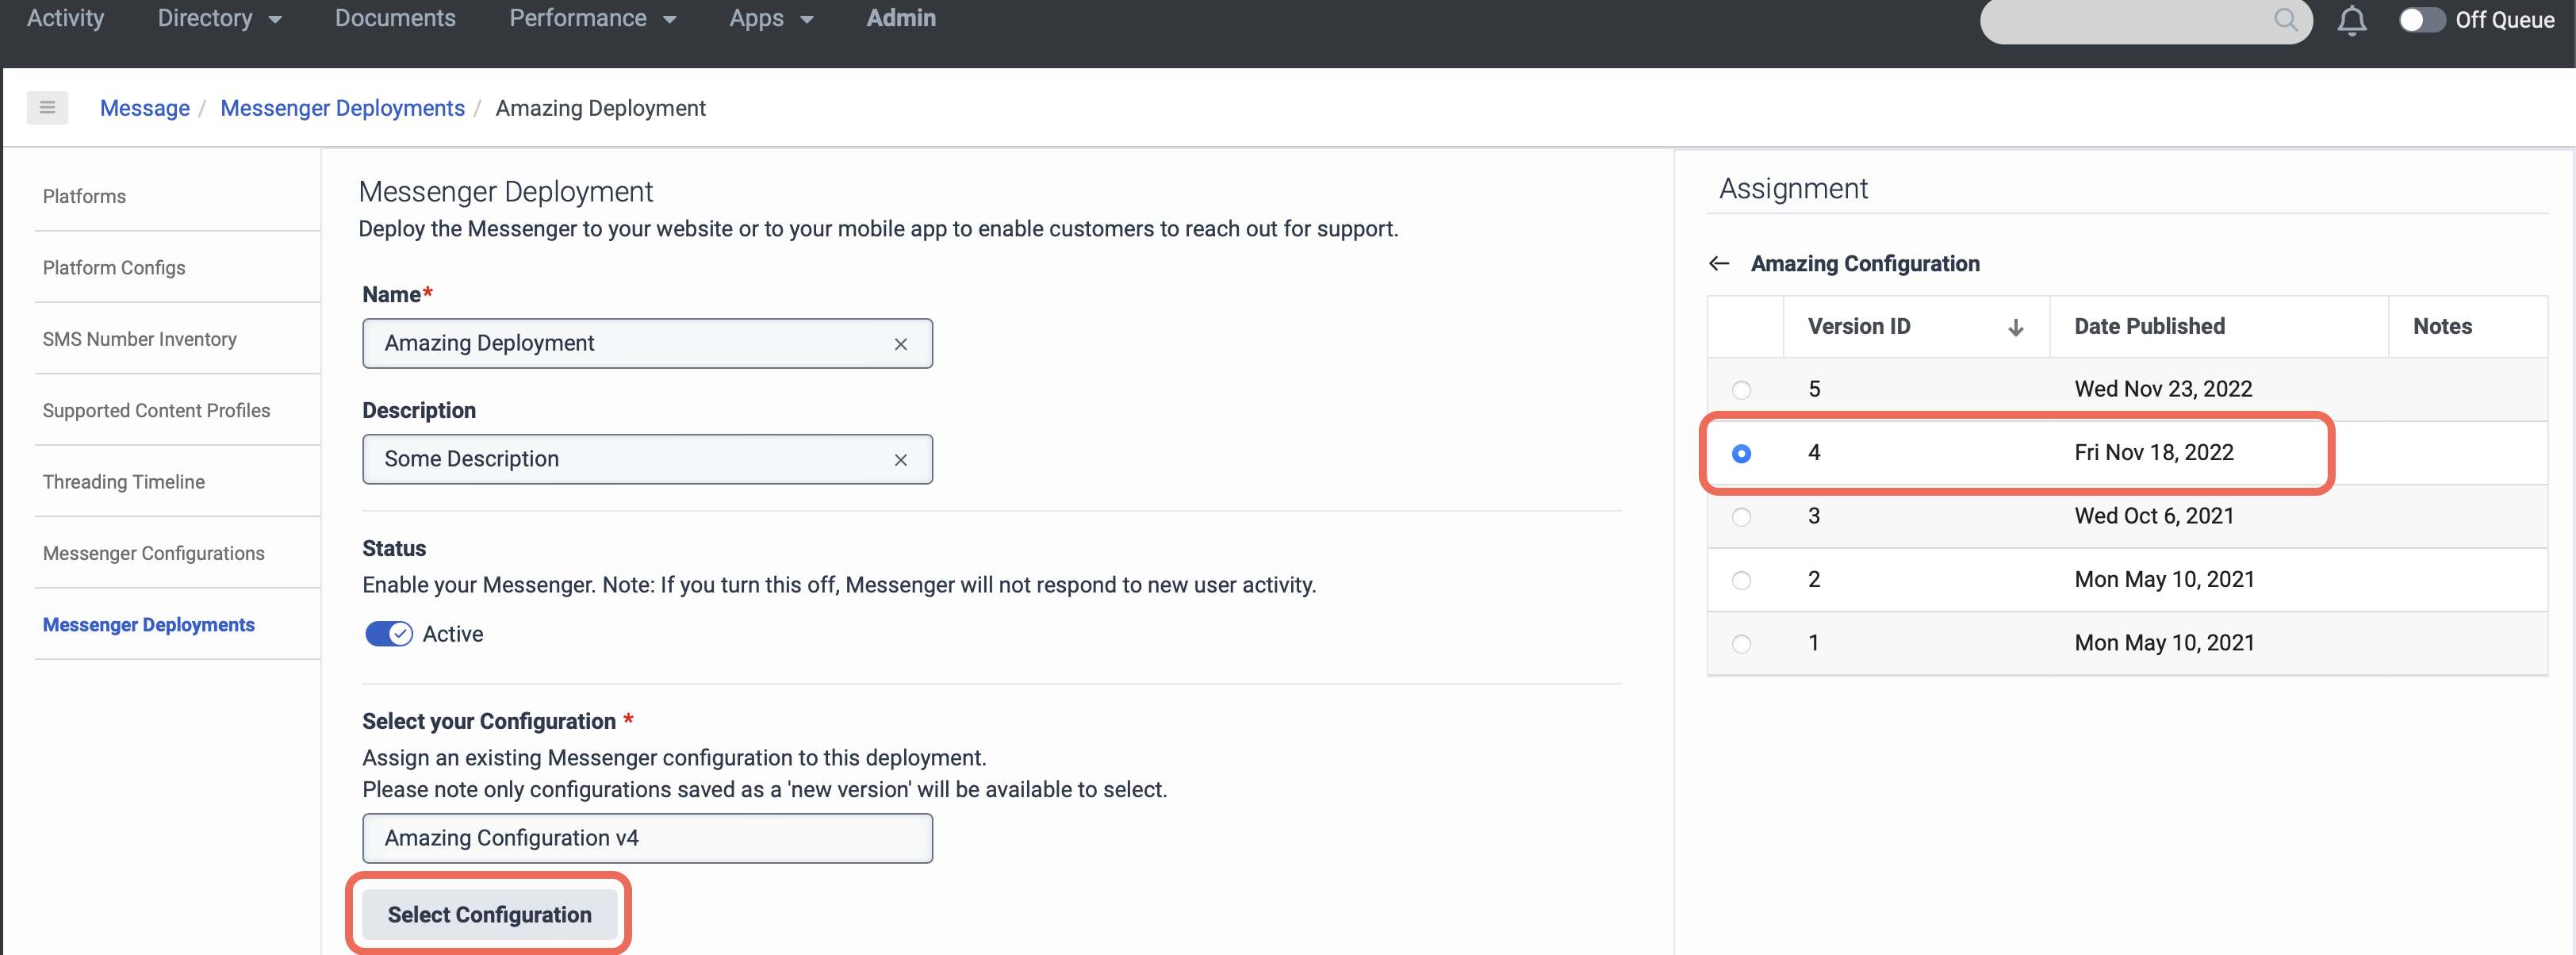
- In the Messenger Deployments list, select the deployment.
- On the Messenger Deployment page, in the Select your configuration section, click Select Configuration.
- The Assignment section displays on the right side of the page. Click the assignment.
The list of configurations display details such as version ID, date published, and notes.
Click the image to enlarge.
To upgrade the deployment manually:
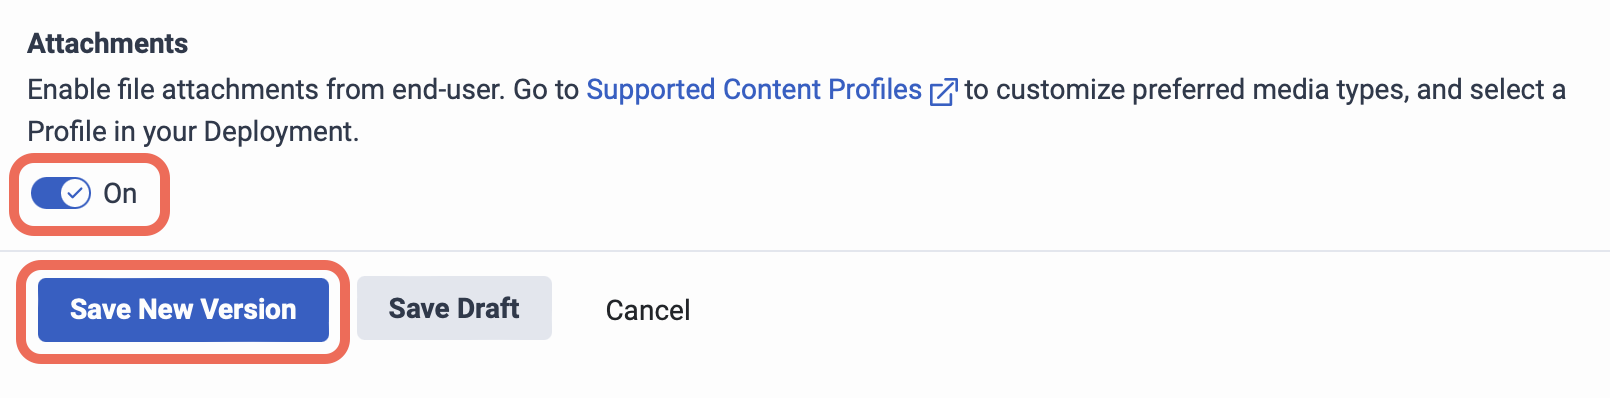
- Open the corresponding Messenger Configuration to upgrade. Ensure to check if you have enabled Attachments.
- To save this as a new configuration, click Save New Version. Perform this step even if the attachments are already enabled.
- After the new configuration version is created, update the corresponding Messenger Deployment object to reference the updated version of your Messenger configuration.
Your Messenger starts to accept all file types as listed in the content profile and assigned to your Messenger deployment.
Click the image to enlarge.