Add an inbound message flow that calls a digital bot flow
This article demonstrates how to create an inbound message flow, call a digital bot flow, and then test the bot behavior.
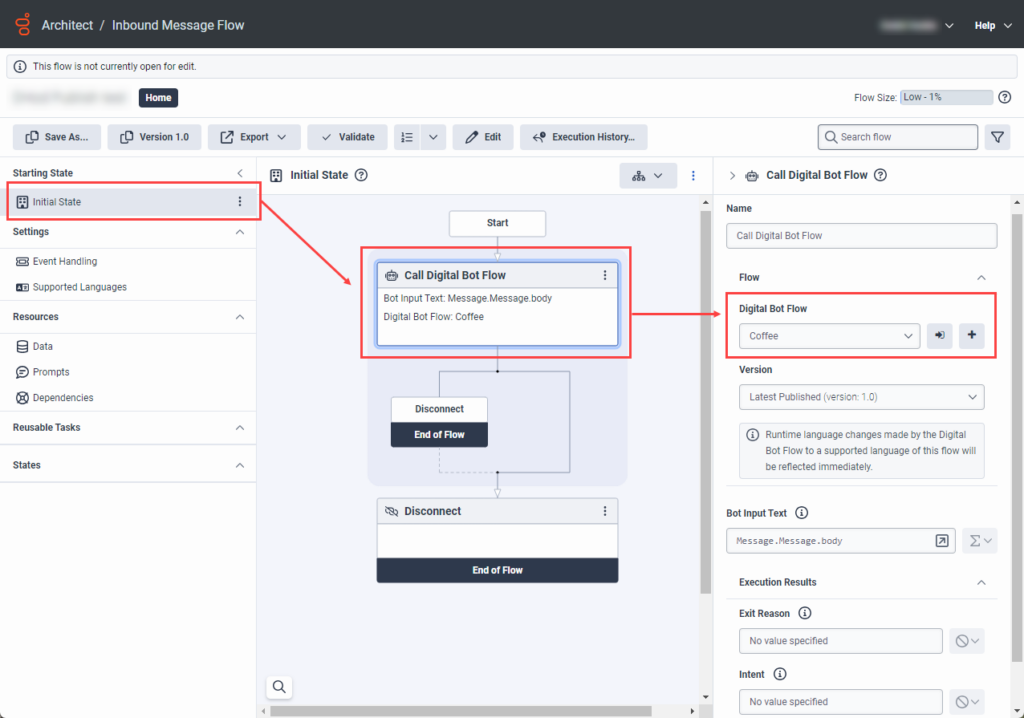
Create an inbound message flow and then call a digital bot flow
- In Architect under flow type, create a new inbound message flow or open an existing one.
- Under Starting State, confirm that the Initial State has focus.
- From the Toolbox, expand the Bot menu and drag a Call Digital Bot Flow action below Start.
- Configure the action:
- Leave the default Call Digital Bot Flow name unchanged or update it with a new name.
- Under Flow, click the Digital Bot Flow list and select the appropriate bot flow.
- Click Publish.
Click the image to enlarge.
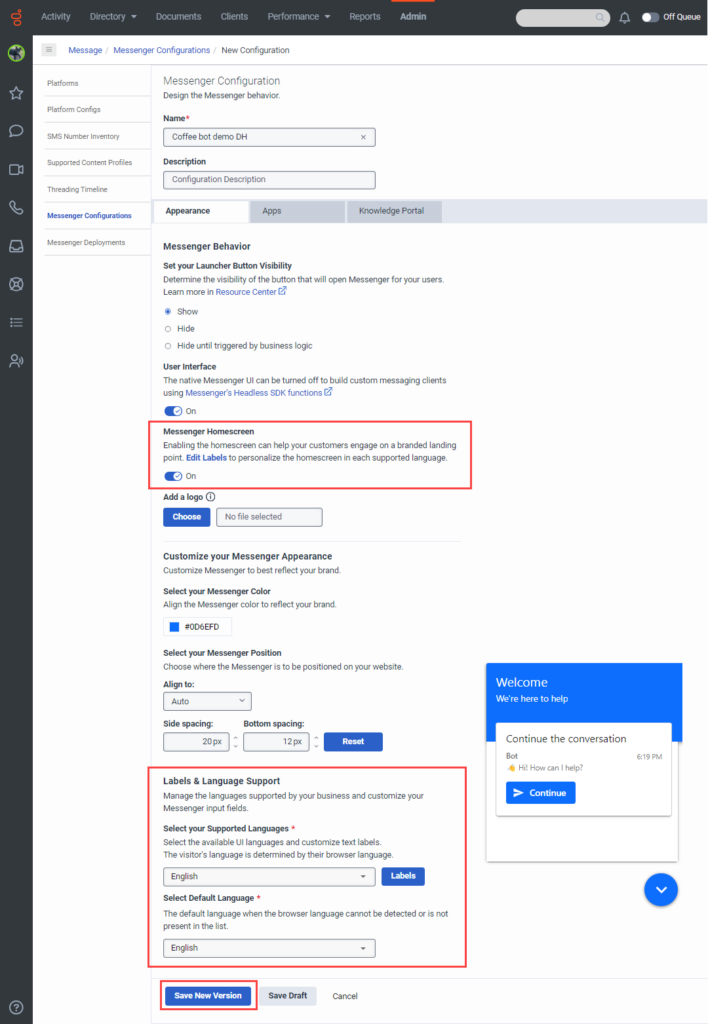
Configure the bot in Messenger
- In Genesys Cloud, click Admin.
- Under Message, click Messenger Configurations.
- Click New Configuration.
- Give the Messenger a meaningful name.
- Under Messenger Homescreen, click Off to enable the setting. The setting changes to On.
- Under Labels & Language Support, complete these steps:
- Under Select your Supported Languages, click the Select language(s) list and choose the languages that you want to support in the Messenger interface.
- Under Select Default Language, click the Select language list and choose the default language. Messenger attempts to automatically detect the customer’s languages from the browser preferences. If the detected language matches any supported language, the Messenger applies the corresponding localized labels to the UI elements. If the detected language does not match any supported language, the Messenger shows UI labels in the default language. For more information, see Genesys Cloud supported languages.
- Complete the remaining configuration to customize Messenger according to your organization’s preferences. For more information, see Configure Messenger.
- Click Save New Version.
Click the image to enlarge.
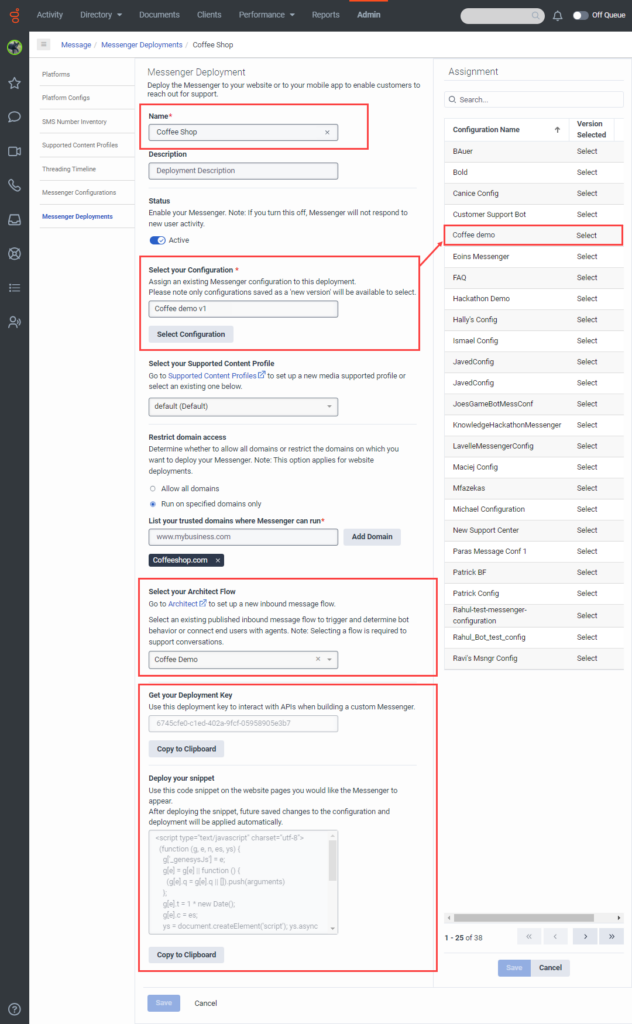
Configure the Messenger deployment
- Click Messenger Deployments.
- Click New Deployment.
- Give the deployment a meaningful name.
- Under Status, use the toggle to set the status of the Messenger deployment.
- To enable the Messenger deployment on your website or in your mobile application, turn on the toggle. The status shows as Active.
- To disable the Messenger deployment on your website or in your mobile application, turn off the toggle. The status shows as Inactive.
- Under Select your Configuration, click Select Configuration to select a version of a Messenger configuration to assign to this deployment.
- In the Assignment pane, navigate to the Messenger configuration you want to assign to the configuration and click the name of the Messenger configuration.
- Select the version that you want to assign.
- Click Save.
- Under Restrict domain access, determine whether to allow all domains or restrict the domains on which you want to deploy the snippet.
- To allow all domains, select the Allow all domains option. Use this option for testing and development purposes.
- To restrict domains, enter a domain and click Add Domain. You can add multiple domains to the list. Restrict domains to prevent unauthorized usage of your snippet from unknown domains. If you restrict a domain, then Messenger does not run on that website and rejects API requests from that domain.
- Under Select your Architect Flow, select a published inbound message flow.
- Complete the remaining configuration to customize Messenger according to your organization’s preferences. For more information, see Deploy Messenger.
- Click Save. The Messenger Deployments page now displays the snippet and deployment key. Next, copy the Messenger snippet and deploy the Messenger snippet to your website. If you are building a custom Messenger, copy the deployment key.
Click the image to enlarge.
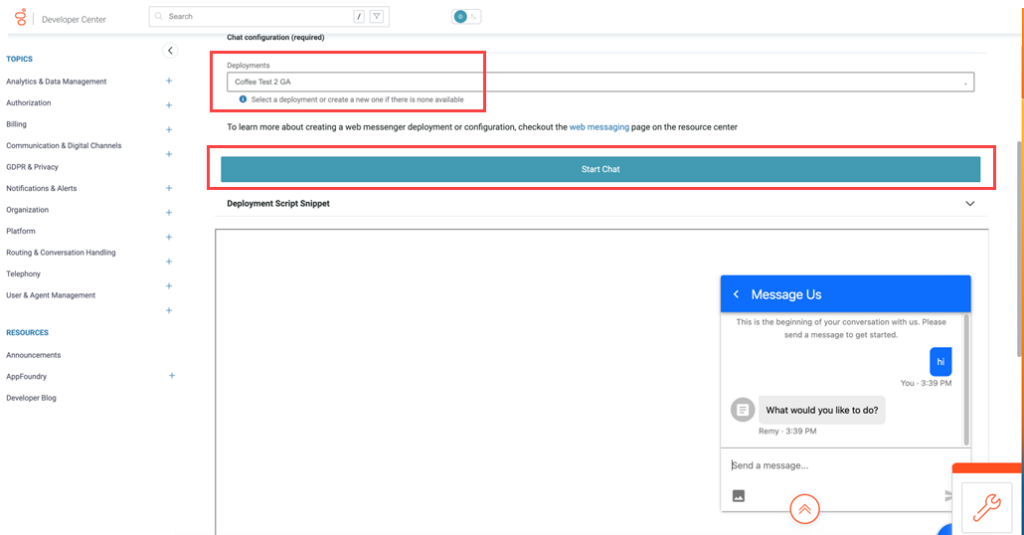
Test the end to end configuration
Note: You can also perform a test directly in Architect, but only for the digital bot flow.
- Navigate to https://developer.genesys.cloud/devapps/web-chat-messenger.
- Add a new account or log in with your credentials.
- Under Chat configuration (required), click Select a deployment and then select the newly created deployment.
- Click Start Chat.
Click the image to enlarge.