
Activate queues in Genesys Cloud CX Utility
Your administrator adds you to specific queues. You can view the list of queues that you are a member of, and activate or deactivate a queue. When you activate or deactivate a queue, it does not affect the queue membership.
- Open the Genesys Cloud CX Utility window, click the icon and select Queue from the list.
- Expand the Queue Activation section.
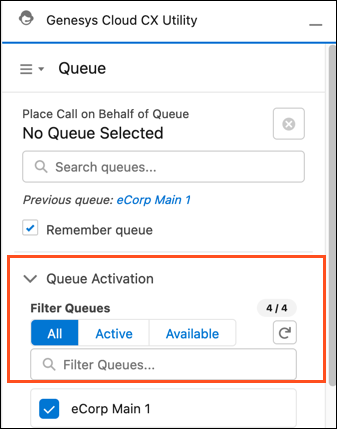
- The Queue Activation section in the Genesys Cloud CX Utility window lists the following three tabs.
Tabs Description Action Automatically updates when All All the queues to which you are added as a member. Click to activate or deactivate a queue from here. The blue color indicates that you have selected the queue to receive interactions.
your administrator adds or removes you as a member of a queue.
Active The queues that you have selected to receive the interactions when you go on queue. Click to deactivate a queue. you add or remove your participation from a queue. Available The queues from which you do not receive any interactions when you go on queue. Click to activate a queue. you add or remove your participation from a queue. -
(Optional) Enter a string in the Filter Queues box to filter the queues displayed in each list.