Configure interaction logging
After you install Genesys Cloud for Zendesk, you can configure settings for interaction logging.
- In the left navigation pane in Zendesk, click the Genesys Cloud icon.
- Click Interaction Logging.
- Configure the settings under Settings, Ticket Comments, and Attribute Mappings.
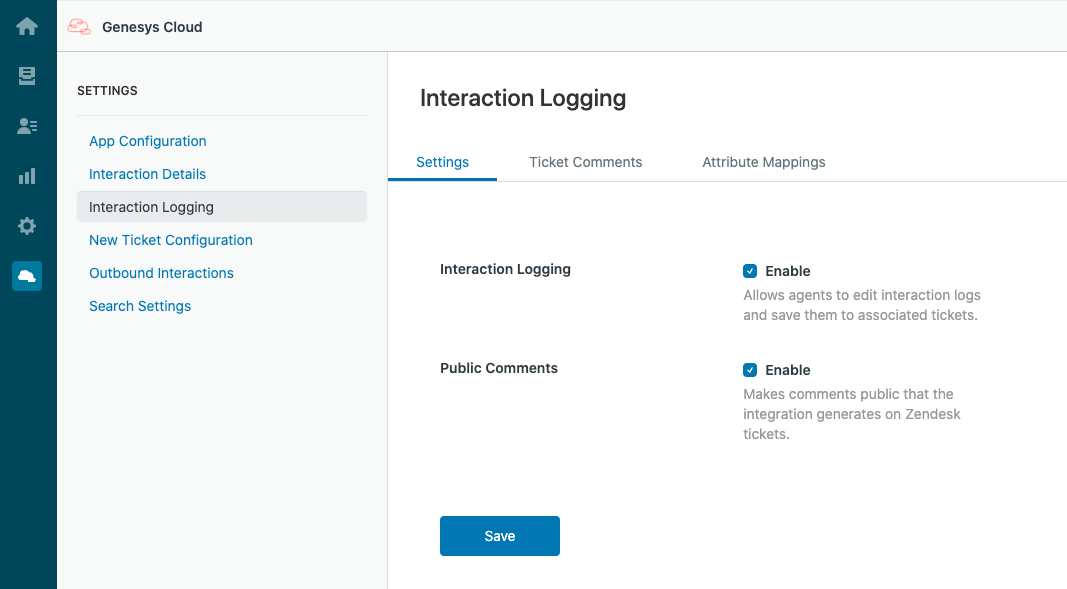
- Interaction Logging allows agents to edit interaction logs and save them to associated tickets.
Agents can work on interaction logs until the interaction deallocates (two minutes after the interaction disconnects). Genesys Cloud for Zendesk then copies the interaction log to the interaction attribute on an open ticket in Zendesk. For more information, see Interaction logs.
Important: When this setting is selected, the Notes section does not appear in the Wrap-up window. For more information, see Wrap up an interaction. - Public Comments makes comments public that the integration generates on Zendesk tickets.
When this setting is selected, these comments are visible to all people, including customers, and are sent to the ticket requester. When this setting is not selected, these comments are only visible to other agents and are not emailed to the ticket requester.
- Click Save.
- Customization of comments under Ticket Comments takes precedence over any attribute mapped to the Ticket Comments ticket field under Attribute Mappings.
- If you change any customizations after initial setup, changes will not take effect until a page refresh.
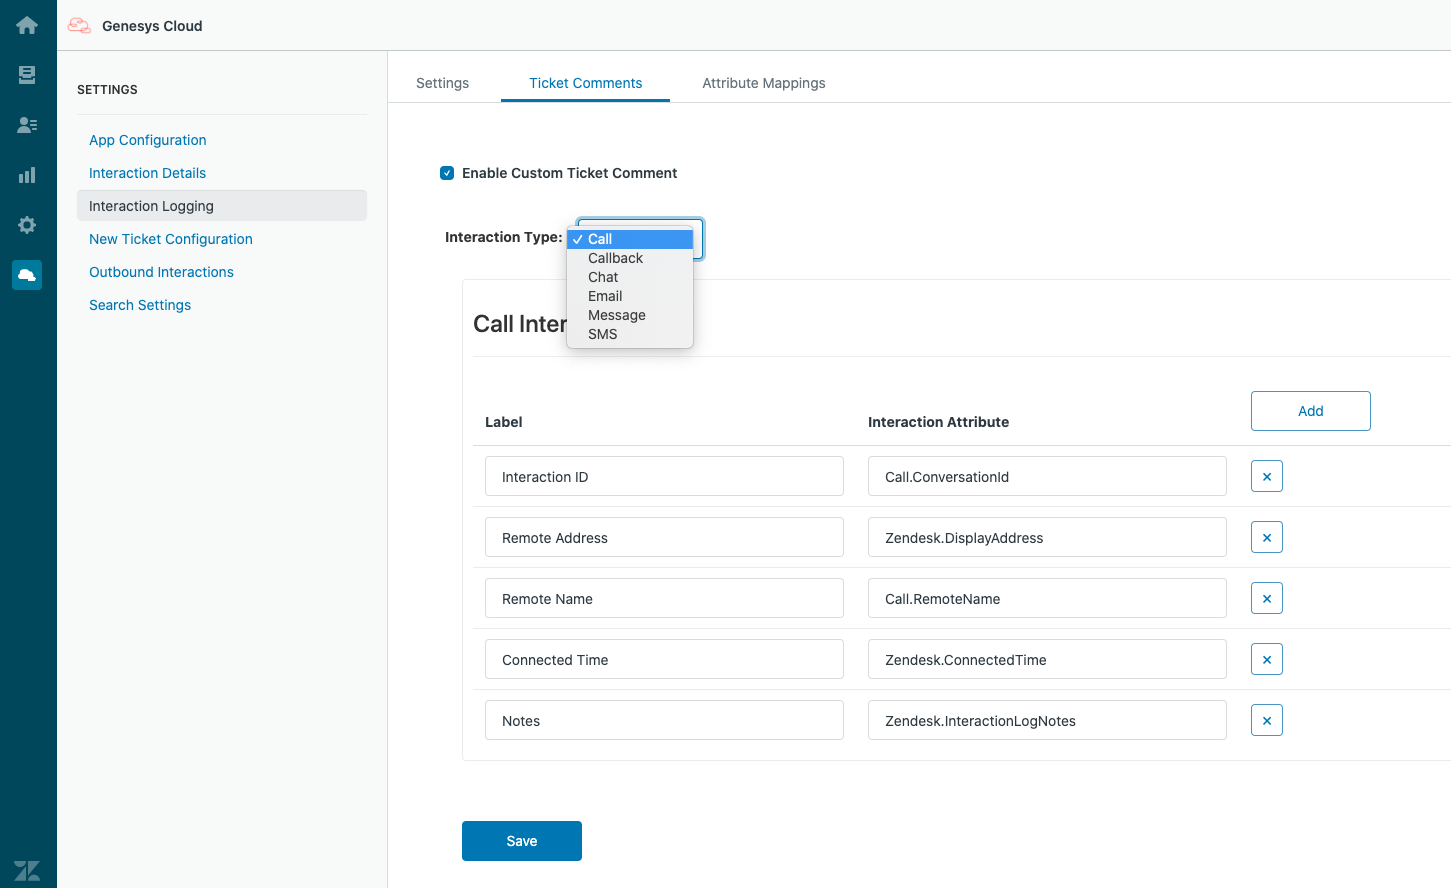
- Select Enable Custom Ticket Comment.
This setting allows you to customize the information that appears on Zendesk ticket comments. See Interaction logs.
- Select the interaction type that you want to have customized tickets.
The Label and Interaction Attribute fields are populated with default values. You can modify these fields or add new labels and interaction attributes. For more information, see Interaction logs and Interaction attributes.
- To add more data to ticket comments, click Add.
- Under Label, add a label for the data to appear on the ticket comment.
- Under Interaction Attribute, add an interaction attribute to appear on the ticket comment.
For more information and a list of supported attributes, see Interaction attributes.
- Click Save.
Click image to enlarge.

- Do not map interaction attributes to the same ticket fields in Attribute Mappings and New Ticket Configuration. Otherwise, the integration will overwrite the first mappings to the ticket fields with later mappings. The sole exception is the Ticket Comments ticket field, which can be mapped in multiple settings. For more information, see Configure new tickets.
- If you change any mappings after initial setup, changes will not take effect until a page refresh.
- Customization of comments under Ticket Comments takes precedence over any attribute mapped to the Ticket Comments ticket field under Attribute Mappings.
- If you do not add custom ticket fields to ticket forms, the custom ticket fields and data for the mapped interaction attributes will not appear on tickets. For more information, see Adding custom fields to your tickets and support request forms in the Zendesk documentation.
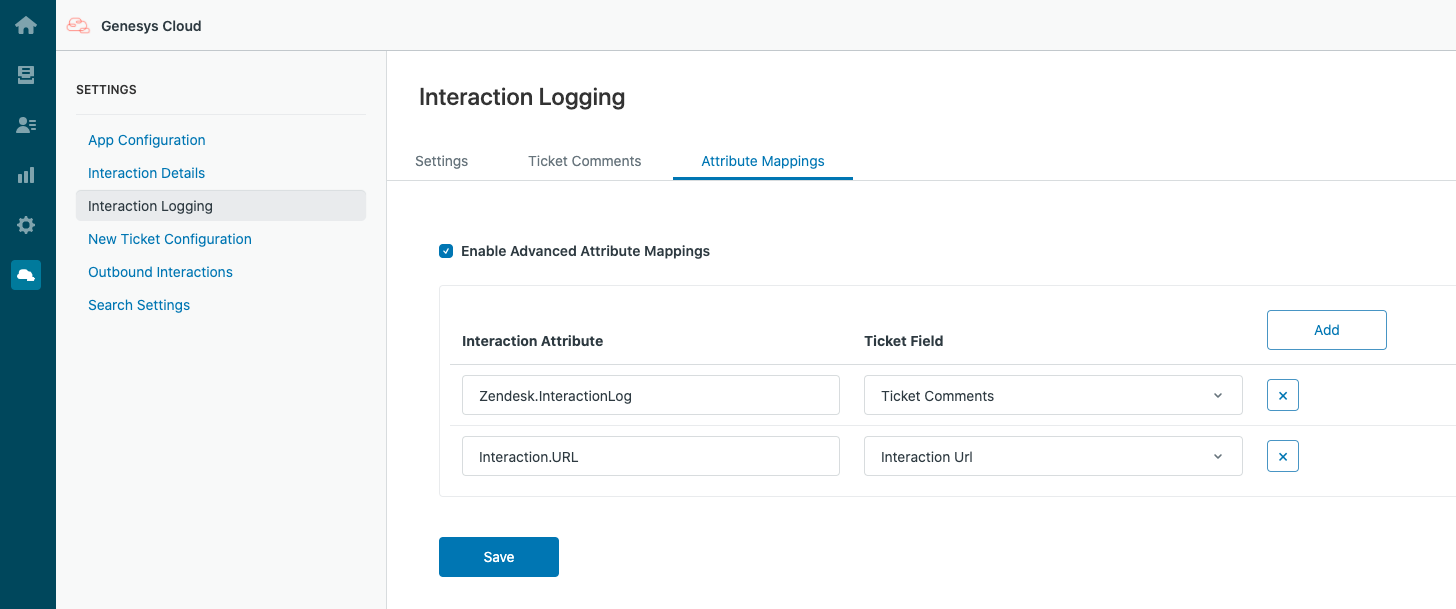
- Select Enable Advanced Attribute Mappings.
This setting allows you to map interaction attributes in Zendesk to system ticket or custom ticket fields. After an interaction deallocates, the integration saves these mapped interaction attributes to the ticket. For information about the values to use with system ticket fields, see JSON Format in the Zendesk documentation.
For information about creating custom fields, see Adding custom fields to your tickets and support request forms in the Zendesk documentation.
Notes:- The integration supports all custom ticket field types, except Credit card.
- Multi-select fields: Set multiple values in other services as pipe or comma delimited.
- Numeric or Decimal fields: If users enter non-numeric strings (such as “hello”), the integration will fail to save all field data to the ticket.
- Date fields: The value for this field must be in “yyyy-mm-dd” format.
By default, Zendesk.InteractionLog is mapped to Ticket Comments. You can remove this selection so interaction logs do not appear in comments or you can map Zendesk.InteractionLog to a field so that the interaction log information is searchable. For more information, see Interaction logs and Interaction attributes.
- To add an interaction attribute mapping, click Add.
- Under Interaction Attribute, add an interaction attribute.
For more information and a list of supported attributes, see Interaction attributes.
- Under Ticket Field, select a system or custom ticket field that you want to map the interaction attribute to. Notes:
- Do not map more than one interaction attribute to a single ticket field.
- Comments are not searchable, but fields are. If you want to be able to search the content of an interaction attribute, do not map it to Ticket Comments.
- Continue to add interaction attribute mappings.
- Click Save.
Click image to enlarge.
For the other settings, see Settings in Genesys Cloud for Zendesk.
For more information about the integration, see About Genesys Cloud for Zendesk.


