
Pair an Edge using a USB flash drive and an LCD
- Telephony > Plugin > All permission
You can pair an Edge with the Genesys Cloud cloud-based software using a USB flash drive and an the external LCD. The USB/LCD pairing option is available for the Edge Standard v3 / v2, Edge Mini v2 / v1, and Edge Micro. (These Edges ship with a USB flash drive and an external LCD included in the box.)
Encryption certificate options
The pairing process allows you to choose a private Genesys Cloud encryption certificate or a publicly signed encryption certificate. The pairing process also supports China-specific encryption. Use China-specific encryption for locations under the jurisdiction of Chinese law.
Encryption certificates are based on the site location. If you are in China, you must choose a site located in China to get a China-specific certificate authority.
When you select a China site, the Certificate Authority option does not appear.
For the China-specific option, open TCP port 945 from the Edge IP on your firewall
To pair an Edge using a USB flash drive and an LCD
- Press the power switch on the Edge.
- Wait up to 10 minutes for the unit to initialize.
- From a computer on your network, open a web browser and log in to Genesys Cloud.
- Click Admin.
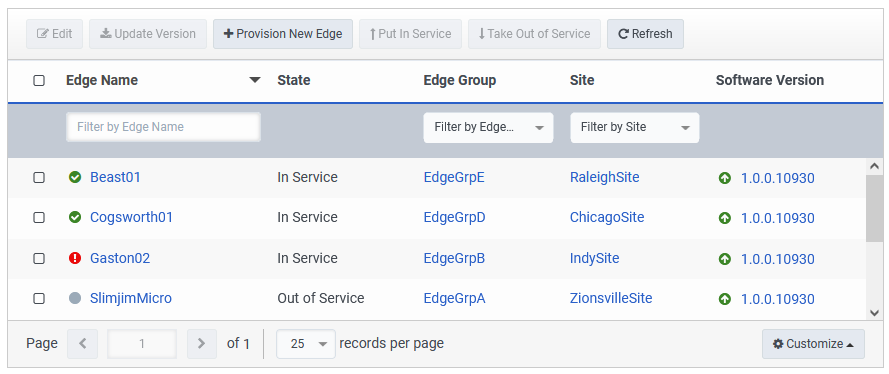
- Under Telephony, click Edges.
- Click Menu > Digital and Telephony > Telephony > Edges.
- Click Provision New Edge.
- In the Provision New Edge screen, enter a name for the Edge in the Edge Name field.
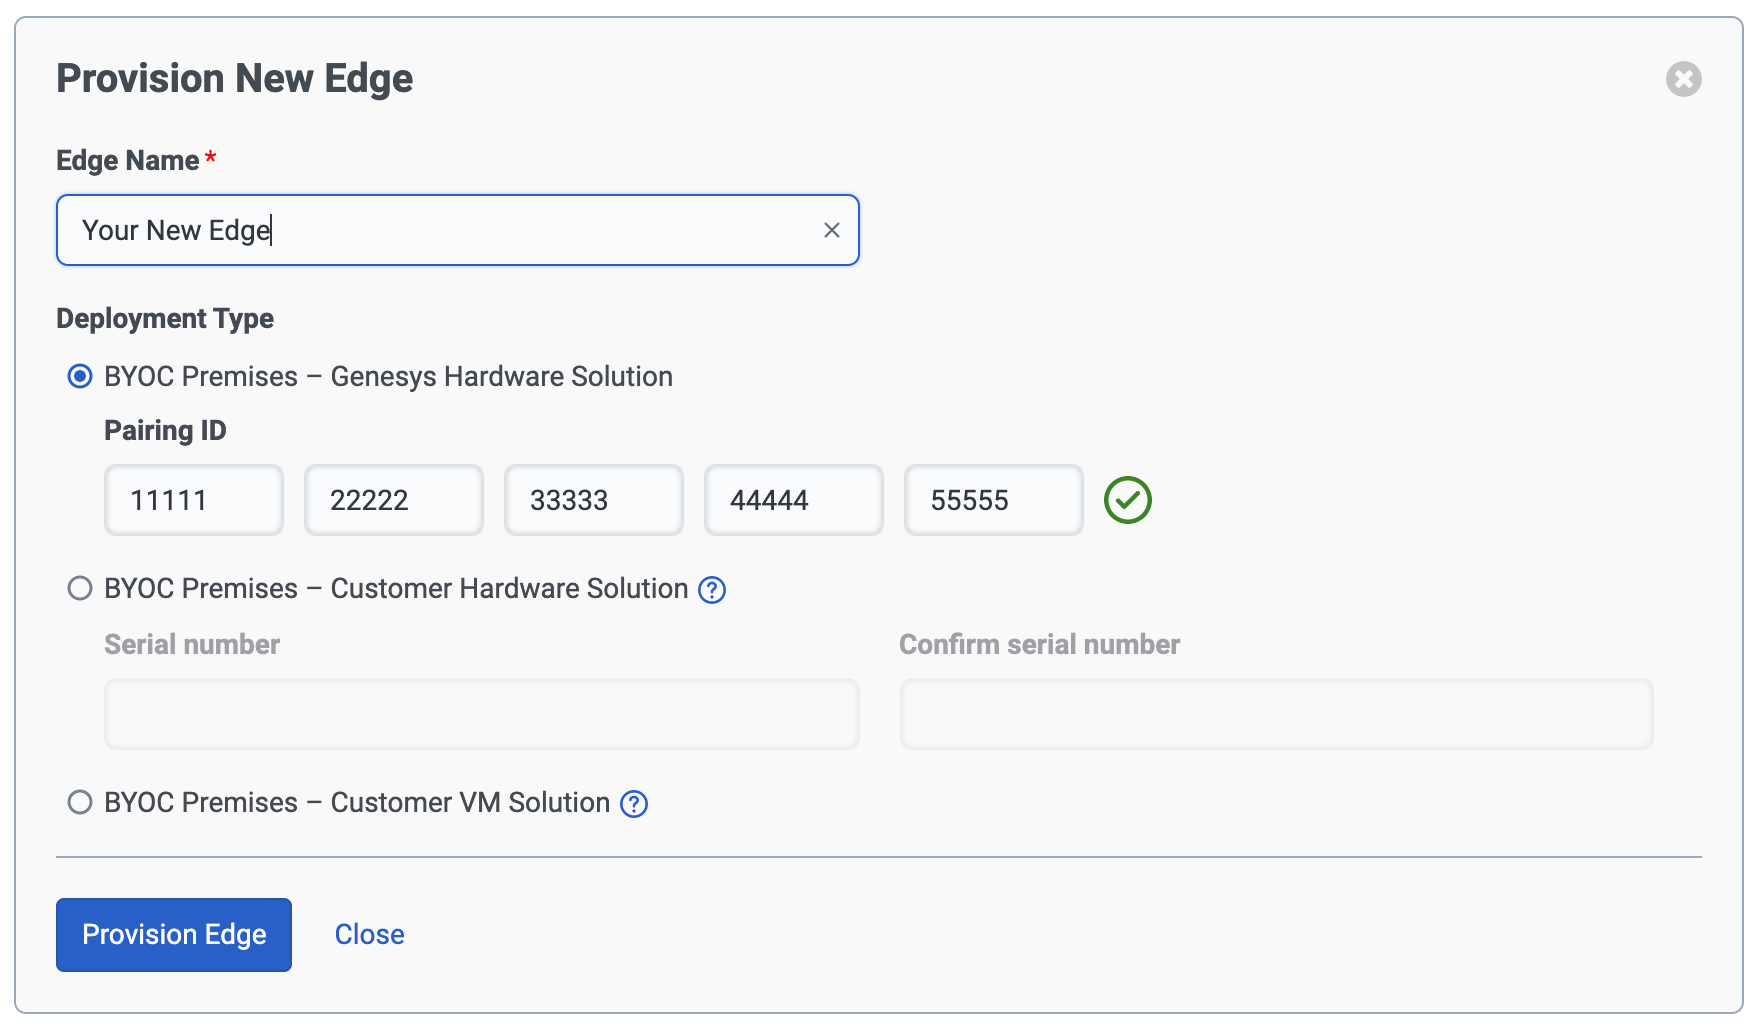
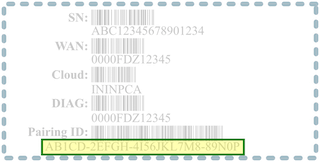
- Enter the Edge pairing ID into the Edge Pairing ID field. Your pairing ID appears on a sticker attached to the Setup Quick Reference Guide instruction sheet. To locate this information, look for the Pairing ID serial number printed below the bar code. Note: The Managed By option is unavailable in most situations.
- Click Provision Edge.
- When you see the Create the Provisioning Package screen, use the Site drop-down to select the site location for the Edge.
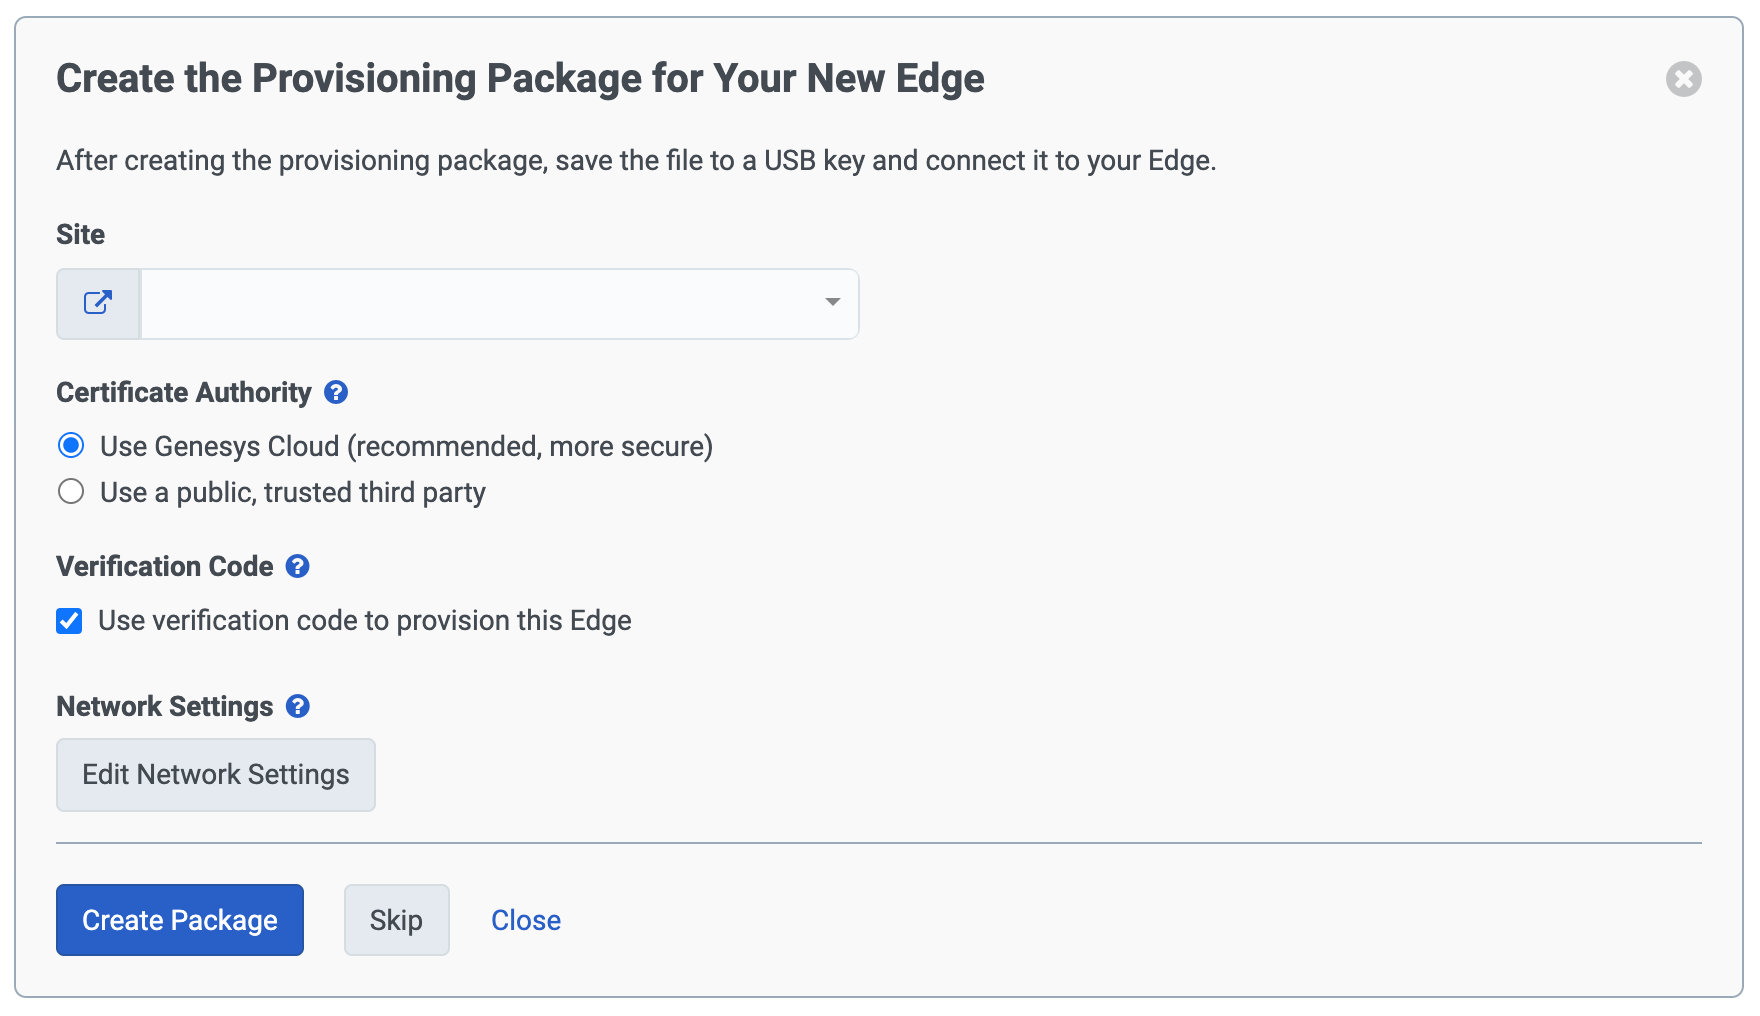
- Choose a Certificate Authority. (Use Genesys Cloud unless you contracted with a third-party certificate authority.)
- Click the Use verification code to provision this Edge check box.
The Verification Code feature is designed to provide an extra level of protection against a Man in the Middle (MITM) attack during the pairing process. While MITM detection is built into the network stack on every Edge, Genesys Cloud recommends that you enable and use the verification code. This step ensures an added level of protection.
When pairing the Edge using a USB Flash Drive, the actual verification code is written to a text file and saved on the drive. Later in the pairing procedure, Genesys Cloud prompts you to enter the last 10 digits of the verification code. You then open the text file and copy/paste the appropriate digits in the text box.
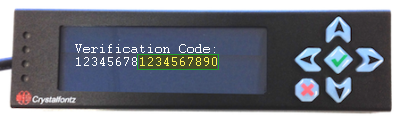
If you are using an LCD along with a USB Flash Drive, the Edge displays a verification code on the LCD. Later in the pairing procedure, Genesys Cloud prompts you to enter the last 10 digits of the verification code. You can then just type the appropriate digits in the text box.
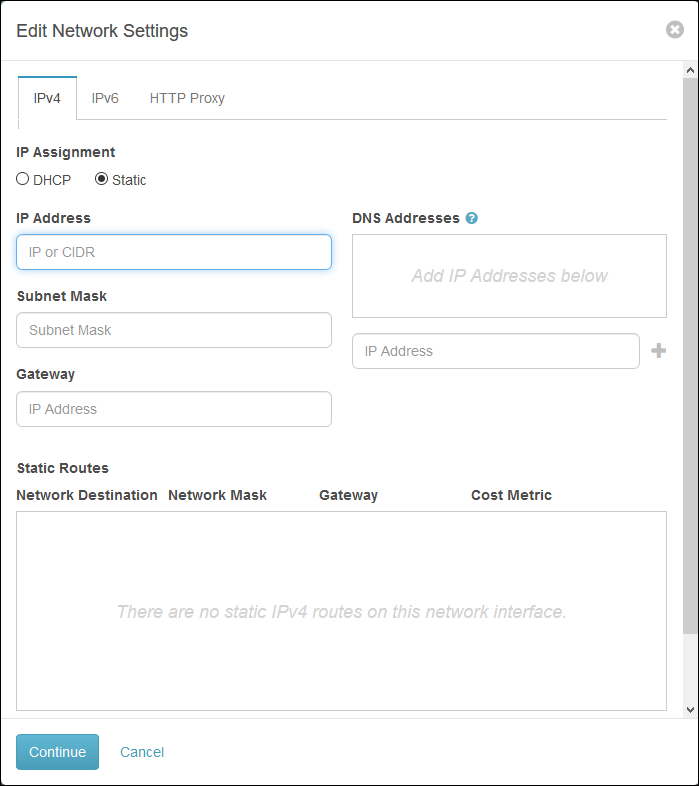
- Click Edit Network Settings to specify your network configuration or to set up a proxy configuration.
Using the tabs in Edit Network Settings, you can specify DHCP or static IP addresses for IPV4 or IPV6. If your network uses a proxy server, you can configure an HTTP proxy connection.
The IPV4 or IPV6 tab
- If you are using DHCP on your network:
- Click DHCP.
- Click Continue.
- If you are using static IP addresses on your network:
- Click Static.
- Enter your network information in the appropriate boxes.
- Click Continue.
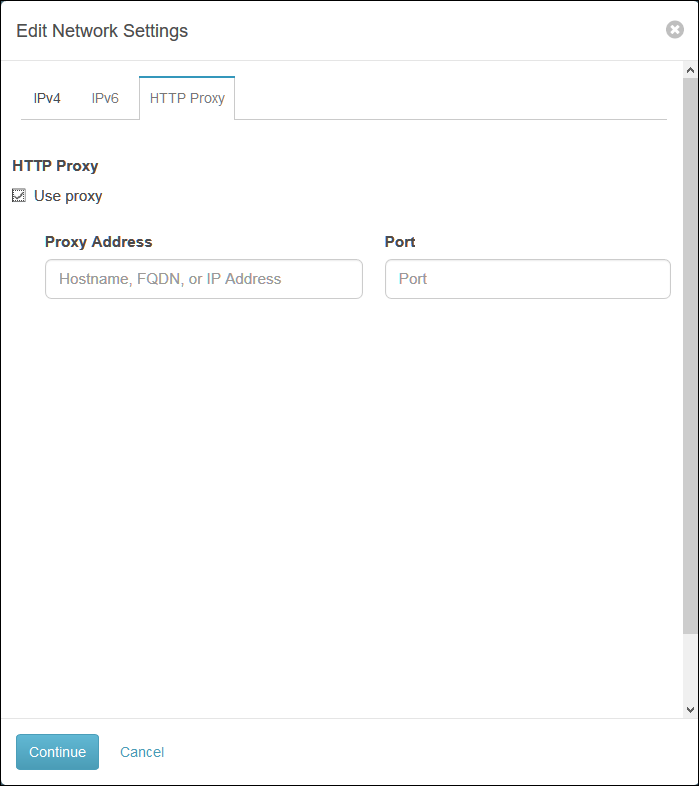
The HTTP Proxy tab
If your network uses a proxy server:
- Select the Use proxy check box.
- Enter a hostname, FQDN, or IP address in the Proxy Address box.
- Enter a port number in the Port box.
- Click Continue.
- Click Create Package. A screen appears to inform you that your Edge is connecting to Genesys Cloud and prompts you to verify your settings.

- When the provisioning package is ready, plug the USB flash drive into the USB port on your PC.
- Locate the provisioning package, which is saved as a .zip file and named after the pairing ID, in the Downloads folder on your PC. Note: If you download multiple copies of the file, remove the appended number at the end of the file to revert to the original file name. For example, change 123.zip(2) back to the original 123.zip.
- Copy the provisioning package .zip file from your PC drive onto the USB flash drive. Do NOT extract the .zip file!
- Eject the USB flash drive from your PC.
- Plug the USB flash drive into the USB port on the Edge after the system is up and running. Note: On the Edge Standard v3, the iLO Service Port and the USB 3.0 port are right next to each other. Make sure that you plug the USB flash drive into the correct port. (The USB port is on the right and the iLO port is on the left.) See Genesys Cloud Edge Standard v3 Product Information Sheet.
- Wait for the Edge to locate the provisioning package and apply the settings.
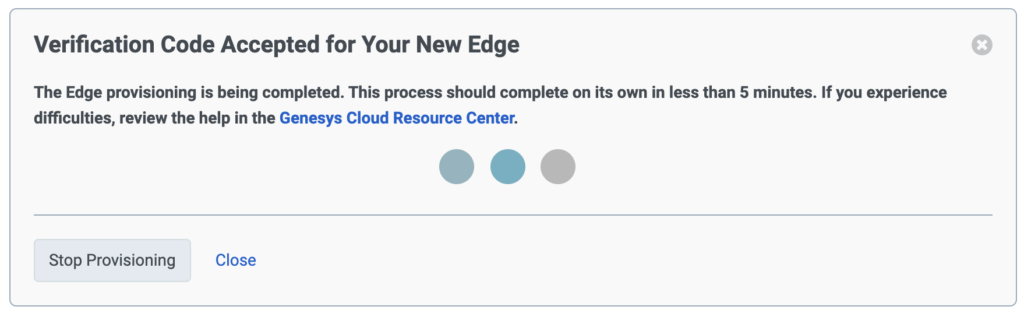
Note: Edge provisioning completes automatically, but the process can take several minutes. - When the Enter Verification Code prompt appears, refer to your LCD display, locate the last ten digits of the verification code and enter them into the text box.
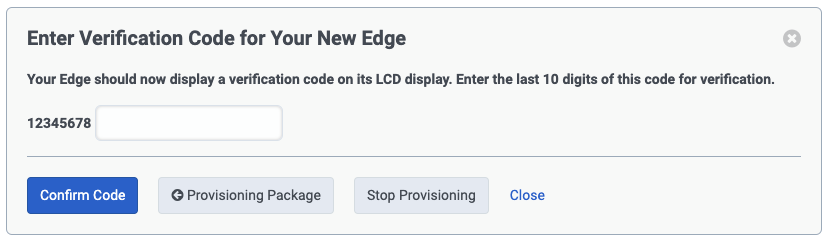
- Click Confirm Code and wait for the system to verify the code.
- When the Ready to Configure prompt appears, click Configure Edge.
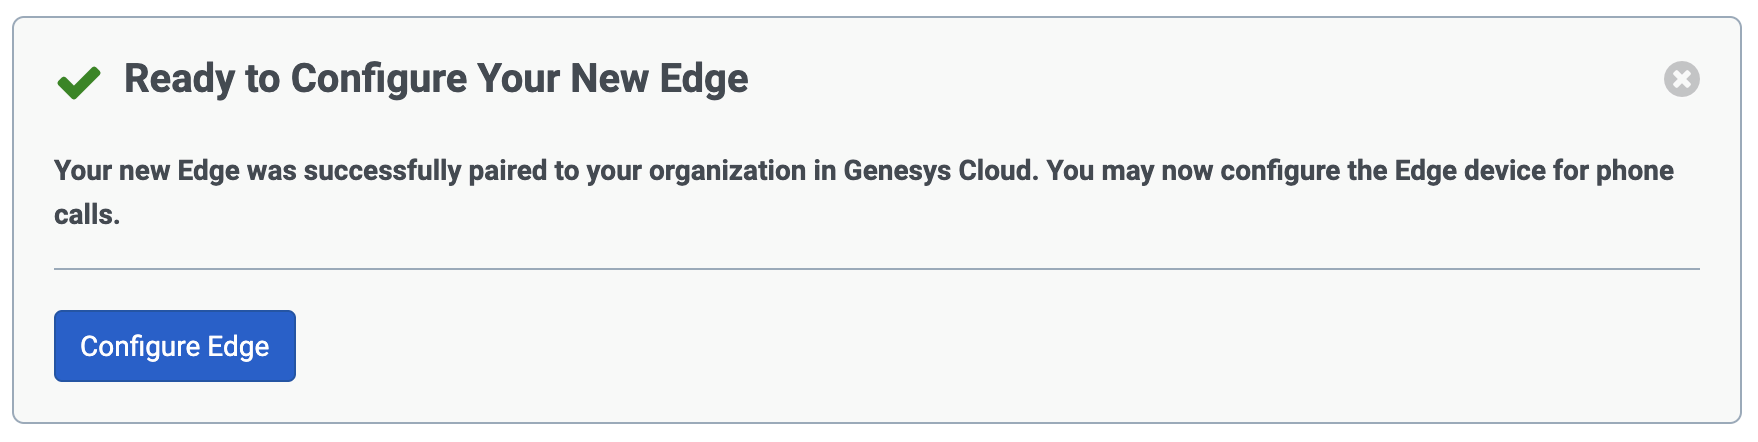
At this point, your Edge is paired with Genesys Cloud and you can proceed to the appropriate Edge configuration article: