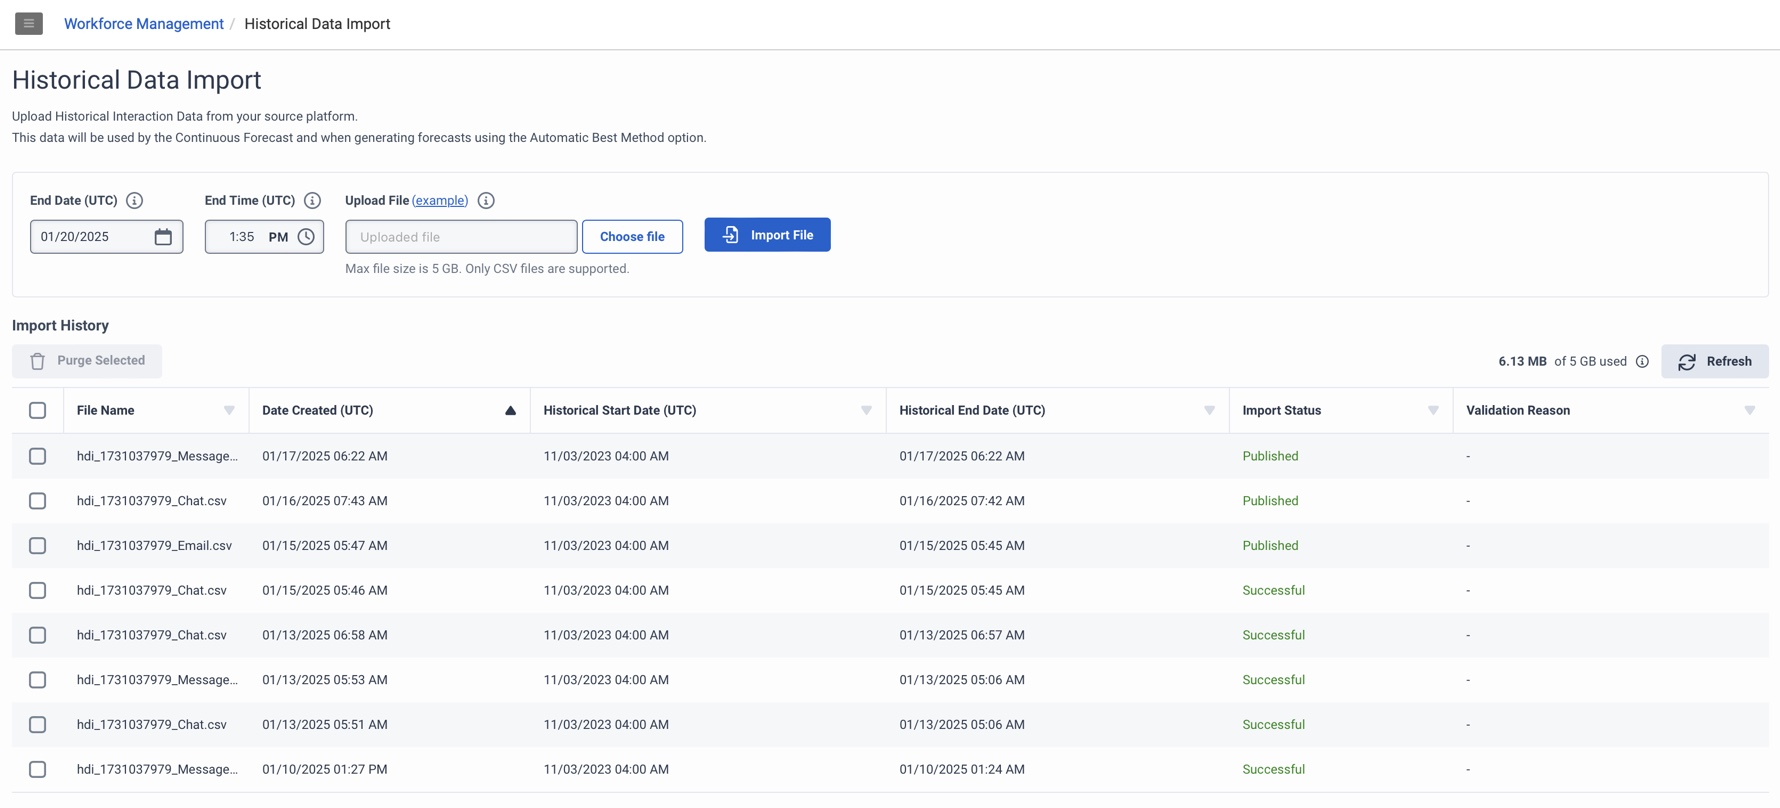
Navigate the Historical Data Import view
Use the Historical Data Import view to upload historical interaction data. Workforce management uses this data to generate forecasts using the Automatic Best Method option. This data is also used when generating the Continuous Forecast. For more information, see Main Forecast Overview.
Click the image to enlarge.
| Column | Description |
|---|---|
| End Date (UTC) |
Indicates the last date that data will be imported from the specified import file. Note: Workforce management uses the uploaded data prior to the end date. After this date, workforce management uses the live interaction data from Genesys Cloud. |
| End Time (UTC) |
Indicates that the last time data will be imported from the specified import file. Note: Workforce management uses the uploaded data prior to the end date/time. After this date, workforce management uses the live interaction data from Genesys Cloud. |
| Upload File | Shows the selected file to be imported. Click (example) to download a sample .csv file that can help you format the file that you want to import. |
| Choose File | Click to search for and select the .csv file that includes the historical data to import. |
| Import File | Click this button to begin the import process. |
| Total Storage Used |
Specifies the total size of all successfully uploaded files. The maximum allowable storage is 5 GB, whether for a combined set of files or a single file. |
| Refresh |
Click to refresh the import history table and view the details of the most recent updated changes for imported and purged files. |
| Purge Selected |
To delete historical data, then from the Import History table, click the respective check box. Click Purge Selected to remove the chosen files from the system. The purge process can take up to 24 hours to complete. After the data from the selected import files successfully purges, newly created forecasts generate from native Genesys Cloud historical data. Note: The purge process completes at approximately 3:00 a.m. local time in each region. |
|
Import History table |
The Import History section contains details about imported files.
Note: After 10 days, the system removes files with any status other than Published and Purge Pending. For more information, see Import historical data.
|


