
Add multiple single sign-on providers to Genesys Cloud
- Single Sign-on > Provider > Add, Delete, Edit, and View permissions
- Admin role in your organization’s identity provider account
- A single email address for both the identity provider account and Genesys Cloud
- Metadata from your identity provider
- An encoded public certificate from your identity provider
Genesys Cloud allows you to configure up to 30 single sign-on (SSO) integrations with the same identity provider or a mix of identity providers. To help you create your SSO integrations, Genesys Cloud enables you to import a Security Assertion Markup Language (SAML} metadata file that you receive from your identity provider. Importing a SAML metadata file, which contains the relevant configuration details and certificate information, automatically populates the necessary fields in the integration.
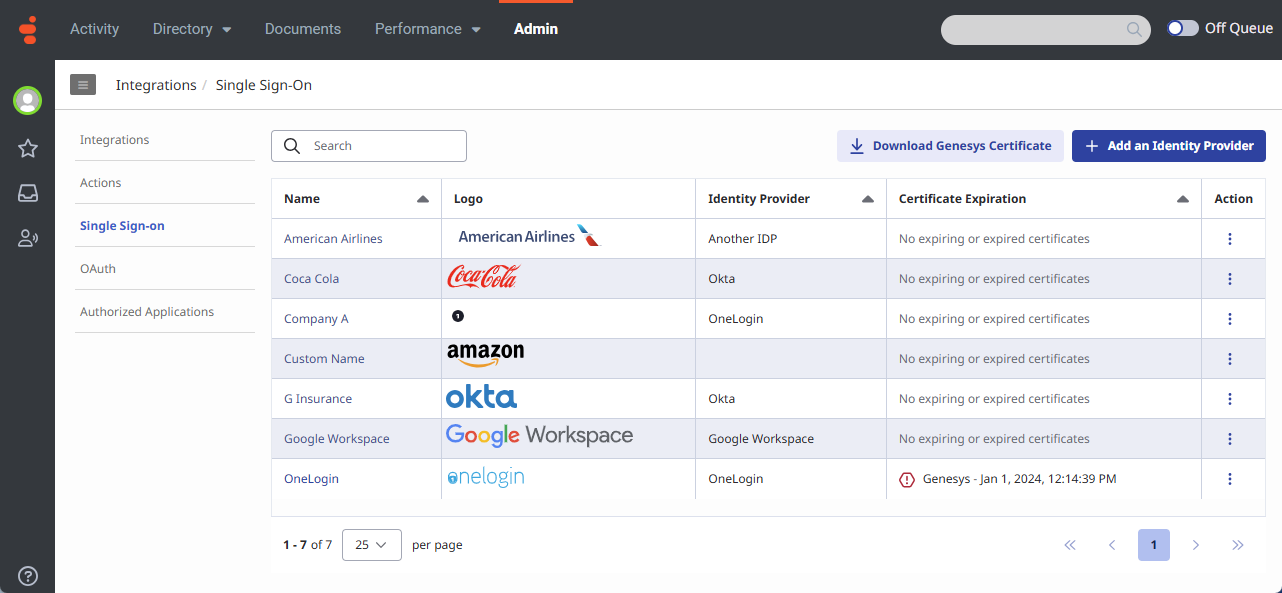
Single Sign-On page
To track multiple SSO integrations, Genesys Cloud displays the integrations as a list on the Single Sign-On page. The page provides a summary of each integration including the log in name, logo, identity provider, and certificate expiration details. In the Action column, click More to display a menu that allows you to edit and delete an integration. On the Name, Identity Provider, and Certificate Expiration column headers, click Sort to rearrange the view in ascending or descending order.
The page also provides options that allow you to add an identity provider and download a Genesys certificate. To send a Genesys certificate to an identity provider, click Download Genesys Certificate.
Click the image to enlarge.
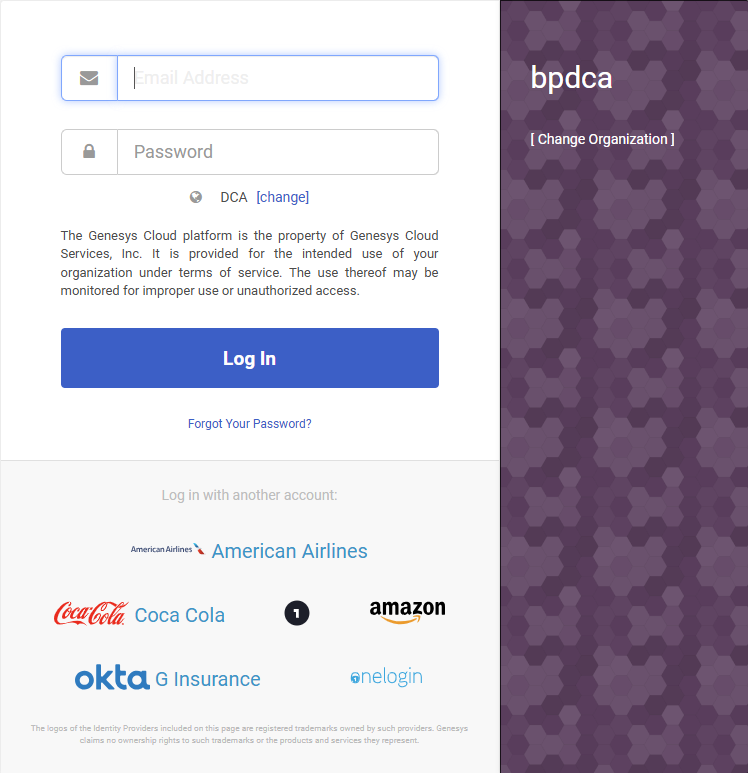
Customize the login screen for each SSO integration
You can customize how to display each SSO integration with a different login name and a logo of your choice. You can choose to display the name or the logo, or both the name and logo. The choice you make determines how the SSO integration displays on the Single Sign-On and Genesys Cloud login pages.
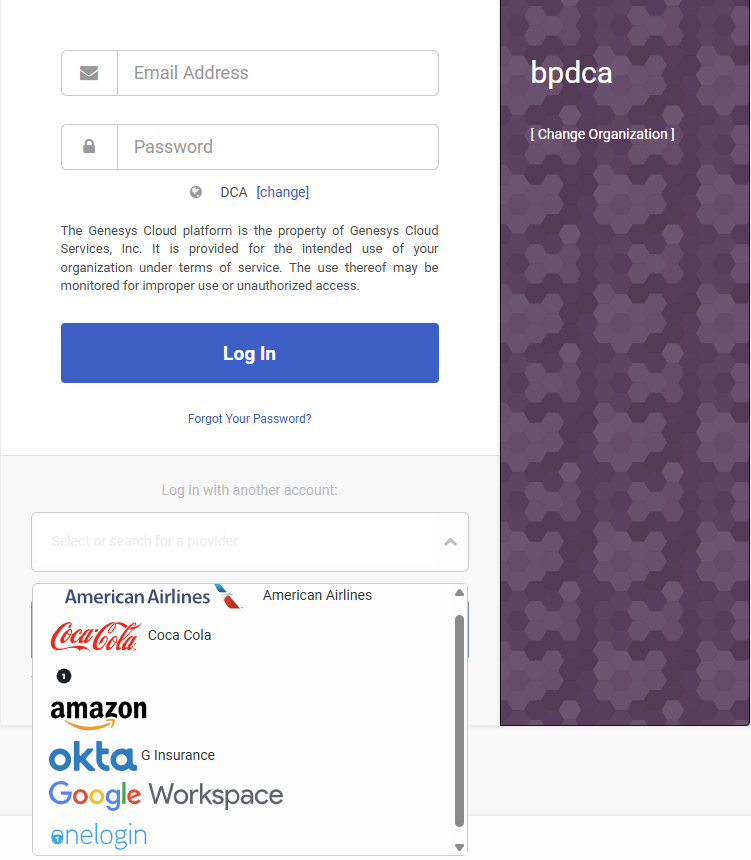
To conserve space, only six SSO integrations appear directly on the Genesys Cloud login page.
If you have more than six SSO integrations, they appear in a list on the login page.
Create an SSO integration
Genesys Cloud metadata
To pair an SSO integration between Genesys Cloud and an identity provider, configure settings on both ends. Identity providers supply you with a metadata file that contains the issuer URI, single sign-on URI, and single log out URI to enter into Genesys Cloud as you configure your organization’s identity provider account. You can generate a SAML metadata file with the Genesys Cloud metadata and certificate information that an identity provider must use to configure settings on their end.
To create an SSO integration:
- Click Admin.
- Under Integrations, click Single Sign-on.
- Click Menu > IT and Integrations > Single Sign-on.
- Click Add an Identity Provider.
- Enter the name that you want to assign to your integration.
- To display the logo on the Genesys Cloud login page, select Display Name On Login Page.Note: If you have more than six identity providers, the Display Name On Login Page option is not available.
- Click Identity Provider Name and you can select one of the available, fully supported, identity providers or enter a new identity provider name.Note: The Identity Provider Name list contains a set of the most common providers. If you do not see your identity provider listed, you can add them by typing their name. After you save the configuration, the new identity provider appears in the list.
- Click Select logo and upload the logo image file that you want to display on the login page. Alternatively, you can drag and drop the logo image file.Note: The logo image file must be in SVG format and cannot be larger than 25 KB in size.
- To import the metadata file that your identity provider sent to you, in the Identity Provider Data section, click Select SAML metadata to import. Alternatively, you can drag and drop the metadata file.
After you import the metadata file, notice that the required fields are automatically populated and the encoded public x509 certificate for SAML signature validation is available.
| Field | Description |
|---|---|
| Issuer URI | The identity provider’s Issuer ID. |
| Single Sign-On URI | The identity provider’s Single Sign On URL. |
| Single Sign-On Binding | The sign in binding that your identity provider specified. |
| Sign Authentication Requests |
Select the Sign Authentication Requests check box if you want to add an extra layer of security to verify that requests are coming from a verified source. Note: As an additional security measure, Genesys Cloud enables you to sign authentication requests. A signed authentication request is a SAML (Security Assertion Markup Language) request that has been digitally signed to ensure its authenticity and integrity. |
| Single Logout URI | The log out URL that your identity provider specified. |
| Single Logout Binding | The log out binding that your identity provider specified. If no binding is specified, select HTTP Redirect. |
| Name Identifier Format | The format that your identity provider specified. If the format is unknown, select Unspecified. |
| Certificate |
X.509 certificates for SAML signature validation. Uploaded certificates appear with their expiration date. You can have up to five certificates per SSO configuration. Genesys Cloud chooses the correct certificate during single sign-on and log out. To upload more certificates, click Select certificates to upload and upload the certificate. Alternatively, you can drag and drop the certificate. To remove a certificate, click Remove |
- Click Save.
Genesys Cloud Service provider data
When you click Save, Genesys Cloud generates the SAML metadata that your identity provider uses when configuring your identity provider account.
- To download a SAML metadata file that contains the Genesys Cloud metadata and certificate information that an identity provider must use to configure settings on their end, under Genesys Cloud Metadata, click Download Metadata.
- If you only need a Genesys certificate to send to an identity provider, under Single Logout URI, click Download Certificate.
SAML assertion decryption support
Genesys Cloud supports SAML assertion decryption for single sign-on. This feature is designed to provide your organization with an additional layer of security for SSO configurations. With this feature, identity providers can securely encrypt SAML assertions using the Genesys Cloud public encryption key, ensuring only authorized decryption. To enable SAML assertion decryption support, download the current Genesys Encryption certificate and send it to your identity provider.
Download the Genesys Encryption certificate from either the main Single Sign-On page or from your identity provider configuration page.
At the top of the Single Sign-On page, click Download Genesys Encryption certificate. At the bottom of your identity provider configuration page, click Download Genesys Encryption certificate.
SAML attributes
If the following extra SAML attributes are present in the assertion, Genesys Cloud acts on the attributes. The attributes are case-sensitive.
| Attribute name | Attribute value |
|---|---|
| OrganizationName |
|
| ServiceName |
(Optional) A valid URL for the browser to be redirected to after successful authentication, or one of the following keywords:
|