
Use custom dynamic list slot types in a bot flow
In addition to built-in slot types, Architect supports four custom slot types: list slot type, dynamic list slot type, regular expression slot type, timeslot slot type, and if you enable Virtual Agent, AI-powered slots. If you do not know the allowed slot values when you create the bot flow, configure a dynamic list in your bot flow.
Dynamic list slot types are similar to list slot types; however, list slot type values are static. Dynamic lists are helpful if your bot contains many values for a slot type and you do not want to manually and individually configure them within Genesys Dialog Engine Bot Flows. These dynamic lists are also useful in cases where slot values are dynamic for each user and that are not known to the bot author at design time. Use a data action or another source to retrieve the values during the bot conversation and store them in a string collection variable. For more information about data actions, see Manage individual actions for integrations.
You can use a data action or other sources to get the allowed values during the bot session and store that list in a String Collection variable. You can use that string collection to populate your values or synonyms in the dynamic list.
- Dynamic slots only support string collections.
- The maximum number of items, or values, is 500.
- String collections are limited to 2,000 items.
- A values collection cannot be empty.
- A synonyms collection is optional; however, if you provide them, they must match the size of the values collection.
- To provide multiple synonyms for a single value, use a comma-separated string.
- The maximum combined character length of the values collection and the synonyms collection is 4,000,000 characters.
- Dynamic lists support quick replies.
Create a data action that retrieves the values during the bot conversation
You can create custom actions in Genesys Cloud for use with your data actions integrations. Either copy an existing action (static or custom) to use as a template, or follow these steps to create an entirely new action. When you add an action, you can either add contracts and configuration or import them from another data action.
In Genesys Cloud, use a data action to retrieve the values during the bot conversation. Here, you define the input contract and the output contract. The Output Contract in the data action should match the return message that you configure in your route to endpoint.
Example: Third-party data action configuration
[
{
"loanName": "prsnl",
"synonyms": "personal, vacation, holiday"
},
{
"loanName": "auto",
"synonyms": "Auto, Auto loan, car loan "
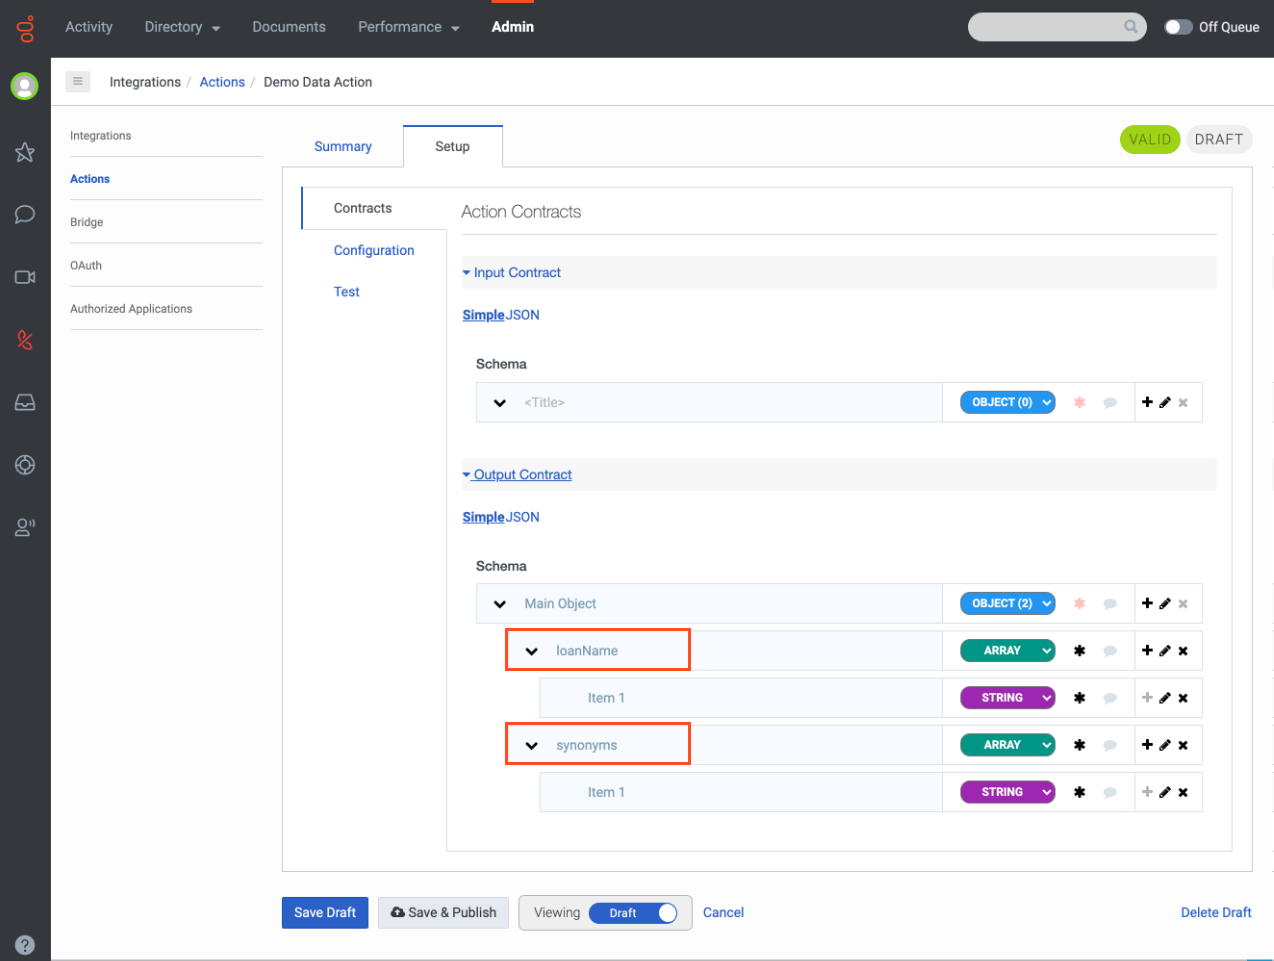
}Example: Genesys Cloud data action Contracts tab
Click the image to enlarge.
Example: Genesys Cloud data action Response tab configuration
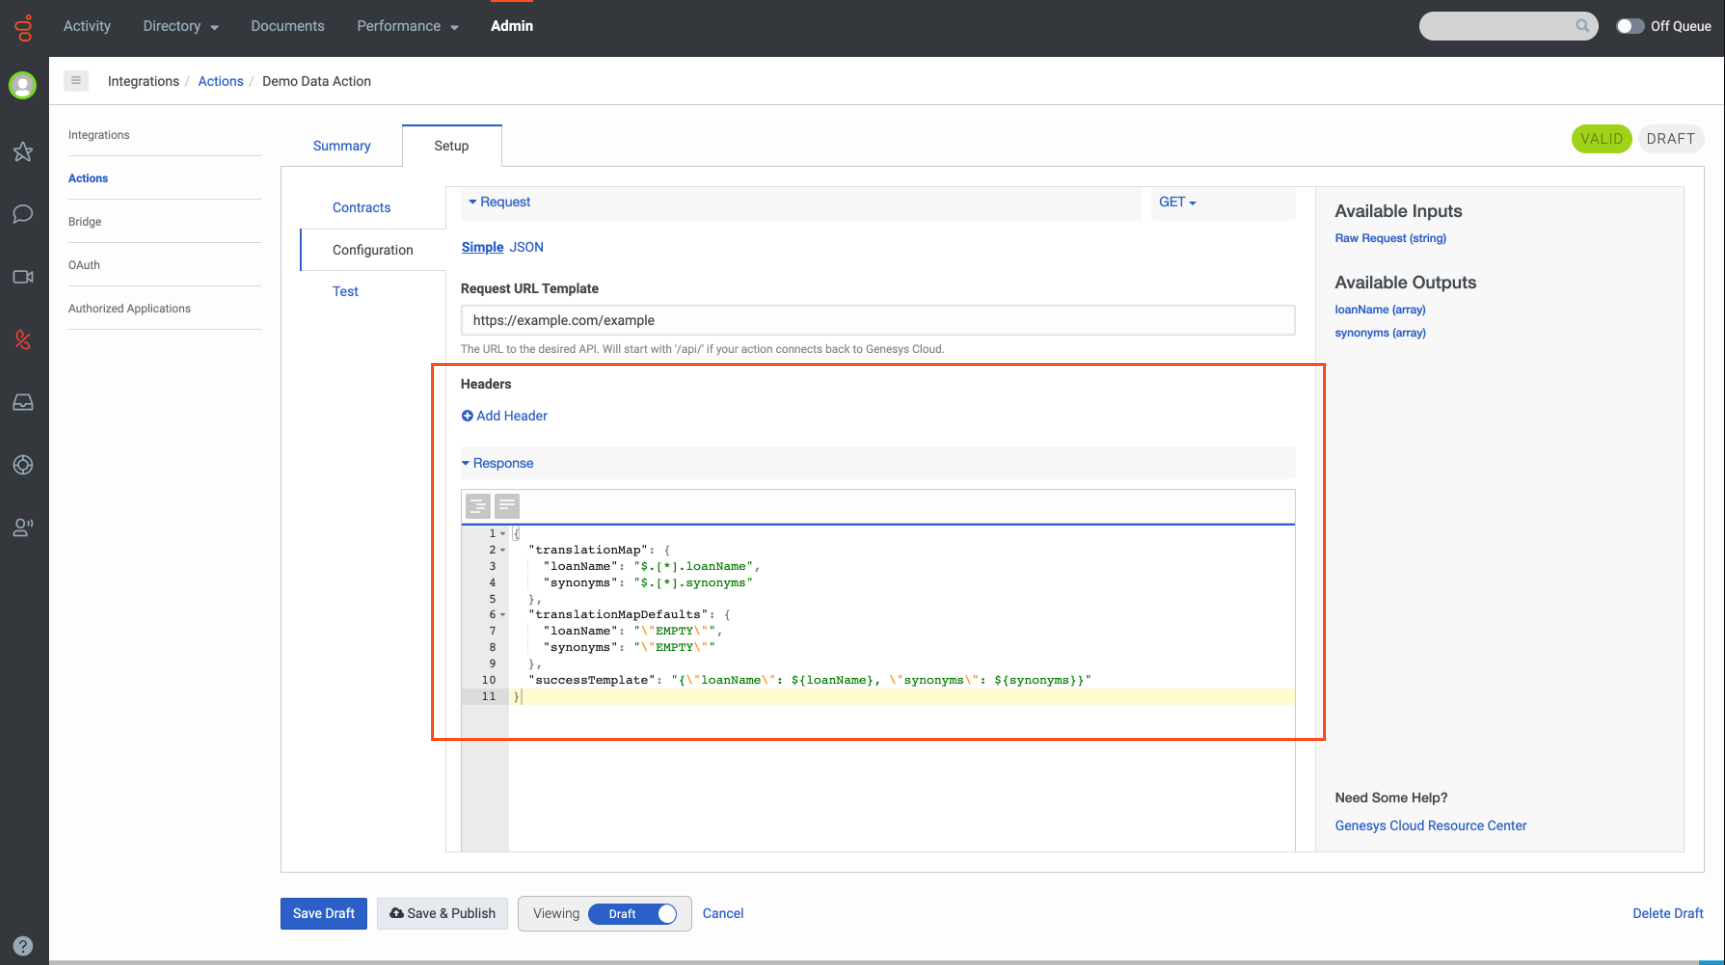
Convert an integer collection to a string collection
{
  "translationMap": {
    "fundName": "$.[*].fundName",
    "fundAmount": "$.[*].fundAmount",
    "synonyms": "$.[*].synonyms"
  },
  "translationMapDefaults": {
    "fundName": "[]",
    "fundAmount": "0",
    "synonyms": "[]"
  },
  "successTemplate": "{\"fundName\": ${fundName}, \"synonyms\": ${synonyms}, \"fundAmount\": $fundAmount.replace(', ','\",\"').replace('[ ','[\"').replace(' ]','\"]') }\"}"
}
To create a data action in Genesys Cloud, complete these steps:
- In Genesys Cloud, click Admin.
- Under Integrations, select Actions.
- In Genesys Cloud, click Menu > IT and Integrations > Data Actions.
- Create a custom action for integrations.
- Add contracts.
- Add configuration.
- Test the action.
For more information, see Manage individual actions for integrations.
Call the data action from the Architect bot flow
To continue the bot flow design, add and configure a Call Data Action.
Call Data Action in the bot flow
Click the image to enlarge.
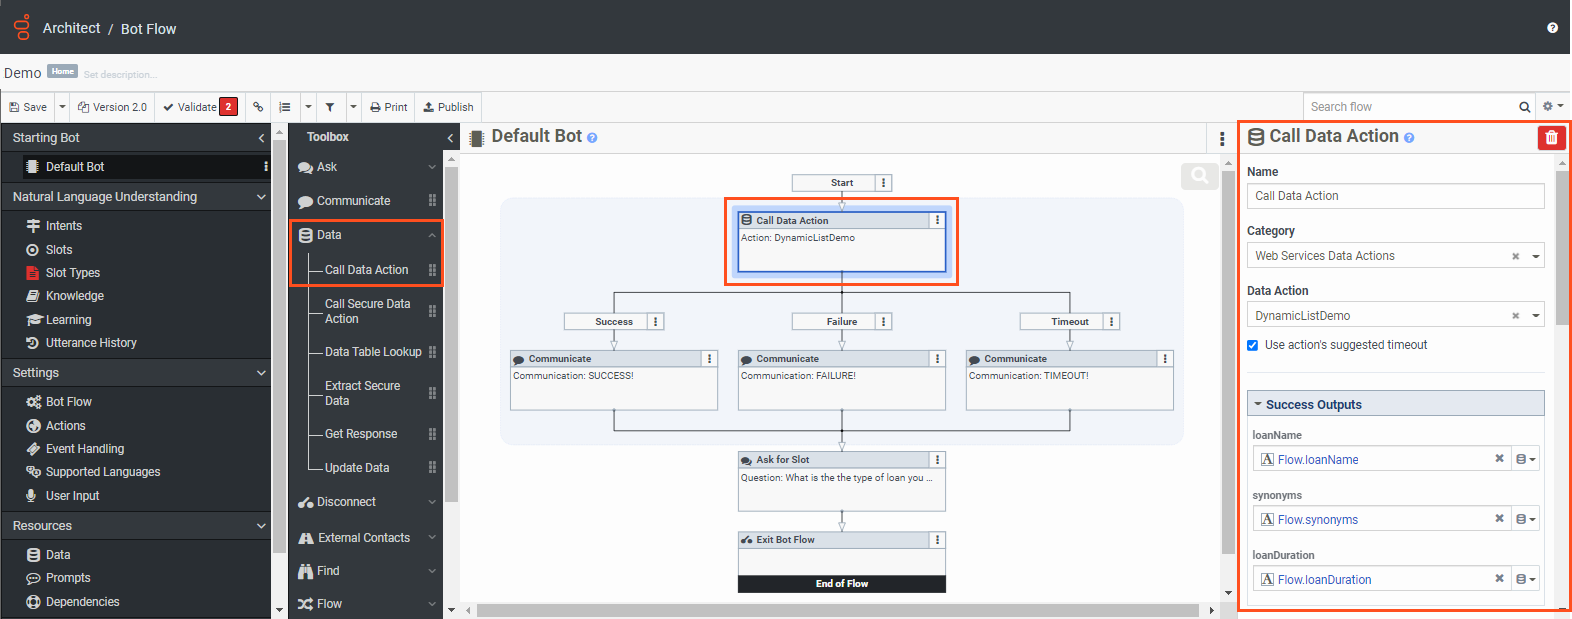
To call a data action from an Architect bot flow, follow these steps:
- From the Architect toolbox, drag a Call Data Action into the task editor, below the Start element.
- Under Category, select the appropriate integrations category; for example, Web Services Data Actions.
- Under Data Action, select the dynamic list data action that you created in Genesys Cloud Admin.
- To complete the Success Outputs and Failure Outputs, do one of the following:
- Enter the appropriate variable for the string collection you want to create, and then press Enter.
- Confirm that the fields populate with the corresponding preconfigured fields in the data action.
Add a custom dynamic list slot type
After you create and configure a data type in Genesys Cloud, add a dynamic slot list to your bot flow.
Add a dynamic list slot type
Click the image to enlarge.

Navigate to the Bot Flow settings page
Click the image to enlarge.
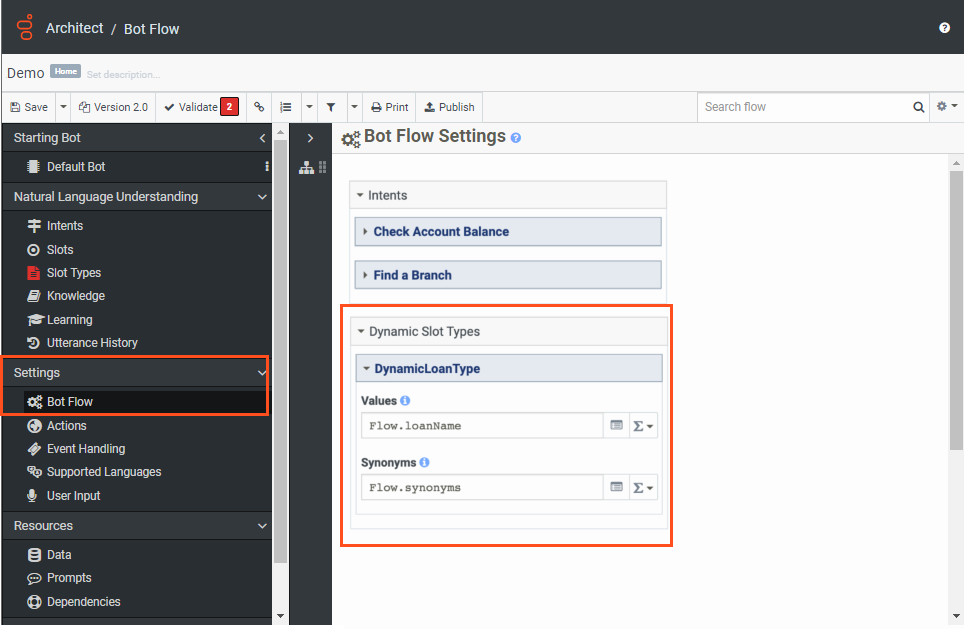
To add a dynamic list slot type, follow these steps:
- In Architect, create a new bot flow or open an existing one.
- Under Starting Bot, select the Default Bot.
- Under Natural Language Understanding, click Slot Types.
- From the Slot Types page, click Add Slot Type.
- Enter a name for the custom slot type and click Save.
- Select Dynamic List as the custom slot type.
- Click Navigate to Bot Flow Settings.
- Under Dynamic Slot Types, complete the remaining fields by associating values and synonyms, as necessary.
Create a slot using the dynamic slot type
After you create a custom dynamic slot type, create a new slot and associate the dynamic slot type to it.
Click the image to enlarge.

To create a slot with a dynamic list slot type, follow these steps:
- Under Natural Language Understanding, click Slots.
- Click Add Slot. The Add Slot dialog box appears.
- Give the slot a meaningful name.
- Under Slot Type, navigate to and select the custom dynamic slot type.
- Click Save.
Use the Ask for Slot action to call the dynamic slot in the bot flow
Now you can use the dynamic slot in an Ask For Slot action within the call flow.
Click the image to enlarge.

To use the dynamic slot in an Ask for Slot action, follow these steps:
- From the Architect toolbox, expand the Ask category and then drag an Ask For Slot action below the Call Data Action’s Success, Failure, and Timeout path.
- Under Slot, enter the dynamic loan slot that you created previously and then complete the relevant fields.
- Complete your bot flow according to your organization’s design.
Modify a slot
To modify slot information, from the Slot menu, select a slot and click Edit .
Delete a slot
To delete a slot, from the Slot menu, select a slot and click Delete .