
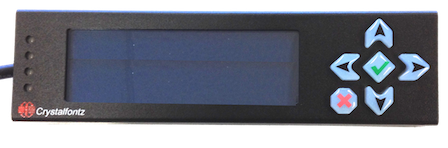
Use the external LCD to set the static IP for the Edge WAN port
You can use the external LCD to set the static IP address for the WAN port on the Edge Standard v3 / v2, Edge Micro, and the Edge Mini. The Edge is not paired with Genesys Cloud at the beginning of this procedure.
Note: When setting an IP address throughout this procedure, if you move the cursor past the rightmost digit before you finish setting the address, you’ll need to cancel and re-enter the address.
- Press the right arrow at Genesys Cloud Edge.
- Press the down arrow at Status.
- Press the green check mark at Settings.
- Press the down arrow at System.
- Press the green check mark at Network.
- Press the down arrow at Proxy.
- Press the green check mark at:
- Lan2 (WAN) for the Edge Micro/Mini.
- Port1 (WAN) for the Edge Standard v3 / v2.
- Press the down arrow at Set DHCPV4.
- Press the green check mark at Set Static IPV4.
- Press the green check mark at IPV4 Address.
- Set the address at the IP Address 000.000.000.000Note: This address is for the Lan2 (WAN) on the Edge Micro/Mini or the Port1 (WAN) on the Edge Standard v3 / v2.
- Move the cursor left and right using the left and right arrows.
- Increase and decrease the highlighted number using the up and down arrows.
- After you set the IP address, press the right arrow to move the cursor past the rightmost digit.
- Press the green check mark when the IP address is complete.
- Press the down arrow at IPV4 Address.
- Press the green check mark at IPV4 Subnet Mask.
- Set the IPV4 Subnet Mask address at the IPV4 Subnet Mask 255.255.255.0:
- Move the cursor left and right using the left and right arrows.
- Increase and decrease the highlighted number using the up and down arrows.
- After you set the subnet mask, press the right arrow to move the cursor past the rightmost digit.
- Press the down arrow at IPV4 Subnet Mask.
- Press the green check mark at IPV4 Gateway.
- Set the IPV4 Gateway address for Lan2 (WAN):
- Move the cursor left and right using the left and right arrows.
- Increase and decrease the highlighted number using the up and down arrows.
- After you set the address, press the right arrow to move the cursor past the rightmost digit.
- Press the green check mark when the address is complete.
- Press the down arrow at IPV4 Gateway.
- Press the green check mark at IPV4 DNS 1.
- Set the address for Lan2 (WAN) at IPV4 DNS 1 000.000.000.000:
- Move the cursor left and right using the left arrow and right arrow.
- Increase and decrease the highlighted number using the up and down arrows.
- After you set the address, press the right arrow to move the cursor past the rightmost digit.
- Press the green check mark when the address is complete.
- Press the down arrow at IPV4 DNS 1.
- Press the green check mark at IPV4 DNS 2.
- Set the address for Lan2 (WAN) at IPV4 DNS 2 000.000.000.000:
- Move the cursor left and right using the left and right arrows.
- Increase and decrease the highlighted number using the up and down arrows.
- After you set the address, press the right arrow to move the cursor past the rightmost digit.
- Press the green check mark after you complete the address.
- Press the down arrow at IPV4 DNS 2.
- Press the green check mark at IPV4 DNS 2.
- Press the green check mark at Apply Changes?
Note: When you finish using the external LCD, Genesys recommends that you disconnect the device from the Edge. Leaving the external LCD connected to the Edge for extended periods of time can cause unnecessary CPU usage.