Set up a Voci V-Spark transcription and speech analytics integration
Prerequisites
- Genesys Cloud CX 2, Genesys Cloud CX 3, Genesys Cloud CX 4, or Genesys Cloud EX license
- Voci V-Spark account. For more information, visit AppFoundry.
- A Voci V-Spark auth token.
- A folder configured in Voci V-Spark for uploading recordings to transcribe. For more information about configuring a folder, see the V-Spark Management Guide provided by Voci (PDF, Voci login required).
- Voci integration turned on for your Genesys Cloud organization. Contact Genesys Cloud Customer Care to have this option enabled.
Voci V-Spark transcription and speech analytics allows you to transcribe Genesys Cloud policy-based recordings. After you set up the integration, you can select a policy option to transcribe all recordings that the policy matches. You access transcribed recordings through V-Spark, which also provides information based on those transcriptions. For example, you can view analytics about customer and agent emotion, and search for specific words.
- Click Admin.
- Under Integrations, click Integrations.
- Click Menu > IT and Integrations > Integrations.
- Click Integrations.
- Find the Voci V-Spark Transcription integration and click Install.
- Click the Configuration tab.
- In the transcribeURL box, type the URL of your Voci V-Spark server. The transcribeURL uses the following format:
https://{server-address}/transcribe/{short-orgname}/{folder-name}
- server-address: the address of your Voci V-Spark server
- short-orgname: the short name of your organization from your Voci Settings > Accounts page.
- folder-name: the folder you want to upload recordings to. Folders are listed on your Voci Settings > Folders page.
https://vspark-demo.vocitec.com/transcribe/Genesys Cloud/QMStereo - Click Credentials.
- Click Configure.
- Paste your auth token into the Auth Token box.
- Paste the token into second box to confirm.
- Click Ok.
- Click the Integration Details tab.
- In the Name box, type a name for the integration.
- Under Status, click the Active/Inactive switch to activate the integration.
- Click Yes to confirm that you want to activate.
- Click Save.
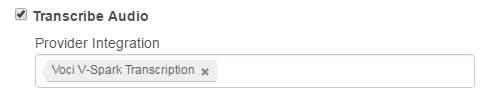
After you set up the integration, you can use policies to specify which recordings to transcribe. Select Transcribe Audio to transcribe the audio for interactions that the policy covers.