Configure a voicemail flow to allow a caller to opt out of voicemail
You can configure the Architect voicemail flow to allow an inbound caller to opt out of directing to a Genesys Cloud user’s voicemail. Instead, the caller redirects to another Architect inbound flow.
If the select flow leads to a Genesys Cloud queue, then the caller can opt out of the option to leave a voicemail. The system sends the caller to a Genesys Cloud queue.
Note: Examples in this article pertain to English-only. Make sure to add additional languages according to your organization’s specifications.
Click the image to enlarge.
You can also replace the voicemail system greeting with blank audio.
Click the image to enlarge.
Before you begin
Read the following articles:
(Optional) Download the example template:
Configure the voicemail flow
To configure the voicemail flow, follow these steps:
- From the Architect home page, click the Flows list and select Voicemail.
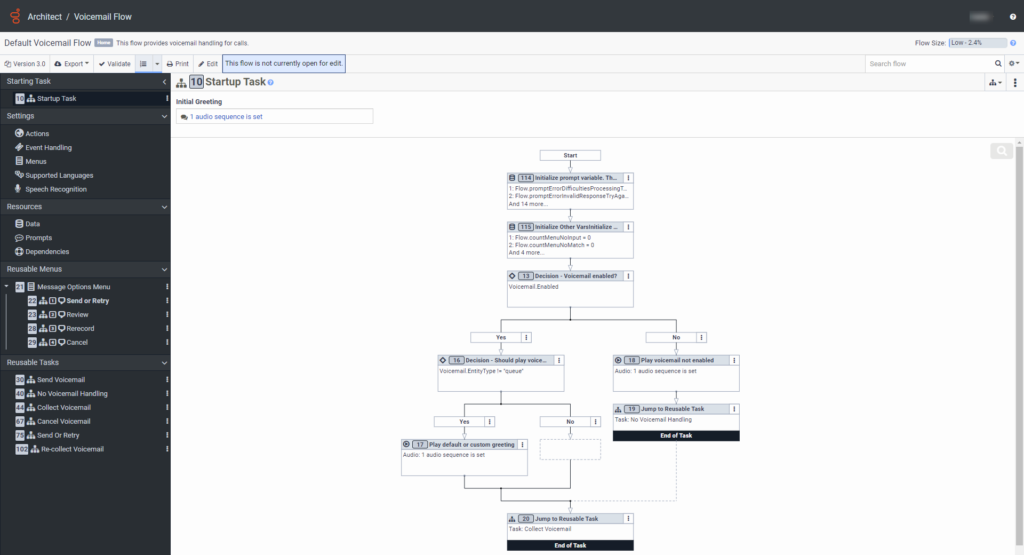
- Click Default Voicemail Flow. The default flow opens.
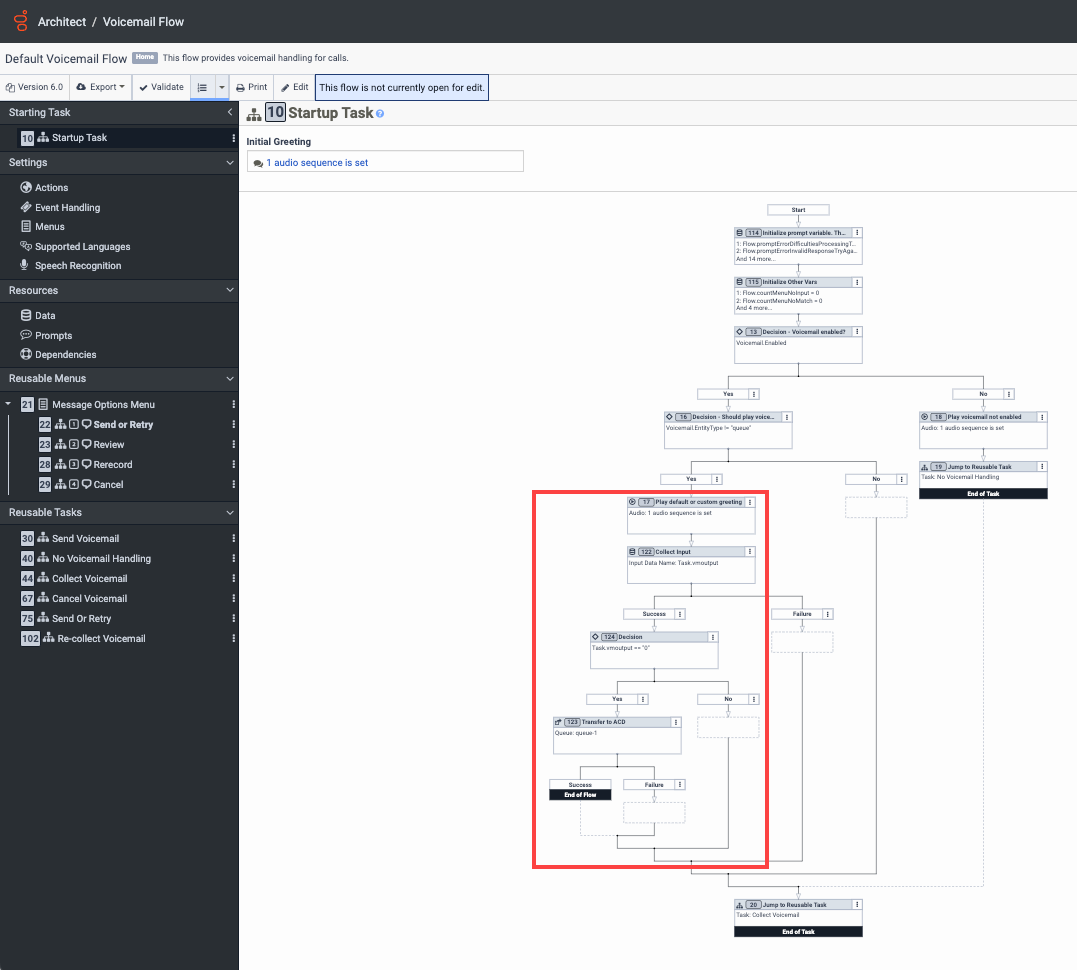
Click the image to enlarge.
- Click Edit.
- Under Starting Task, click Startup Task.
- In the task editor, locate the Play default or custom greeting Play Audio action.
- Click More .
- From the menu that appears, click Toolbox > Data > Collect Input. A Collect Input action appears below the Play Audio action.
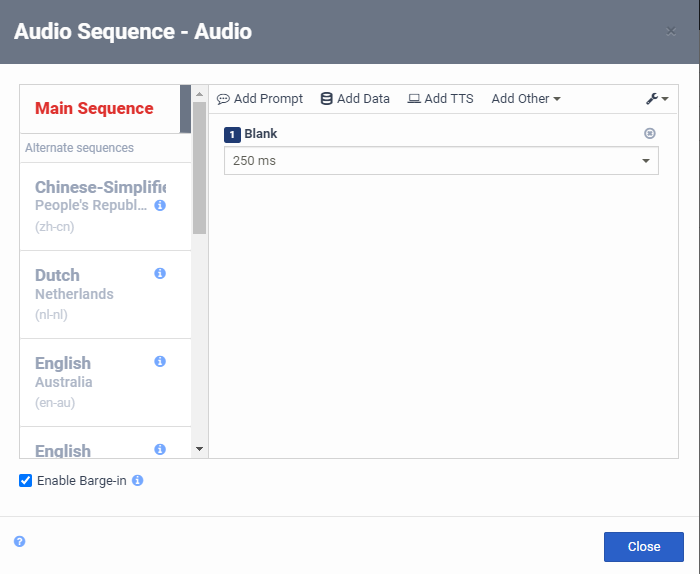
- In the Collect Input configuration pane, under Input Audio, click Audio Sequence . The Audio Sequence builder opens.
- Define the desired voicemail opt out audio sequence. Click the image to enlarge.
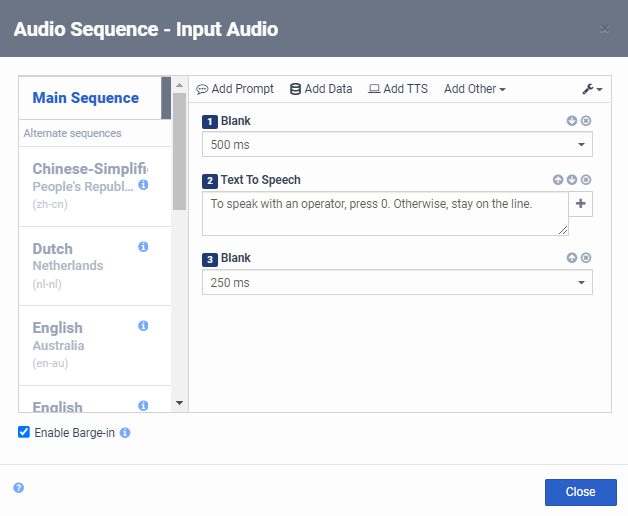
- Click Add Other > Add Blank Audio.
- Set the blank audio to 250 ms, or your desired blank audio time.
- Click Move Up to move the Blank box above the Text To Speech box.
- Under Text To Speech, add a message to the caller. For example, “To speak with an operator, press 0. Otherwise, stay on the line.”
- To add another blank audio time span below the text-to-speech message, click Add Other > Add Blank Audio.
- Set the blank audio to 250 ms, or your desired blank audio time.
- Click Close.
- In the Collect Input configuration pane, complete the action’s configuration.Click the image to enlarge.
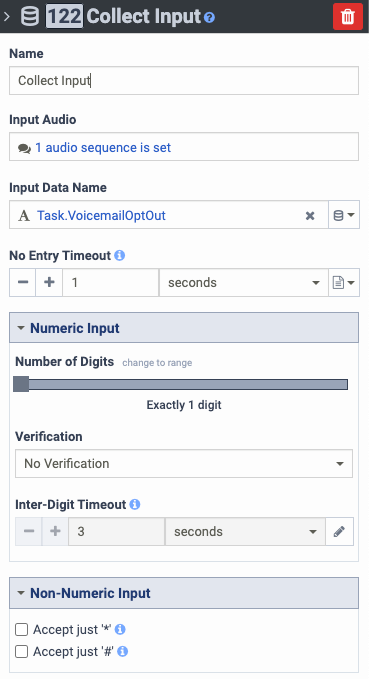
- Under Input Data Name, define a variable name. For example, VoicemailOptOut.
- Under No Entry Timeout, set the timeout duration.
- Under Terminating DTMF, select the digit that you defined in the text-to-speech message in step 9d.
- Under Number of Digits, click change to exact and select Exactly 1 digit.
- From the toolbox, expand the Logical category and drag a Decision action below the Collect Input action’s Success path.Click the image to enlarge.

- In the Decision action configuration pane, configure the action.
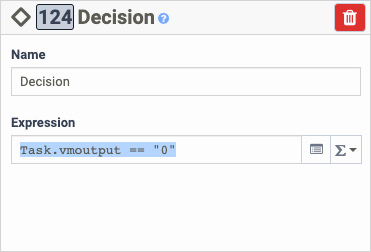
- Click the Expression modes button and select Expression .
- In the Expression box, enter an expression that matches your greeting. In this example, type Task.vmoutput == “0”.
- From the toolbox, expand the Transfer category and drag a Transfer to ACD action below the Collect Input action’s Success path.
- In the Transfer to ACD action configuration pane, configure the action:Click the image to enlarge.
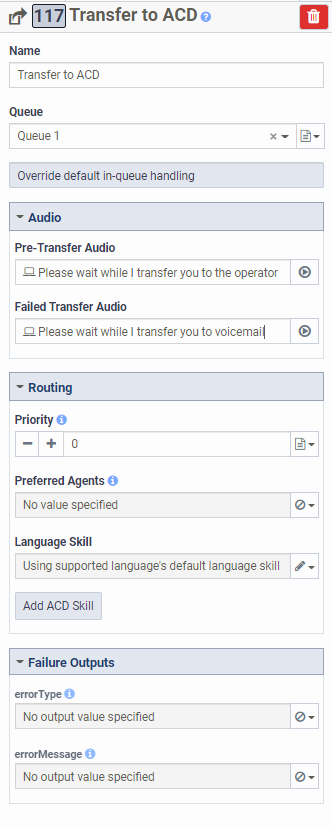
- Under Queue, select the appropriate queue.
- Under Audio, set the pre-transfer audio and the failed transfer audio.
- Make any other desired changes to routing and failure outputs.
- Click Save.
- Click Publish.