
Install and configure the Genesys Cloud for Salesforce External Routing package
- Install or upgrade the Genesys Cloud for Salesforce managed package to version 4.3 or later. See Install or upgrade the Genesys Cloud for Salesforce managed package.
-
Ensure that you have the following items set up in Salesforce:
- Enable Omni-Channel settings. See Enable Omni-Channel.
- Create a service channel with Messaging Session as the Salesforce object. See Create Service Channels.
- Create at least two presence statuses. An Online status with the service channel created for Messaging for In-App and Web use case and a Busy status. See Create Presence Statuses.
- Configure OAuth client credentials. See Configure authentication.
- Map Omni-Channel statuses to Genesys Cloud statuses for external routing. See Configure Omni-Channel sync.
- Create and assign permission set for Messaging for In-App and Web Agent. See Give Users Access to Messaging for In-App and Web.
-
Ensure that you have the following items set up in Genesys Cloud:
- Open messaging integrations. See About open messaging.
- Webhook URL and secret token. External routing does not require the URL and secret token, but you must populate them while configuring the open messaging integration.
- If you want to use the legacy chat in Salesforce, Enable Chat settings. See Enable Chat.
Install the external routing package
The package contains all the installation components that are necessary to run Genesys Cloud for Salesforce External Routing.
- Install the package from here (current version 1.10).Note: Package version 1.10 or later supports only Messaging for In-App and Web, and not chat. To use legacy chat in Salesforce, you must install package versions lower than 1.10. You can install package version 1.9 from here. For more information, see Considerations when Replacing Chat with Messaging for In-App and Web in Salesforce documentation.
- Click Install for All Users or Install for Specific Profiles.
Note: If you click Install for Admins only, then you have to manually add access to non-administrators (including agents) for specific Apex classes that are added in the package.
For more information about the options and their implications, see Installing a Package in the Salesforce documentation.
Upgrade to the latest version of the package
Salesforce supports upgrades for managed packages only. To use the latest version of the unmanaged external routing package, you must uninstall the existing version and then install the latest version. Ensure that you follow the instructions given by Salesforce for uninstalling a package and migrate or export a copy of your package’s data.
For more information, see Uninstalling a package in the Salesforce documentation.
Configure the package settings
- In Salesforce, click Setup.
- Search for Installed packages.
- On the Installed Packages page, click Configure next to the Genesys Cloud for Salesforce External Routing package.
- In the Retrieve Genesys Cloud External Routing Options section, click Retrieve Options. The integration queries Genesys Cloud for queues and messaging integrations, and then syncs these objects from your Genesys Cloud organization to your Salesforce organization.
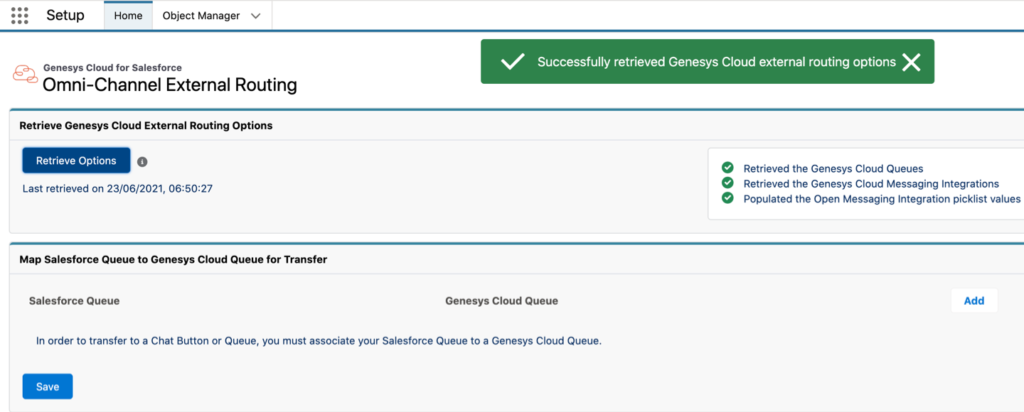
- (Optional) To allow your agents to transfer a chat to a chat button or queue, click Add in the Map Salesforce Queue to Genesys Cloud Queue for Transfer section. Select the Salesforce queue and the corresponding Genesys Cloud queue.Note: The mapping supports transfers only between queues linked to an external routing configuration. You must configure the Salesforce queue with the Omni-Channel routing option to allow transfer. For more information, see Expected Behavior for External Routing for Omni-Channel in the Salesforce documentation.
- Click Save.
For more information about creating a flow to route Salesforce messaging, see Configure external routing of Salesforce messaging.
For more information about the integration, see About Genesys Cloud for Salesforce.