
Write and publish guides
- Virtual Agent enabled in your organization. For more information, contact your designated Customer Success Manager.
- AI Studio permissions for Guides. For more information about all the required permissions, see AI Studio permissions.
After you create a guide using one of the available options for guide creation, you can add instructions to it or edit the existing instructions on the Instructions tab.
Create or open a guide
- Click Admin.
- Under AI Studio, click Guides.
- Click Menu > Orchestration > AI Studio > Guides.
- To search for a specific guide, start typing the name of the guide in the search box. As you type, the matching guides are shown.
- To open a guide, click its name.
- Select the Instructions tab.
- In the Instructions tab, add or change the steps of the guide.
Write instructions for the guide
Follow these basic guidelines when writing and formatting your instructions:
- Design your guide with a focus on a single task or intent.
- Divide your task into main steps and substeps. This type of structuring ensures that your AI agent understands the context and reference when you ask it to jump between steps.
- Assign a unique name to each main step. Choose a name that provides an accurate description of what happens within the step and its substeps.
- Use the available predefined commands as building blocks for your guide.
Predefined commands
- Say "Bienvenido al registro de nuestro Programa de Lealtad {{Variable.programa_lealtad}}. Te guiaré a través del proceso." | Command | Usage description | Syntax | Examples |
|---|---|---|---|
| Say |
Use this command to enter an output message that the AI agent must send to the user. It can include simple variables that are captured in the guide or provided as input from the flow to the guide. |
- Say "Exactly what you want the AI agent to say” |
Or
Or
|
| Ask |
Use this command to request input from the user. You can include simple variables too. For example, the AI agent can ask questions to the user using their name or referring to any previous information. A Store statement must always follow the Ask command to save customers’ answers as variables. You can use these variables later in the guide, for example, to call a data action or to pass values to an Architect flow. |
|
Or
|
| Ask and Confirm |
Use this command to request input from the user and then confirm that the provided value is correct. It works like an Ask command, but includes a confirmation step that allows the user to revise their answer if their initial input is incorrect. This command supports all types of variables. A Store statement must always follow the Ask and Confirm command to save customers’ confirmed answers as variables. You can use these variables later in the guide, for example, to call a data action or to pass values to an Architect flow. |
|
Example A with single variable:
Example B with multiple variables:
|
| Call |
Use this command to call a data action with input parameters and store the output in variables. If there are multiple parameters to call, you can denote them with commas and by specifying other separators. Also, if you want to store the output, you can follow it with a Store command. Currently, data actions that return simple data types including strings, numbers, and Booleans are supported. |
|
Example A with Store:
Example B with Store:
|
| Store |
Use this command to save data to variables. You can then use the variables in other areas of the guide. You can store multiple variables at a time from Ask, Ask and Confirm, and Call commands. Note: Proper descriptions are important for the variables. Update these descriptions in the Variables tab. |
- Store in {{Variable name}} [ { and | , } ... ] |
Or
|
| Go To |
Use this command to navigate to another step in the guide. Ensure that you match the step names correctly. |
- Go To [step_name] |
Or
|
| If:Then:Else |
Use this command to follow conditional branching logic. It allows you to direct the AI agent to different paths depending on the customer’s responses. The If condition must be a true or false statement and you must follow it by a Then statement. The Else statement is optional. |
Without Else statement:
With Else statement:
|
Or
Or
Or
Or
|
| Exit |
Use this command to end the guide execution. By default, the guide ends if there is nothing else to do. However, this optional command allows you to set the exit status or to branch certain answers to specific exit paths. |
- Exit with { Completion | Failure | Escalation } |
Or
|
Formatting of commands
To improve reliability and consistency across guides, ensure that each command line starts with a hyphen (-) followed by a space. Also, the first letter of the command must be in uppercase.
Example:
...
– Say “text”
...
– Ask and Confirm “text”
...
Generating a guide using an AI prompt or document upload creates instructions in this format.
All sections (main steps) in the guide must have a heading to which the AI agent can navigate. For more guidelines and best practices on writing instructions, see Best practices for writing guides.
Add variables
- Create a guide or open an existing one.
- Select the Variables tab.
- In the Variables tab, create guide variables that you plan to use in your guide.
- Select the Instructions tab.
- In the Instructions tab, place your cursor where you want to insert a variable and type /. A dialog box shows all available variables.
- Select the required variable.
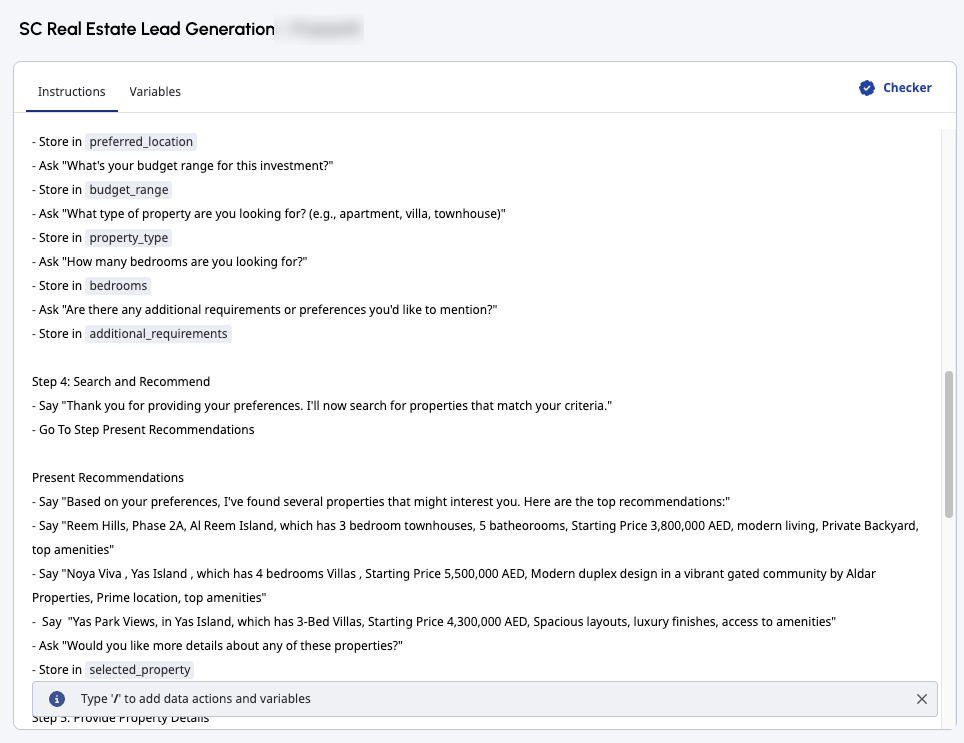
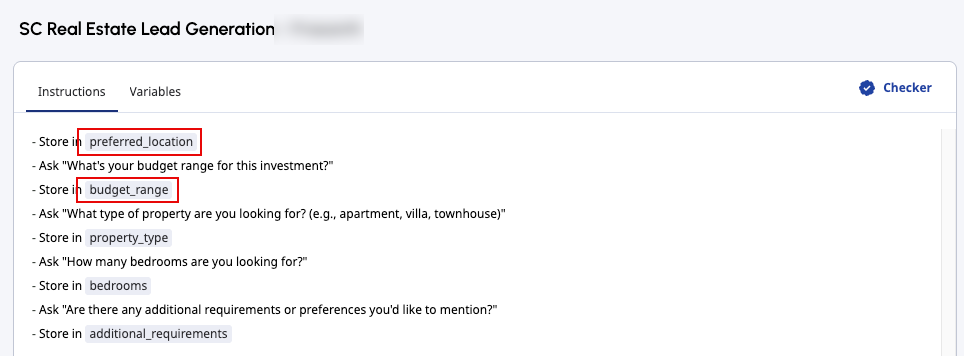
The editor emphasizes variables present in your guide using a gray background.
Add data actions
You can add a previously configured data action to your guide. For more information about creating a custom data action, see Create a custom action for integrations.
- Create a guide or open an existing one.
- Select the Instructions tab.
- In the Instructions tab, place your cursor where you want to insert a data action and type /. A dialog box shows all available data actions.
- Select the required data action.
The editor emphasizes variables present in your guide with a gray background and the data action icon . For more information about how to use data actions in guides, see Connect guides to external services with data actions.
Save and publish the guide
- When you finish editing, click Save to save the guide as a draft.
- Run the guide checker. If the checker returns any syntax errors, troubleshoot them. For more information about the guide checker, see Validate your guide using checker.
- Click Publish to publish the guide.
- While your guide is in draft mode, you can change the guide variables, if needed. After you publish a guide, you cannot change an existing variable’s name, type, or availability, but you can add new variables.
- When you publish a guide, which is already linked to an Architect bot flow that is enabled with Virtual Agent, the flow immediately updates its configuration to call the latest published guide during its execution.
- The performance of the Virtual Agent can vary across languages. Genesys encourages testing with preferred languages before going live.
- When you publish a guide, the editor runs the guide checker automatically. Before you can publish the guide, you must troubleshoot and fix all the errors shown by the checker. Also, whenever you change the guide and save it, you are prompted to run the checker again.
After you publish a guide, you can connect it to an Architect bot flow or digital bot flow that is enabled with Virtual Agent using the Call Guide action. For more information, see Connect guides to your Virtual Agent flows. For more information about how to duplicate or delete a guide, see Duplicate or delete guides.