Agent experience for Digital and AI package setup
When you log in to the Salesforce Service Console and set the status to one of the online statuses in the Omni-Channel utility, the utility logs you into the Genesys Cloud. After you log in to Genesys Cloud, the CX Cloud, Digital and AI component displays the information:
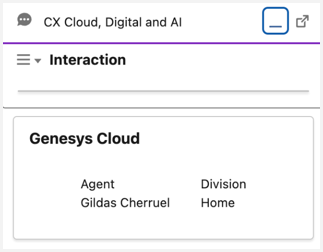
You can use the CX Cloud, Digital and AI component to start outbound emails and messages.
The Omni-Channel utility shows notification when you receive a new chat or message. Depending on the configuration setup:
- The buttons to deny or accept the Omni-Channel work display.
- Information about the chat or message displays.
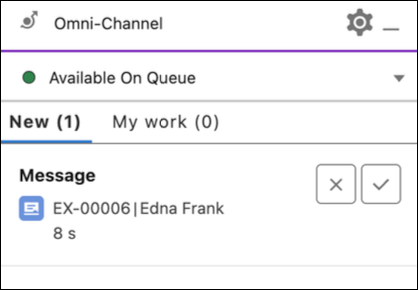
When you click the notification, the chat or message opens in a new tab in the Salesforce console. If you do not answer in a timely manner, the chat or message is routed to another agent and a dialog box is presented to confirm if you want to stay in the queue to accept the messages:

The Lightning app page layout varies depending on the configuration and the added components. The Interaction Lightning web component shows the chat transcript and allows you to chat with the customer. While the transcript shows the messages sent by the customer on the left side, the messages sent by you or bots are on the right side. For each message, the agent can see the time when the message was sent and whether it was read by the customer or not with a tick mark. While the messaging is being sent, an indicator displays.
The following features are available for you to send and receive messages in the chat transcript:
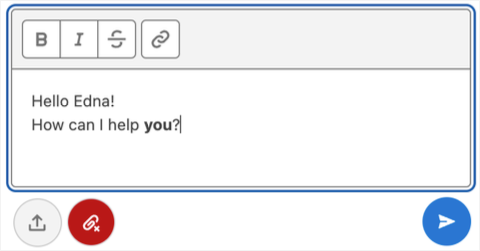
- Text box – Type the message in the text box to send messages. You can send rich text, images and links, and format text to bold or italics.
- Send – Use this button to send the messages.
- Upload – Use this button to attach files to the message. To attach files, you must have the CreateWebMessageAttachment custom permission.
- Paperclip icon – Use this button to remove the attachment. When you attach a file, this button is enabled.
Email alerts in the Omni-Channel utility functions similarly to chat and message alerts. When you accept the email, it is opened in a new tab in the Salesforce console.
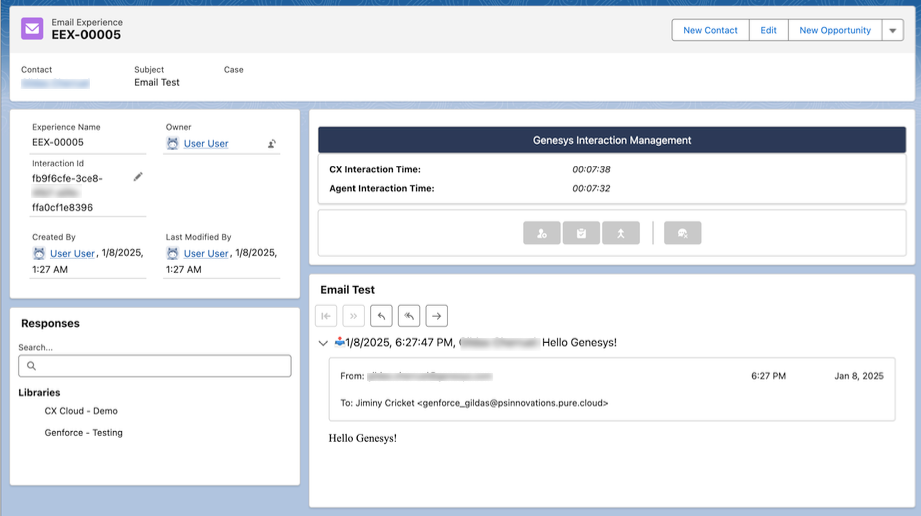
The Genesys Cloud email component displays the email conversation thread in an accordion layout, with the most recent mail expanded. To draft an email, use the Reply, Reply All, and Forward buttons on the top of the email thread. You can either enter the email address directly in the fields, or search for Salesforce Contacts, Genesys Cloud Users, or Genesys Cloud External Contacts in the search box. The matched contacts display with distinct icons for Salesforce Contact, Genesys Cloud User, and Genesys Cloud External Contact.

To attach files, you must have the CreateEmailAttachment custom permission. Use the Upload Files button to add attachments or drop the file directly in the attachment area. After you send the email, use the Genesys Cloud email component to disconnect and wrap up the interaction.
To control the chat or message, use the Genesys Cloud Chat component in the Lightning app page.
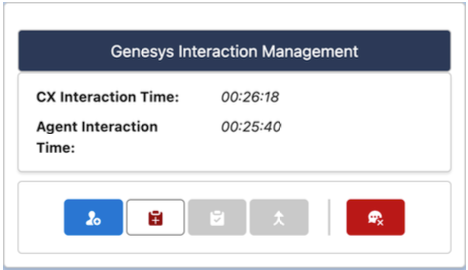
The layout varies depending on the configuration of CX Cloud, Digital and AI for Salesforce and the Genesys Cloud Queue. The component displays the total duration of the interaction and time that the agent has spent handling the interaction, and the following options:
- Transfer the interaction to another agent or queue.
- Request a wrap-up after the interaction is finished.
- Send the wrap-up.
- Initiate the transfer.
- Disconnect the interaction.
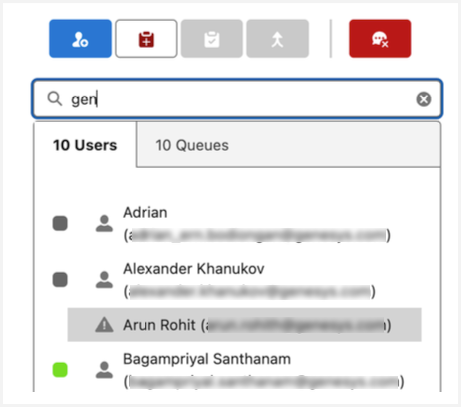
When you transfer the interaction, you can choose an agent or a queue. Enter the name of the agent or queue in the search box. The search results shows both queues and agents. The agents are listed along with their availability status (gray or green) and eligibility for transfer (triangle or user icon).
When you click the Transfer button, a dialog box to choose the destination of the transfer displays. Search for the destination by typing the name of the queue or the name of another agent. These options are searched in Genesys Cloud:
After the transfer is initiated or the interaction is disconnected, you can set the wrap-up status for the interaction. When the Agent Requested after call work option is enabled, click the Wrap-up icon to complete the after call work. After selecting the wrap-up code and adding some notes, click Send Wrap-up to send the wrap-up data. If the queue is configured for Time-boxed after call work, then a countdown timer is displayed.
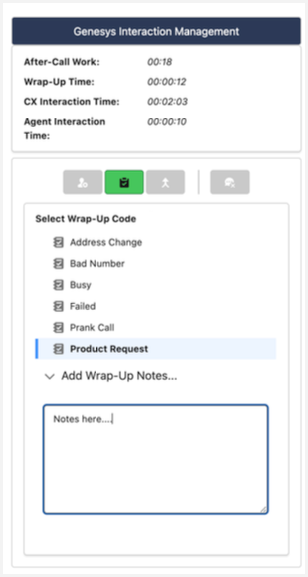
If you do not send the wrap-up data within time, the interaction is automatically wrapped up. After the interaction is wrapped up, the Genesys Interaction Management component shows the duration and the wrap-up data.
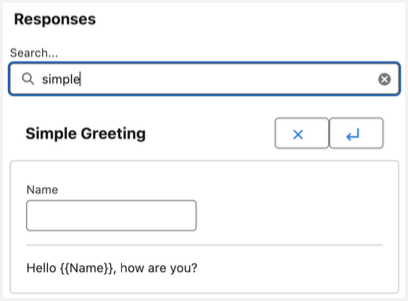
To use canned responses, use the Genesys Cloud Responses component in the Lightning app page:
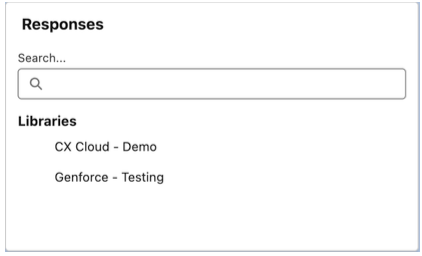
Only the canned responses libraries that are available to the current interaction are shown, which is controlled by the Genesys Cloud queue configuration. To access the canned responses list, click one of the libraries. You can also search for a specific response. Select the response and insert it in the messaging text box or the email draft. If the response has variables, fill them in before sending the response.
To start an Outbound Messaging or email, use the CX Cloud, Digital and AI component in the Utility Bar and click the icon to get the options:
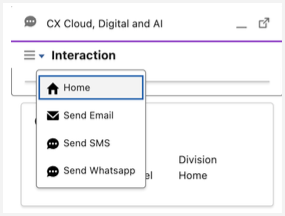
Select the type of interaction that you want to start and fill the details of the interaction.
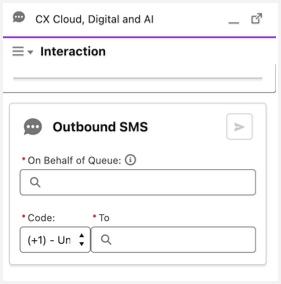
For all types of interactions, provide the following details:
- Search for the queue by name that you want to use and select from the list.
- Search for the interaction’s target by name or email. The search includes Salesforce Contacts, Genesys Cloud Users, and Genesys Cloud External Contacts. If no match is found, the entered targets’ email or phone number is used.
- Search for the outbound queue that you want to use. Search the queue by name and select it from the result list.
- Search for the target of the interaction. Search by typing the name or the email of the target. The search is done in Salesforce Contacts, Genesys Cloud Users, and Genesys Cloud External Contacts. If the contact is not found, the target address (email and phone number) that was typed can be used.
Click Start to start the interaction.
After the interaction starts, an Experience or an Email Experience is created in Salesforce and its tab is opened in the Salesforce console. You can handle the interaction in the same way you handle the inbound interactions.

