
Quick start: set up the knowledge portal
Prerequisites
- Genesys Cloud CX 1 Digital Add-on II, Genesys Cloud CX 2, Genesys Cloud CX 2 Digital, Genesys Cloud CX 3, Genesys Cloud CX 3 Digital or Genesys Cloud CX AI Experience license
- A working knowledge base
The following permissions:
- Architect > Flow > Add
- Architect > Flow > Edit
- Architect > Flow > View
- Routing > Message > Manage
- Routing > Queue > Add, Delete, Join, and View
- Web Deployments > Configurations > All
- Web Deployments > Deployments > All
This article describes how to set up your knowledge portal for Genesys Cloud.
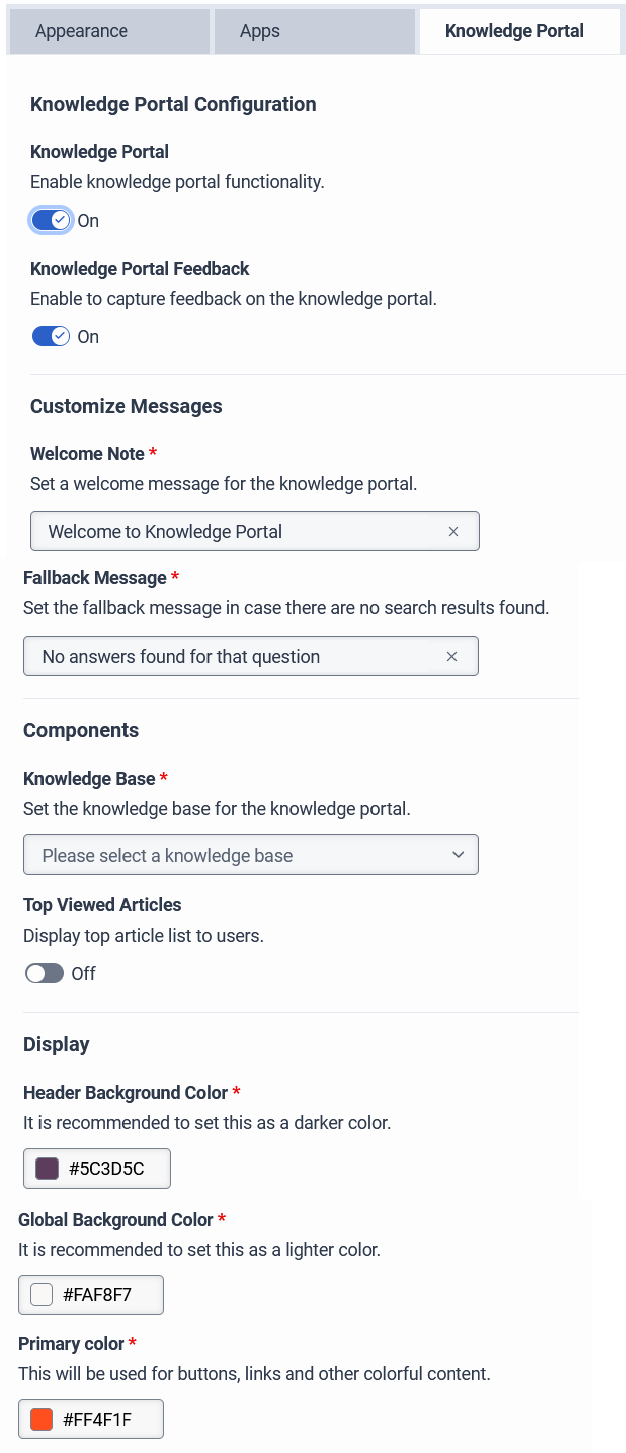
Step 1: Configure the knowledge portal
This section describes how to configure the knowledge portal.
- Click Admin.
- Under Message, click Messenger Configurations.
- Click New Configuration.
- Click the knowledge portal tab.
- Enable the knowledge portal functionality.
- Under Customize messages, enter a customized Welcome note and a Fallback message.
- The Welcome note welcomes the customer when they visit the knowledge portal page.
- The Fallback message is the message that appears to customers when their search shows no relevant results.
- Under Components, select the knowledge base and the categories you want the knowledge portal to use.
- Click the Knowledge Base list and choose the knowledge base to use.
- Click Category browsing and select the wanted categories.
- (Optional) Under Display, determine the header background color, global background color, and primary color.
- Under Customize messages, enter a customized Welcome note and a Fallback message.
- To continue to the knowledge portal configuration, click Save Draft.
- To save the completed configuration, click Save New Version.
Click the image to enlarge.
Step 2: Deploy the knowledge portal snippet
This section describes how to deploy the knowledge portal.
- Click Admin.
- Under Message, click Messenger Deployments.
- Enter a name and description.
- Under Status, use the toggle to set the status of the Messenger deployment.
- Under Select your Configuration, click Select Configuration to select the knowledge portal configuration to assign to this deployment.
- Under Select your Architect Flow, select a published inbound message flow.
- Click Save. The knowledge portal Deployments page now displays the snippet and deployment key.
- Under Deploy your snippet, click Copy to Clipboard to copy the code.
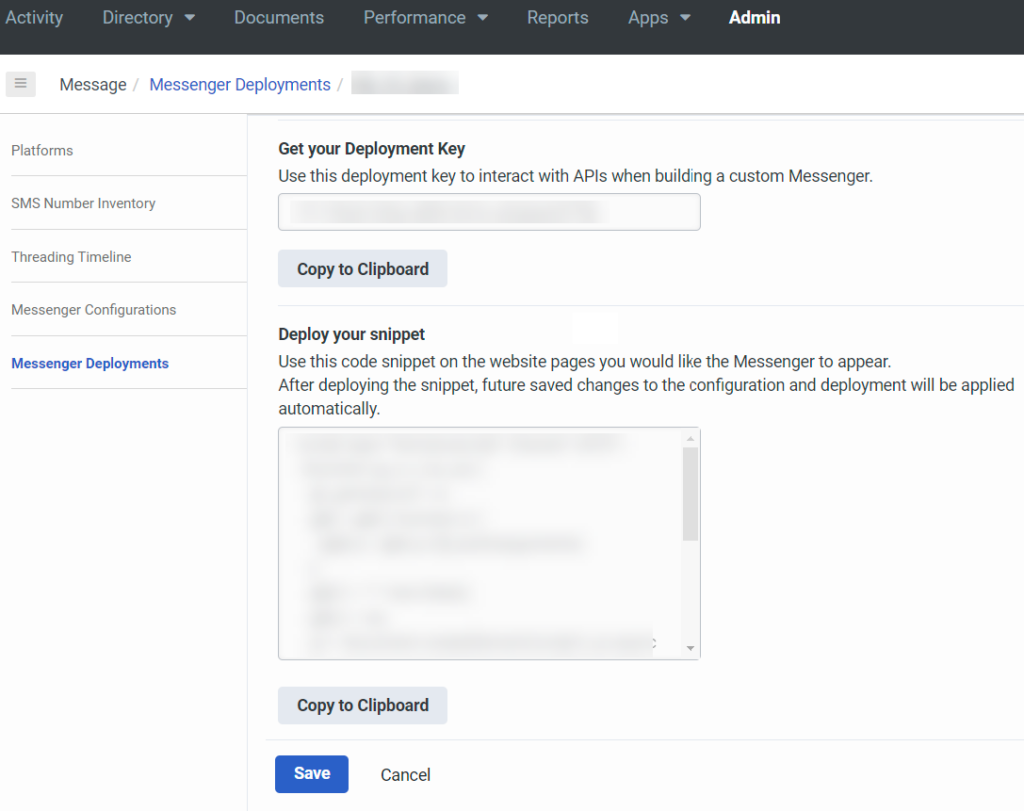
Note: These steps require IT administrator access. Contact your IT department.
- Paste the HTML snippet you copied at Deploy your snippet in the
headersection of the site on which you want to host the knowledge portal. - Insert a
divtag in the HTML code of the site on which you want to host the knowledge portal. Include the IDgenesys-support-centerin thedivtag. This ID pairs up with the embedded HTML snippet to display your knowledge portal.
Example ID code:<div id="genesys-support-center"></div>